


Welcome, grill enthusiasts! This guide will help you master how to oil grill grates. Why does it matter? Well, oiling grill grates make grilling fun and easy. It saves your food from sticking and keeps your grill in top shape. Plus, it adds that extra flavor we all love.
Understanding the Importance of Oiling Grill Grates

Picture this. Your meat smoker grill is ready. The charcoal grills are hot. You’re about to cook. But, if you forgot to oil the grill grate, you’re in for a problem: sticking. When food sticks, it burns. It ruins those neat grill marks. It wastes good meat. But, with oiled grates, your food will slide right off.
Oiling grill grates isn’t hard. You’ll need a grill brush, cooking oil, and a paper towel. Many love using canola oil. Why? It’s a high smoke point. That means it can handle high heat without burning. You dip the brush in oil, rub it on the grates, and wipe off the excess with a towel.
When do you oil grill grates? When the grill is completely cool. Oil a cold grill before you heat it up. This protects your grill grates. It keeps them from rusting and makes them last longer.
So, there you have it. Oiling grill grates is a simple, slow process. But it’s crucial for any grill master. It keeps your food from sticking. It makes your grill last. And most of all, it makes your food taste better. Now, let’s dive into the art of oiling grill grates because a well-oiled grill makes for a perfect barbecue dinner.
Preparing Your Grill Grates for Oiling
Before you learn how to oil grill grates, you must prepare them. You can’t cook on a dirty stove, so you can’t oil dirty grill grates. They need to be clean and free of debris. Here’s how you do it.
Cleaning and Checking for Other Debris on Your Grill Grates

Cleaning is easy. You’ll need a grill brush, a small bowl of water, and a dry paper towel. The water helps loosen the grease and the stuck-on bits of food.
First, heat up your grill. This is important. A hot grill makes cleaning easier. The heat helps to burn off any leftover food and reduces it to ash. The ash is easier to clean than stuck-on food.
Now, dip your long-handle grill brush in the bowl of water. Scrub the grill grates with the brush. The steam from the hot grates helps lift off the grease and food. Keep scrubbing until the grates look clean.
Next, grab a paper towel. Wipe down the grill grate. This picks up any leftover ash and debris. Be careful. The grill is still hot. Use tongs to hold the towel.
Finally, let the grates cool down. You can’t apply oil to a burning grill. It needs to be completely cool. Why? Oil can catch fire if it gets too hot. Also, hot oil can create a lot of smoke. That’s not good for you or your food.
So there you go. Clean grates are ready for oiling. You’re one step closer to grilling those juicy burgers or tasty vegetables. Now, let’s choose the right oil for your grill grate.
Choosing the Right Oil for Your Grill
The right oil makes a big difference when you oil grates. It prevents sticking, seasons the grate, and adds flavor. It’s an important choice.
Understanding Smoke Points and Choosing Between Vegetable Oil, Canola Oil, and Sunflower Oil

What’s a smoke point? It’s the heat where the oil starts to smoke and burn. Oils with high smoke points are best for grilling. They can handle the heat without burning.
First, there’s vegetable oil. It’s common and cheap. It has a high smoke point, so it’s suitable for grilling.
Next, canola oil. It’s a bit lighter than vegetable oil. It has a high smoke point, too. It won’t burn on your grill.
Lastly, sunflower oil. It’s the lightest of the three. It has a very high smoke point. It’s a bit more expensive, but it’s great for grilling.
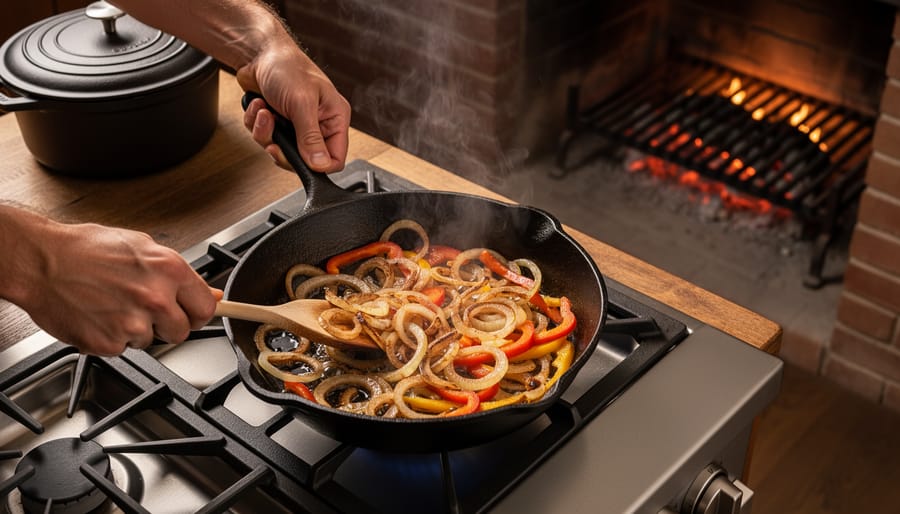
To oil your grill grates, use a small amount of oil. Dip a paper towel in oil. Use tongs to rub the oil on the grate. This coats the grate in a protective layer.
Remember, never spray oil on a hot grill. It can catch fire. Always oil a cold grill to keep it safe.
So, there you have it. Pick your oil, and get ready to grill. Whether it’s burgers or vegetables, the right oil makes all the difference.
The Art of Applying Oil to Your Grill Grate
Now that your grill is clean and you’ve chosen your oil, it’s time to oil the grill grate. This step seasons the grates, protecting them from rust.
Properly Using a Grill Brush and Paper Towel for Oiling
To start, pour a light oil coating onto a folded paper towel. Hold the folded towel with long-handled tongs to keep your hand safe. Then, rub the oil-soaked towel over the grates, coating all sides evenly.
Do this slowly and carefully. You want to create a thin layer of oil over every bit of the grate. This creates a protective barrier against rust. The oil also helps prevent your food from sticking to the grates while grilling.
Remember, the goal is to create a light, even layer. If you add too much oil, it can cause flames when you light your coals. So keep it light and make sure all the grates are covered.
And that’s it! You’ve mastered the art of oiling grill grates. You’re all set for your next grilling adventure. Whether you’re grilling steaks, burgers, or vegetables, your well-oiled grates will help you create a feast. Enjoy!

The Grill Grates’ Seasoning Process
Oiling grill grates is just the start. The real magic happens when you heat them up. This is what we call the seasoning process. It’s simple, but it makes a big difference.
When you heat your grill, the oil on the grates starts to smoke. This is good. The smoke creates a protective coating on the grates. This coating is non-stick. It means your food won’t stick to the grill.
How High Heat and Cross-Hatched Grill Marks Enhance Your Grilling Experience
High heat is essential in this process. It’s what turns the oil into smoke. And the smoke creates the coating.
The increased heat is also what gives you those cross-hatched grill prints. These are the dark lines you see on grilled meat. They look great, but they also add flavor. The increased heat caramelizes the sugars in the meat. This makes it taste better.
But remember, high heat means careful grilling. Keep an eye on your food to make sure it doesn’t burn. Keep your grates oiled to protect them.
Safety Tips and Maintaining Your Grill Grates
Using a grill comes with responsibility. Safety is important. So is taking care of your grill grates.
Managing Excess Oil, High Heat, and Proper Maintenance for Longevity
Excess oil can be dangerous. It can cause flames and smoke. Always apply a light coat of oil to your grates.
High heat can be risky, too. It can burn your food or hurt you. Always wear heat-resistant gloves when grilling.
Lastly, remember to clean and oil your grates after every use. This is proper maintenance. It keeps your grates in good shape for longer.
Clean grates are happy grates. Oiled grates are non-stick grates. Non-stick grates make great food. So love your grill. Take care of it, and it will take care of you. Happy grilling!
Conclusion
And there you have it – the step-by-step guide on oil grill grates. You’re now a pro from cleaning to choosing the right oil to applying it carefully. But remember, it doesn’t end here. You need to keep caring for your grate. It’s a regular part of grilling.
Your grill grate will thank you for being non-stick and rust-free. It will also help you get those perfect crosshatched marks on your meat. So take the time to clean, oil, and season grill grates every time you grill.
After all, if you love grilling, you’ll love it even more when it’s easy and stress-free. So oil that grill and get ready for the best grilling experience of your life. Happy grilling!
")