


Master the 3-2-1 smoking method by smoking your ribs for 3 hours unwrapped, wrapping them in foil with liquid for 2 hours to tenderize, then unwrapping for 1 final hour to set a perfect caramelized bark. This foolproof technique transforms tough meat into fall-off-the-bone perfection by strategically controlling moisture and heat exposure at each stage.
Think of this method as building layers of flavor and texture, much like tending a perfect fire in your home. The initial three-hour smoke penetrates deep into the meat while developing that sought-after smoke ring. During the two-hour wrapped phase, the ribs essentially braise in their own juices, breaking down connective tissue without losing moisture. The final hour firms everything up, giving you that satisfying bite-through texture rather than mushy meat.
The beauty of 3-2-1 lies in its simplicity and forgiveness. You don’t need expensive equipment or years of experience. Whether you’re using a traditional offset smoker, pellet grill, or even adapting smoking techniques for your outdoor cooking area, this method removes guesswork. You’ll know exactly when to wrap, when to check, and when dinner is ready.
This approach mirrors the reliable comfort of a well-maintained heating system: consistent, predictable, and deeply satisfying. By following these time-tested intervals, you’re not just cooking meat. You’re creating an experience that brings warmth and flavor to your table, turning any backyard gathering into something memorable.
What Exactly Is the 3-2-1 Smoking Method?
The 3-2-1 smoking method is a beautifully simple timing framework that takes the guesswork out of your first smoking experience, especially when working with ribs. Think of it as a three-act performance where each phase plays a crucial role in transforming tough meat into tender, flavorful perfection.
During the first three hours, your ribs sit directly on the smoker grates, completely unwrapped and exposed to that gorgeous wood smoke. This is when the magic of flavor development happens. The meat absorbs those rich, smoky notes while the dry heat begins breaking down tough connective tissues. You’ll notice a beautiful mahogany color developing on the surface as the smoke does its work.
The middle two hours mark a shift in strategy. Now you wrap your ribs tightly in foil, creating a mini-steam environment. This is the braising phase, where moisture and heat work together to tenderize the meat further. Many pitmasters add a splash of apple juice or butter during wrapping to keep things moist and add another layer of flavor. The wrapped environment accelerates the breakdown of collagen, turning it into that lip-smacking gelatin that makes ribs so irresistible.
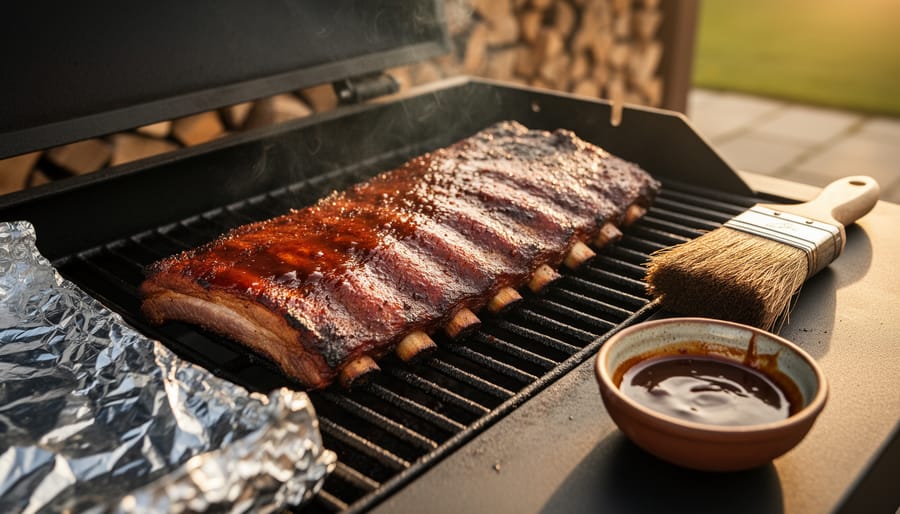
The final hour brings everything home. You unwrap the ribs and return them to direct heat, allowing the surface to firm up and develop that perfect bark. This phase also lets excess moisture evaporate, preventing soggy ribs. If you’re planning to glaze your ribs with barbecue sauce, this is the ideal time to brush it on and let it caramelize into a sticky, finger-licking finish.
This method works particularly well for spare ribs and baby back ribs because the timing aligns perfectly with their thickness and fat content, ensuring you get competition-quality results without complicated temperature adjustments or constant monitoring.
Why This Method Works So Well for Beginners
The beauty of the 3-2-1 method lies in its elegant simplicity, and there’s genuine science working behind those numbers that makes your ribs turn out spectacular every single time. Think of it as a three-act play where each stage has a specific job to do.
During those first three hours of unwrapped smoking, you’re achieving two critical goals. The meat’s surface is cool and slightly moist, which allows smoke particles to adhere beautifully to form that coveted mahogany bark we all love. This is when the magic of smoke penetration happens, as aromatic compounds work their way into the outer layers of the meat. Meanwhile, the lower temperature prevents the ribs from cooking too quickly, giving you time to develop deep, complex flavors.
The two-hour wrapped phase is where moisture retention becomes your best friend. By wrapping your ribs in foil with a splash of liquid, you’re essentially creating a gentle steam environment. This prevents the meat from drying out during the crucial middle cooking phase, while the collagen in the ribs slowly breaks down into gelatin. This is what transforms tough connective tissue into that fall-off-the-bone tenderness everyone craves.
That final hour unwrapped serves a brilliant purpose: it firms up the bark that softened during wrapping and allows excess moisture to evaporate, giving you the perfect texture balance between tender meat and a satisfying exterior crust.
For beginners, this structured approach removes all the anxiety and second-guessing. You’re not constantly opening your smoker wondering if things are progressing correctly. The timeline gives you clear milestones, building your confidence with each successful stage. You’ll know exactly what to expect and when, making your first smoking experience feel more like following a trusted recipe than navigating uncharted territory.
Setting Up Your Smoker for Success
Choosing Your Wood for Flavor
Selecting the right wood for your 3-2-1 ribs transforms good barbecue into something truly memorable. Think of wood as your flavor paintbrush, each variety adding its own unique character to the meat.
For beginners, three woods stand out as reliable choices. Apple wood delivers a mild, slightly sweet flavor that complements pork beautifully without overwhelming it. It’s forgiving and nearly impossible to overdo, making it perfect for your first attempts. Hickory brings a stronger, bacon-like smokiness that’s become the classic barbecue flavor many of us grew up loving. It’s bolder than apple but still approachable when using wood chips or chunks properly. Oak sits comfortably in the middle, offering a medium smoke flavor that works wonderfully as a base, especially when blended with fruitwoods.
When sourcing your wood, look for suppliers who harvest sustainably and avoid treated lumber entirely. Many local orchards offer pruned fruitwood branches, turning what would be waste into your next culinary adventure. Kiln-dried wood chunks from reputable suppliers ensure consistent results and cleaner burning.
Start with two to three fist-sized chunks for a standard smoker, or about two cups of chips. You want thin, blue smoke throughout the process, not billowing white clouds. The wood should smolder steadily, releasing flavor gradually over those crucial six hours. Remember, less is often more when you’re learning. You can always add bolder woods as your confidence grows, but you can’t remove smoke once it’s in the meat.
Getting Your Temperature Just Right
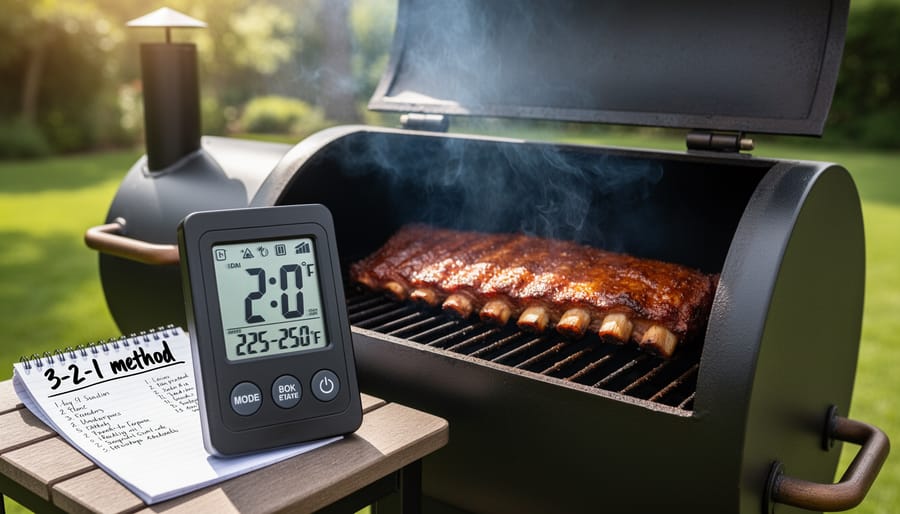
Think of your smoker like a cozy fireplace on a winter evening. You want that steady, consistent warmth that makes everything feel just right. For the 3-2-1 method, your sweet spot is between 225-250°F, and maintaining this range is easier than you might think.
Start by preheating your smoker before adding your ribs. Just like you wouldn’t throw wood into a cold fireplace and expect instant results, your smoker needs time to stabilize. Give it at least 20-30 minutes to reach your target temperature, and you’ll thank yourself later for the patience.
If you’re using charcoal, the key is controlling airflow. Think of it as managing the damper on your chimney. More air equals hotter flames, less air means cooler temperatures. Open your intake vents about halfway to start, then make small adjustments as needed. For temperature spikes above 275°F, close your intake vents slightly and open the smoker door for just a minute to release excess heat.
Temperature drops are equally manageable. If you notice the gauge dipping below 225°F, open your intake vents a bit more and add a few fresh coals or wood chunks if necessary. The beauty of low and slow smoking is that small fluctuations won’t ruin your ribs. A 10-15 degree variance is perfectly acceptable and actually quite normal.
For those using electric or gas smokers, you’ve got built-in temperature controls that make this process even simpler. Set your desired temperature and let the smoker do the heavy lifting, though you’ll still want to monitor things periodically.
Remember, patience and consistency create that perfect environment where smoke and heat work their magic together, transforming tough ribs into tender, flavorful masterpieces.
Walking Through Each Phase of the 3-2-1 Method
Phase One: The First 3 Hours (Building Flavor)
This initial three-hour phase is where the magic begins, much like tending a fire to create the perfect ambiance in your home. Start by placing your ribs directly on the smoker grate, bone-side down, positioning them away from direct heat sources. This arrangement allows the smoke to circulate evenly, building those rich, complex flavors you’re after.
Set your smoker temperature between 225-250°F and maintain this steady warmth throughout the phase. Think of it like maintaining a consistent, comfortable temperature in your living space – stability is key. The smoke should flow gently and consistently, creating that beautiful blue-tinged haze that signals proper combustion.
About 90 minutes into this phase, start spritzing your ribs every 45 minutes with apple juice, apple cider vinegar, or a mixture of both. This light misting keeps the surface moist and helps smoke particles adhere better to the meat, similar to how proper humidity levels enhance comfort in your home. Use a simple spray bottle and apply just enough to lightly coat the surface without creating puddles.
During this unwrapped phase, resist the urge to constantly check your ribs. Each time you open the smoker, you lose precious heat and smoke. If you must peek, do it quickly during spritzing intervals.
By the end of hour three, your ribs should display a beautiful mahogany bark with a slightly tacky surface. The meat will have shrunk back about a quarter-inch from the bone ends, and you’ll notice a pinkish-red smoke ring developing just beneath the surface. The internal temperature should reach approximately 160-170°F. At this point, you’re ready to move into the crucial wrapping phase where tenderness truly develops.
Phase Two: The Middle 2 Hours (Locking in Moisture)
After three hours of smoke-kissed perfection, your ribs are ready for their transformation phase. This is where the magic of the 3-2-1 method truly shines, much like how a well-tended fireplace gradually radiates warmth throughout your home rather than creating one intense blast of heat.
The wrapping phase is all about trapping moisture and breaking down those tough connective tissues while the meat continues cooking. Think of it as creating a gentle, steamy cocoon that turns good ribs into fall-off-the-bone tender masterpieces.
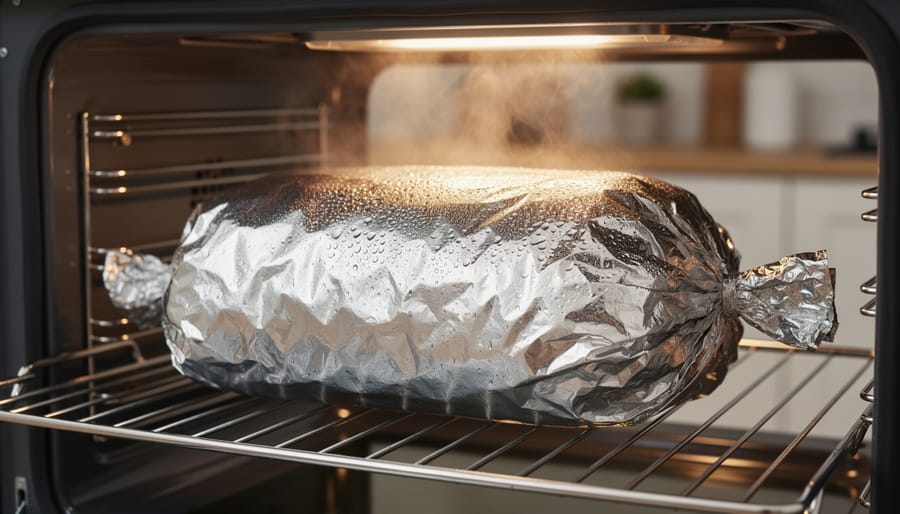
You have two excellent wrapping options: heavy-duty aluminum foil or butcher paper. Foil creates a tighter seal and speeds up the tenderizing process, making it the beginner-friendly choice. It’s like closing the glass doors on your fireplace to concentrate heat. Butcher paper allows slightly more airflow, preserving a firmer bark texture, but requires a bit more experience to master.
Here’s your wrapping technique: lay out two overlapping sheets of foil, creating a surface large enough to fully enclose your rib rack. Before sealing, consider adding moisture-enhancing ingredients. A quarter cup of apple juice adds subtle sweetness, while a few pats of butter create luxurious richness. Some pitmasters swirl in honey, brown sugar, or even a splash of bourbon for complexity.
Place your ribs meat-side down on the foil, add your chosen liquids, then wrap tightly with the seams facing up to prevent leaking. Return them to your 225-degree smoker for exactly two hours. This closed environment essentially braises the meat, dissolving collagen into gelatin without any risk of drying out. The result? Ribs so tender they practically melt, while maintaining that beautiful smoke flavor you built during phase one.
Phase Three: The Final Hour (Perfecting the Finish)
The final hour is where the magic happens, transforming your tender ribs into a masterpiece with that coveted restaurant-quality finish. Once your timer hits the six-hour mark, carefully unwrap your ribs from their foil cocoon. You’ll notice they’re incredibly tender and glistening with moisture, which is exactly what you want at this stage.
Now comes the moment to add your signature touch. If you’re using barbecue sauce, this is your window. Apply a generous but not overwhelming layer across the top, letting the heat caramelize those sugars into a sticky, delicious glaze. Whether you prefer a classic sweet and tangy sauce or something with a bit of heat, this final hour allows those flavors to set beautifully without burning.
Keep your smoker around 225 degrees and let nature work its course. During this uncovered phase, the ribs will develop that gorgeous bark, the flavorful crust that separates good ribs from unforgettable ones. The exterior firms up while maintaining all that tenderness you’ve built during the wrapped phase.
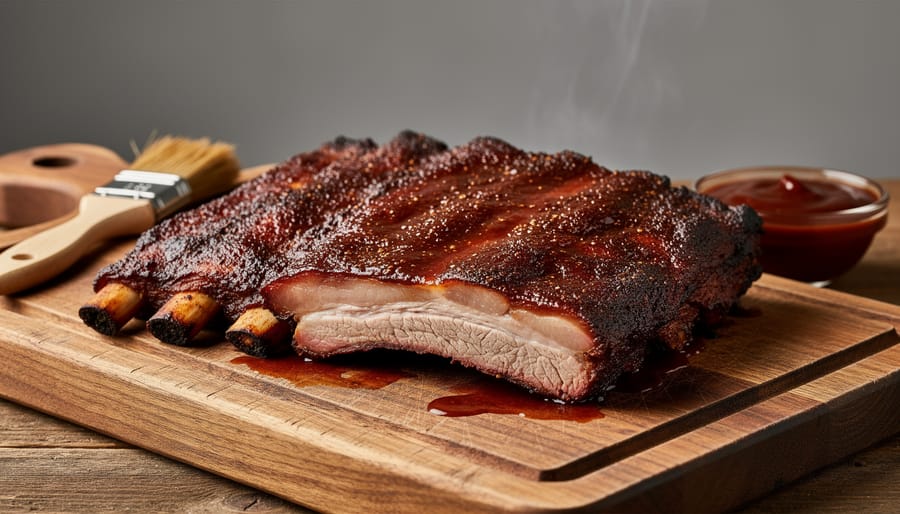
To determine doneness, use the bend test: pick up the rack with tongs at the center. The ribs should bend easily and the meat should crack slightly on the surface, but not fall apart completely. You’re looking for that perfect balance where the meat pulls away from the bone with a gentle tug, not a fight. Visual cues include a rich mahogany color and meat that’s pulled back from the bone ends by about a quarter inch. When you see these signs, your ribs have reached perfection.
Adapting the Method for Different Meats and Situations
The beauty of the 3-2-1 method lies in its flexibility. Once you understand the basic rhythm, you can adapt it to create perfectly smoked meats regardless of what’s in your cooler or what Mother Nature throws your way.
For baby back ribs, which are naturally more tender and smaller than spare ribs, try the 2-2-1 variation. Smoke for 2 hours unwrapped, wrap for 2 hours with your liquids and seasonings, then finish unwrapped for 1 hour. This shortened timing prevents baby backs from becoming overly soft while still delivering that fall-off-the-bone texture everyone craves.
Pork shoulder and beef ribs require different approaches since they’re denser cuts. Pork shoulder benefits from a longer unwrapped phase to develop that gorgeous bark, so consider a 4-3-1 timeline. Beef ribs, being naturally juicier, often do well with a 3-1-1 method to prevent them from steaming too much during the wrapped phase. Experimenting with other cuts to smoke helps you develop an intuitive feel for timing adjustments.
Weather conditions play a surprisingly significant role in your smoking success. Cold or windy days cause your smoker to work harder, potentially adding 30-60 minutes to each phase. Keep your smoker out of direct wind, and don’t be afraid to extend cooking times when the thermometer says your meat needs it rather than blindly following the clock.
Different smoker types also require slight modifications. Electric smokers maintain steady temperatures easily but may need extra wood chips for flavor. Charcoal smokers run hotter and benefit from careful vent management. Pellet smokers offer convenience but watch for temperature swings during the wrapped phase when opening the lid.
The key principle remains constant: build smoke flavor first, tenderize with moisture second, and finish with caramelization. Trust your instincts, use a reliable meat thermometer, and remember that slight variations in timing won’t ruin your results. Your backyard smoking setup is as personal as your indoor fireplace, creating warmth and gathering spaces where memories are made.
Common Mistakes That Trip Up First-Timers
Even experienced backyard cooks stumble when trying the 3-2-1 method for the first time, but knowing these common pitfalls will save you from disappointment and help you master the technique faster.
The biggest mistake? Playing peek-a-boo with your smoker. Every time you open that lid to check on your ribs, you’re letting precious heat and smoke escape, extending your cooking time and creating temperature swings that affect the final texture. Trust the process and resist the urge to look until it’s time to move to the next phase. Think of it like maintaining the perfect environment in your home – you wouldn’t constantly open windows while trying to keep things cozy.
Wrapping mishaps come in second place. Using too little foil creates gaps that let moisture escape, while wrapping too tightly can steam your ribs instead of braising them gently. Use heavy-duty aluminum foil and create a loose but sealed packet, leaving a small air pocket above the meat. This creates the ideal environment for those ribs to tenderize without turning mushy.
Temperature inconsistency throws many beginners off track. Your smoker needs to maintain steady heat throughout all three phases. Invest in a reliable thermometer and learn your equipment’s quirks. On windy days or in cold weather, you’ll need to adjust your fuel supply to compensate, much like adjusting your home heating when conditions change.
Finally, don’t drown your masterpiece in sauce during that final hour. A light glaze that caramelizes is what you’re after, not a soggy coating. Apply thin layers every fifteen minutes, allowing each coat to set before adding the next. This builds flavor gradually and creates that gorgeous, sticky finish everyone craves.
Safety Tips Every New Smoker Should Know
Before you fire up your smoker for that first 3-2-1 ribs session, let’s talk about keeping everyone safe while you master this method. Think of your smoker as a backyard fireplace that requires the same respect and attention to detail.
Position your smoker at least 10 feet away from your home, deck railings, overhanging branches, and any flammable materials. This isn’t just about fire prevention—it’s about creating a comfortable cooking zone where smoke won’t drift into your living spaces. Choose a level, stable surface that won’t shift during your six-hour cook.
When selecting wood for smoking, stick with hardwoods like hickory, apple, cherry, or oak. Never use treated lumber, painted wood, or softwoods like pine, which release harmful chemicals and ruin your meat’s flavor. Quality wood choices align with eco-friendly practices while delivering superior taste.
Temperature safety is non-negotiable. Keep raw ribs refrigerated until you’re ready to smoke, and always use a reliable meat thermometer to verify your pork reaches at least 145°F internally. The 3-2-1 method typically brings ribs well beyond this threshold, but checking ensures peace of mind.
Once your smoking session ends, dispose of ashes responsibly. Let them cool completely in a metal container for at least 48 hours before transferring to your regular trash. This simple step prevents accidental fires and keeps your outdoor space tidy. With these safety fundamentals in place, you’re ready to focus on creating amazing barbecue that becomes a cherished part of your outdoor lifestyle.
Making Your Smoking Setup Part of Your Outdoor Living Space
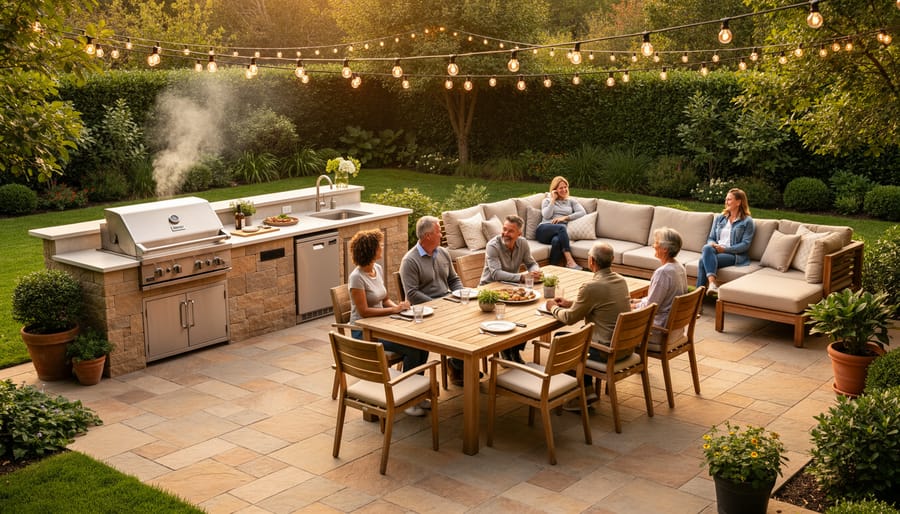
Your smoker doesn’t have to stand alone as a utilitarian cooking tool. Think of it as an anchor piece in your outdoor living space, much like a fireplace becomes the heart of an indoor room. Position your smoker near your outdoor fireplace or fire pit to create a natural gathering zone where friends and family can enjoy the warmth while savoring the tantalizing aromas of slow-cooked meats.
Consider the flow of your backyard when planning your outdoor cooking setup. Place your smoker within comfortable distance of seating areas so you can tend to your 3-2-1 ribs while still being part of the conversation. Add a small prep table nearby and perhaps a beverage station to keep everything you need at your fingertips.
The visual harmony matters too. Many modern smokers come in attractive finishes that complement outdoor fireplaces and fire features. Stone pavers or brick pathways can connect these cooking zones, creating a cohesive design that feels intentional rather than haphazard. String lights overhead or landscape lighting around the area extends your usability into evening hours.
Remember to factor in wind patterns and smoke direction. Position your smoker so prevailing winds carry smoke away from seating areas while still allowing the wonderful barbecue aroma to drift through your space. This thoughtful placement turns smoking into an event that engages all the senses, making your backyard the ultimate destination for relaxed, flame-kissed gatherings.
You’ve just unlocked one of the most foolproof techniques in the smoking world, and that’s something worth celebrating. The 3-2-1 method isn’t just a recipe—it’s your invitation to join a community of people who understand that gathering around incredible food creates the warmth and connection that truly makes a house a home.
Remember, your first rack might not be perfect, and that’s completely okay. Each time you fire up your smoker, you’re building skills and creating memories. The beauty of this method is that it gives you a reliable framework while you develop your instincts and personal touch. Soon, you’ll be experimenting with different woods, tweaking your temperatures, and maybe even adjusting those timing ratios to suit your family’s preferences.
As you master the art of smoking, don’t forget that those beautiful ribs deserve to be surrounded by perfect side dishes that complete the experience. Whether you’re smoking by your backyard fire pit or planning your next outdoor gathering, you’re creating an atmosphere of comfort and togetherness that extends far beyond the meal itself. So light that fire, trust the process, and enjoy every delicious moment of your smoking journey.
")