

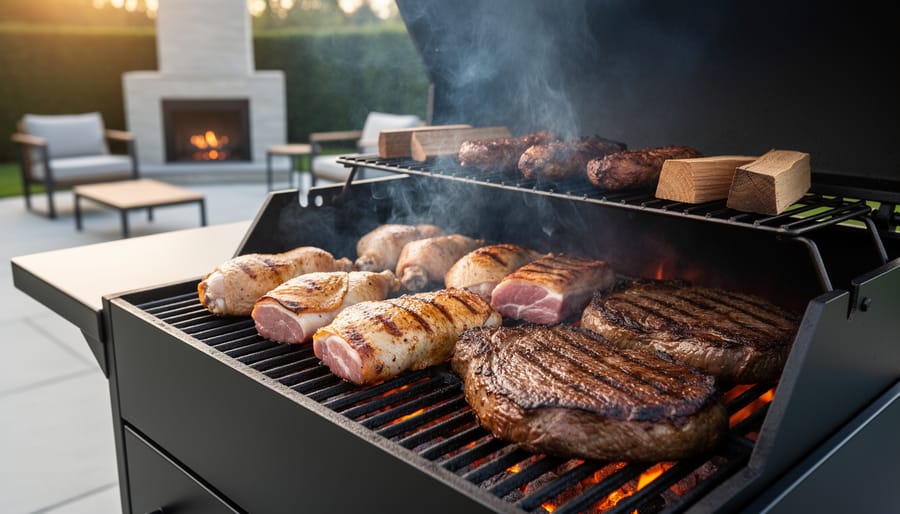

Choose cuts under 4 pounds that reach safe temperatures faster—pork tenderloin, chicken thighs, and beef tri-tip excel in 2-4 hour smoking sessions while delivering authentic smoky flavor without the marathon cook times. Crank your smoker temperature to 275-300°F instead of the traditional 225°F range, cutting cooking time nearly in half while maintaining moisture through proper meat selection and technique.
Set up a two-zone fire in your backyard smoker or even adapt your outdoor fireplace setup with a smoking box, creating an efficient heat source that mirrors the principles of indoor heating systems—maximizing energy output while controlling burn rate. This approach transforms smoking from an all-day commitment into an evening activity that fits naturally into your lifestyle, much like tending a cozy fireplace becomes part of your home’s rhythm.
Master the hot-and-fast method by maintaining consistent airflow and using smaller wood chunks rather than full logs, which produce cleaner smoke that penetrates meat surfaces quickly. Your goal isn’t low-and-slow tradition but rather quality results in realistic timeframes—perfect for homeowners who value both flavor and efficiency.
Focus on internal temperature rather than time, pulling chicken at 165°F and pork at 145°F using an instant-read thermometer. This precision prevents overcooking while ensuring food safety, giving you confidence that faster methods don’t compromise quality. The techniques you develop while mastering meat smoking translate directly to understanding heat management in all outdoor cooking applications, building skills that enhance your entire home’s warmth and entertainment potential.
What Makes Quick Smoking Different From Traditional Methods
Temperature and Time: The Quick Smoking Sweet Spot
The secret to quick smoking lies in embracing a higher temperature range than traditional methods. While classic low-and-slow smoking hovers between 225-250°F, quick smoking operates at 275-325°F, cutting your cooking time nearly in half without sacrificing flavor or tenderness.
Here’s why it works: at these elevated temperatures, meat still absorbs smoke effectively during the crucial first few hours, when it’s most receptive to those deep, smoky flavors. The higher heat creates a beautiful bark on the exterior while rendering fat more quickly, keeping the interior moist and tender. Think of it as bringing the same cozy efficiency you’d expect from a well-maintained fireplace into your outdoor cooking.
The key is maintaining consistent heat within this range. Too high, and you’re grilling rather than smoking. Too low, and you’ve lost the time-saving advantage. A reliable thermometer becomes your best friend here, helping you stay in that sweet spot where speed meets quality.
This approach particularly shines with cuts under five pounds like ribs, pork shoulder portions, and chicken. You’ll achieve restaurant-quality results in 3-5 hours instead of all day, making weeknight smoking sessions actually feasible for busy homeowners who value both flavor and their valuable time.
Best Cuts for Quick Smoking
When you’re eager to enjoy smoky flavors without dedicating your entire weekend to tending a fire, choosing the right cuts makes all the difference. Not all best meats for smoking require marathon cooking sessions.
Chicken pieces like thighs, wings, and breasts are ideal for quick smoking, typically ready in 1-2 hours. Their smaller size allows smoke to penetrate quickly while staying juicy. Fish and seafood shine in quick smoking scenarios, with salmon, trout, and shrimp absorbing beautiful smoky notes in just 30-60 minutes.
Pork chops and sausages are time-conscious cook favorites, needing only 45 minutes to 2 hours depending on thickness. Pre-cooked sausages are especially forgiving and practically foolproof. Thin-cut ribs or individual rib portions cook in 2-3 hours compared to full racks that demand 5-6 hours.
These cuts work faster than traditional brisket or pork shoulder because they have less connective tissue requiring breakdown and significantly reduced mass. Brisket needs those long hours to transform tough collagen into tender, melt-in-your-mouth texture. Quick-smoking cuts achieve delicious results through direct smoke flavor absorption rather than slow rendering, making them perfect for weeknight gatherings or spontaneous outdoor cooking sessions.

Essential Equipment for Quick Smoking Success
Using Your Fire Pit or Outdoor Fireplace for Quick Smoking
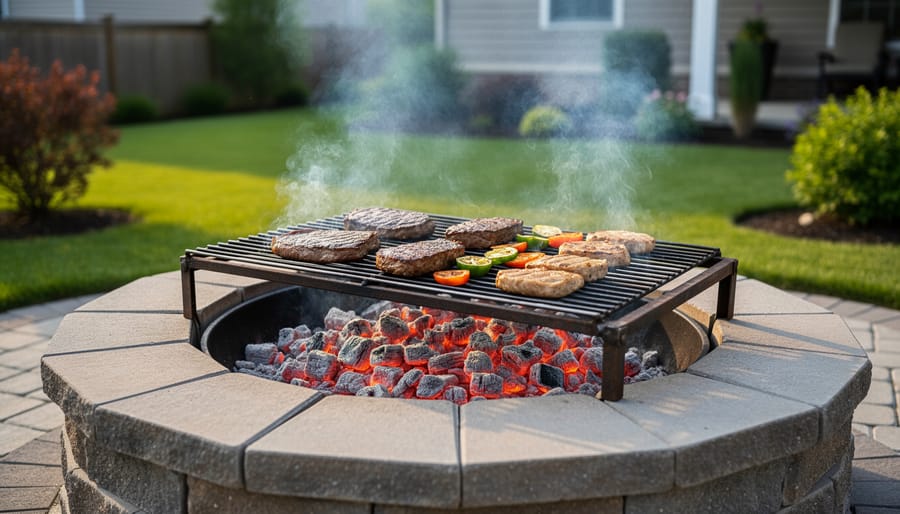
Your outdoor fire pit or fireplace isn’t just for ambiance on cool evenings—it can transform into an effective quick smoker with minimal investment. This multi-purpose approach maximizes your existing outdoor features while adding delicious new possibilities to your cooking repertoire.
Start by placing a sturdy grill grate over your fire pit at the appropriate height. For most designs, positioning the grate 12-18 inches above the coals provides ideal heat for quick smoking. If your outdoor fireplace has a flat cooking surface or opening, you’re already halfway there. The key is creating a stable platform that can safely hold your meat while capturing that smoky essence.
Wood selection makes all the difference in achieving authentic smoked flavor quickly. Choose hardwoods like hickory, apple, or cherry in smaller chunks rather than full logs. These woods ignite faster and produce clean, flavorful smoke without the lengthy burn time of traditional smoking. Soak wood chips for 20-30 minutes before adding them to establish that perfect smoldering effect.
Managing your chimney or airflow is crucial for success. Unlike outdoor cooking with fire where you want maximum heat, quick smoking requires moderate temperatures between 225-275°F. Partially close dampers or adjust air vents to maintain this sweet spot. Too much airflow creates an inferno; too little extinguishes your heat source.
This approach beautifully combines eco-friendly outdoor heating with practical cooking functionality, letting you enjoy your fire feature year-round while creating memorable meals that bring family and friends together around the warmth of real fire.
Affordable Smoker Options Under $200
Getting started with quick smoking doesn’t require a hefty investment. Several affordable options under $200 deliver excellent results for time-conscious homeowners looking to add smoky flavor to their outdoor cooking routine.
Kettle grills are the multitaskers of the smoking world. A quality 22-inch kettle grill runs between $120-$180 and handles both quick smoking and everyday grilling. These versatile units let you set up two-zone cooking, with charcoal on one side and your meat on the other, creating an efficient smoking environment that works beautifully for 2-4 hour sessions. Think of them as the outdoor equivalent of your fireplace’s adaptable warmth—functional, dependable, and perfect for creating ambiance.
Portable bullet smokers are another smart choice, typically priced between $100-$150. Their compact vertical design makes them ideal for patios and smaller yards while maintaining consistent temperatures for quick smoking. These smokers use less fuel than larger units, making them an eco-friendly option that aligns with sustainable outdoor cooking practices.
For apartment dwellers or those with space constraints, electric smokers in this price range offer set-it-and-forget-it convenience. While purists might debate authenticity, these units reliably produce smoke flavor in condensed timeframes—perfect when you’re balancing family dinners with busy schedules. The key is choosing equipment that fits your lifestyle and space, just as you’d select the right heating solution for your home’s unique needs.
The Quick Smoking Process: Step-by-Step
Building Your Fire for Quick Smoking
Building a proper fire base is your foundation for quick-smoking success. Start by creating good airflow at the bottom of your smoker or grill—think of it like tending a fireplace where oxygen flow makes all the difference. Arrange your charcoal in a compact pile rather than spreading it thin, which helps maintain consistent heat without constant adjustments.
Light your coals using a chimney starter for an eco-friendly approach that avoids chemical-laden lighter fluids. You’ll know your coal bed is ready when the coals are about 75% ashed over with a gentle orange glow underneath—typically 15-20 minutes. This sweet spot gives you the stable heat platform needed for quick smoking without temperature swings.
Add your smoking wood chunks or chips only after your coal bed is established. For quick smoking sessions, two to three fist-sized chunks are plenty. Too much wood creates bitter smoke that overwhelms your meat rather than enhancing it.
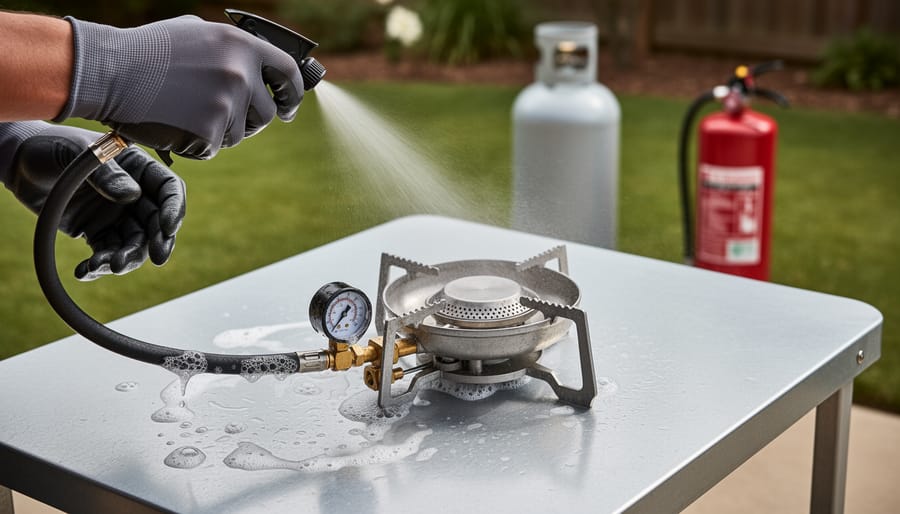
Safety reminder: always position your smoker away from structures and overhanging branches, keep a fire extinguisher nearby, and wear heat-resistant gloves when adjusting vents or adding fuel. Never leave your fire unattended, even during these shorter smoking sessions.
Wood Selection: Matching Smoke to Meat
Choosing the right wood for quick smoking is simpler than traditional methods since you’ll use less wood overall. Think of it as adding a gentle kiss of smoke rather than a prolonged embrace. For poultry like chicken or turkey, fruit woods such as apple or cherry deliver a mild, sweet flavor that won’t overpower the meat in shorter cooking times. These woods also complement the eco-friendly aspect of efficient smoking, using fewer resources while achieving delicious results.
Pork pairs beautifully with hickory or oak, though you’ll want to use these stronger woods sparingly in quick smoking sessions. A small amount goes a long way when you’re working with higher heat and shorter timeframes. For delicate fish and seafood, lighter options like alder or maple provide subtle flavor without overwhelming the natural taste.
The beauty of quick smoking is efficiency. You’ll typically need only one to two cups of wood chips or a few small chunks, compared to the hefty quantities traditional smoking demands. This not only saves money but reduces waste, making it a more sustainable approach to achieving that coveted smoke flavor. When using wood chips properly, soak them for about thirty minutes beforehand to create steady, controlled smoke that enhances rather than dominates your meat’s natural flavors.
Managing Temperature and Smoke
Maintaining steady heat between 225-275°F is your foundation for quick smoking success. Think of it like tending a cozy fire in your living room – you want consistent warmth, not wild temperature swings. Check your thermometer every 20-30 minutes during the first hour, then hourly once you’ve found your rhythm. For charcoal setups, keep a chimney starter with fresh coals ready to add if temperatures dip. Gas and pellet smokers make this easier with digital controls, offering the same convenience as modern heating systems.
The smoke quality matters just as much as temperature. Good smoke appears thin and blue-white, almost translucent, with a pleasant wood aroma. Bad smoke looks thick, gray, or white like billowing clouds, and smells acrid or sooty – this creates bitter flavors on your meat. If you spot bad smoke, increase airflow by adjusting vents or add dry wood chunks rather than wet ones.
When making adjustments, resist constantly opening the smoker lid. Each peek releases heat and extends cooking time, defeating your quick-smoking goal. Instead, trust your thermometer readings and only open when necessary to add wood or check meat doneness. Small vent adjustments work wonders – open them wider for hotter temps and cleaner smoke, close slightly to lower heat while maintaining that eco-friendly efficient burn.
Three Quick Smoking Recipes That Actually Work
90-Minute Smoked Chicken Thighs
Chicken thighs are perfect for quick smoking because their higher fat content keeps them moist and flavorful in just 90 minutes. This recipe delivers beautifully bronzed, tender meat that’ll impress your family without monopolizing your afternoon.
Start by patting six bone-in, skin-on chicken thighs dry with paper towels. For a simple yet delicious dry rub, combine two tablespoons brown sugar, one tablespoon paprika, two teaspoons garlic powder, one teaspoon onion powder, one teaspoon black pepper, and one teaspoon salt. This blend caramelizes beautifully while complementing the smoke without overpowering it. Rub the mixture generously over all surfaces of the chicken, letting it sit at room temperature for 20 minutes while your smoker preheats.
Set your smoker to 275°F, using fruit woods like apple or cherry for a mild, sweet smoke that pairs wonderfully with poultry. Place the thighs skin-side up on the grate, leaving space between each piece for proper smoke circulation. The chicken is done when it reaches an internal temperature of 175°F, typically after 75-90 minutes. The skin should be golden brown and slightly crispy.
Let the thighs rest for five minutes before serving. The result is juicy, smoky chicken that proves quick smoking delivers authentic flavor without requiring all day beside the fire.

2-Hour Smoked Pork Chops With Apple Wood
This recipe transforms humble pork chops into something special in just two hours, proving that quick smoking doesn’t mean sacrificing flavor. Apple wood’s naturally sweet smoke complements pork beautifully, creating a pairing that’s been beloved for generations.
Start by preparing a simple brine to keep your chops juicy during the faster cooking process. Mix 4 cups of water with 1/4 cup kosher salt, 1/4 cup brown sugar, and a tablespoon of black peppercorns. Submerge your 1-inch thick bone-in pork chops for 2-4 hours before smoking. This step is crucial for moisture retention when you’re working with higher temperatures.
Pat the chops completely dry and let them reach room temperature for about 30 minutes. Apply a light rub of brown sugar, paprika, garlic powder, and black pepper. The sugar will caramelize nicely during smoking, adding another layer of flavor.
Preheat your smoker to 250°F using apple wood chunks or chips. Place the chops directly on the grate and smoke until they reach an internal temperature of 145°F, typically 90 minutes to 2 hours depending on thickness. Resist the urge to peek too often, as this releases heat and extends cooking time.
Let the chops rest for 5 minutes before serving. You’ll notice a beautiful pink smoke ring and taste that perfect balance of savory pork and sweet, fruity smoke that makes this method absolutely worth mastering.
Quick-Smoked Salmon in Under 45 Minutes
Salmon transforms beautifully in just 30-45 minutes of smoking, making it the perfect centerpiece when you’re entertaining but short on time. The key to success lies in understanding that delicate fish requires a gentler approach than heartier meats.
Start with a 1-2 pound salmon fillet, skin-on, and pat it completely dry. Apply a simple dry brine of equal parts brown sugar and kosher salt, letting it rest for 15 minutes while your smoker preheats to 225°F. Use mild woods like alder or apple to avoid overwhelming the fish’s natural flavor—this is where many home cooks go wrong. Too much smoke creates an acrid, bitter taste rather than the refined, restaurant-quality finish you’re after.
Rinse the brine thoroughly and let the fillet air-dry for 10 minutes to form a pellicle, that slightly tacky surface that helps smoke adhere properly. Smoke for 25-35 minutes until the internal temperature reaches 145°F. The salmon should flake easily but remain moist and glossy.
This quick method delivers impressive results that’ll have your guests thinking you spent all day preparing. The gentle smoke enhances rather than masks the fish’s delicate character, creating an elegant dish that proves quick smoking doesn’t mean compromising on quality.
Common Quick Smoking Mistakes and How to Avoid Them
The Dry Meat Problem
Higher temperatures mean faster cooking, but they also accelerate moisture loss from your meat. Think of it like the difference between a gentle fireplace warmth and a roaring blaze—one provides steady comfort while the other can be overwhelming. When you’re quick smoking at 275-300°F instead of traditional low temperatures, you’re working against the clock to keep your meat juicy.
The solution starts with proper meat selection. Choose cuts with good fat marbling and consider leaving a fat cap intact for natural basting. Brining is your best friend here—a simple mixture of water, salt, and sugar for 4-12 hours before smoking creates a moisture reservoir that helps meat retain juiciness even at higher temperatures.
During the cook, keep a spray bottle handy filled with apple juice, apple cider vinegar, or simply water. Spritz your meat every 30-45 minutes to maintain surface moisture and build a beautiful bark. This technique mimics the self-basting effect of longer, slower cooks.
Finally, respect the rest period. After removing meat from heat, wrap it in foil and let it rest for 15-30 minutes. This allows juices to redistribute throughout the meat rather than running out onto your cutting board. These simple steps ensure your quick-smoked results rival traditional methods.
Too Much Smoke, Not Enough Flavor
When you’re working with quick smoking methods, less is definitely more when it comes to wood. Think of smoke like seasoning your favorite dish—you want just enough to enhance the natural flavors, not overwhelm them. Since your meat won’t be sitting in the smoker for hours, it doesn’t have time to develop that deep, complex smoke ring and flavor you’d get from traditional low-and-slow cooking.
The key is using smaller amounts of wood chips or chunks, and opting for milder varieties like apple, cherry, or maple rather than heavy-hitting hickory or mesquite. Too much smoke in a short timeframe creates an unpleasant, bitter coating that can ruin even the best cut of meat. You’re aiming for a subtle kiss of smoke, not a chokehold.
Start conservatively—perhaps half the wood you’d normally use—and remember that smoke should be thin and almost blue in color. Thick, white billowing smoke is a red flag that you’re creating creosote buildup, which tastes acrid and harsh. If you’re new to quick smoking, err on the side of using too little wood. You can always add more next time, but you can’t remove that bitter flavor once it’s settled into your meat.
Quick smoking isn’t about cutting corners—it’s about adapting authentic techniques to fit the way we actually live today. You’ve learned that with the right approach, proper equipment, and smart temperature management, you can create genuinely delicious smoked meats in a few hours instead of dedicating your entire weekend to tending a fire. These aren’t shortcuts that sacrifice flavor; they’re refined methods that deliver real smoke penetration, tender textures, and that satisfying pink smoke ring we all love.
The beauty of quick smoking is how accessible it makes this ancient cooking method. You don’t need to master overnight brisket sessions to impress your family and friends with authentic smoked flavor. Start with something simple—maybe those pork chops or chicken thighs we discussed—and build your confidence from there. Pair your smoked creations with perfect BBQ side dishes, and you’ve got a complete meal that brings people together around the table.
Remember, fire has always been central to the human experience—it’s about more than just cooking. Whether you’re nurturing flames in your indoor fireplace on a cold evening or managing your smoker’s heat on a Saturday afternoon, you’re connecting with something fundamental. Quick smoking gives you that primal satisfaction of cooking with fire and wood, creating warmth and gathering spaces where memories happen, all while respecting the demands of modern life. Light that fire, trust the process, and enjoy the journey.


")