


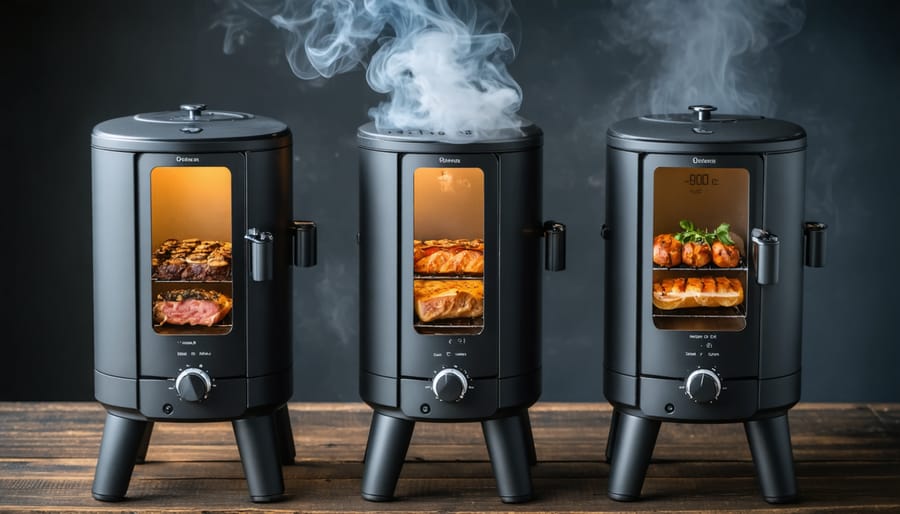
Start with a digital smoker or pellet grill that maintains temperature automatically—your first dozen smoking sessions shouldn’t require babysitting a firebox every thirty minutes. Choose pork shoulder or chicken thighs as your maiden voyage meats; both forgive temperature fluctuations and remain juicy even when you overshoot by twenty degrees. Keep your smoke thin and blue rather than thick and white, aiming for 225-250°F throughout the cook, and resist the urge to peek inside constantly—every lid lift adds fifteen minutes to your cooking time.
If you already manage a wood-burning fireplace, you possess the fundamental skill that separates great pitmasters from mediochopers: understanding how wood burns, how airflow affects combustion, and how different woods create distinct flavor profiles. That intuition translates directly to smoking meat, where controlling oxygen, managing coal beds, and selecting the right fuel wood determines whether you’re serving tender, smoky perfection or dried-out disappointment.
The smoking meat journey mirrors what draws many of us to gather around fires in the first place—that primal satisfaction of transforming raw ingredients through patience, smoke, and carefully managed heat. Unlike grilling’s quick sear-and-serve approach, smoking demands the same measured attention you’d give a crackling evening fire, rewarding your patience with flavors impossible to achieve any other way. This beginner’s guide will help you avoid expensive equipment mistakes, choose meats that guarantee early success, and master temperature control techniques that build confidence with every cook.
Why Fire Management Skills Make You a Better Smoker
If you’ve been managing a fireplace or wood stove in your home, you’re already ahead of most beginner meat smokers. The truth is, the skills you’ve developed tending your fire translate beautifully to the smoking pit—and that gives you a significant advantage.
Think about what you already know: how different woods burn at different rates, how airflow affects flame intensity, and how to maintain consistent heat over hours. These aren’t just fireplace management skills—they’re the exact fundamentals that separate great smoked meat from disappointing results.
When you understand that oak burns slow and steady while pine flares hot and fast, you’re applying chemistry knowledge that matters just as much in your smoker. The patience you’ve cultivated watching coals develop that perfect glow? That’s the same patience needed to let brisket render slowly at 225°F for twelve hours.
Your experience reading smoke color and adjusting vents transfers directly to outdoor cooking techniques. The thin, blue smoke that indicates complete combustion in your fireplace is exactly what you want kissing your ribs—not the thick, white smoke that signals incomplete burning and creates bitter flavors.
Even fire safety habits serve you well. You already respect heat, understand proper wood storage to maintain ideal moisture content, and know that rushing a fire leads to problems. These principles form the backbone of successful smoking.
The biggest difference? In smoking, you’re deliberately creating a controlled, low-temperature environment rather than maximum heat. But the core skill—managing wood combustion to achieve your desired result—remains identical. You’re not starting from scratch; you’re adapting expertise you’ve already mastered in your living room to create incredible flavors outdoors.
Choosing Your First Smoker (And Why It Matters Less Than You Think)
Charcoal Smokers for Fire Purists
If you’ve mastered the art of building and maintaining a wood fire in your fireplace, charcoal smokers will feel wonderfully familiar. These traditional smokers connect you directly to the fundamentals of fire management—managing airflow, reading smoke color, and adjusting vents to control temperature.
Charcoal smokers, whether offset barrel-style or kettle designs, offer hands-on control that many fire enthusiasts genuinely enjoy. You’ll use natural lump charcoal or briquettes as your heat source, adding wood chunks for that signature smoky flavor. The learning curve mirrors tending a good fireplace fire: understanding how oxygen feeds combustion, recognizing when to add fuel, and maintaining steady temperatures through thoughtful adjustment rather than digital controls.
This approach demands more attention than set-it-and-forget-it pellet smokers, but rewards you with deeper understanding and connection to the smoking process. Plus, charcoal burns cleaner than many realize, especially when using quality natural lump charcoal—an eco-friendly choice that produces minimal additives or chemicals in your cooking environment.
Electric and Gas Options for Consistent Results
Electric and gas smokers are excellent starting points for newcomers who want predictable results without mastering fire management first. These models maintain steady temperatures automatically, removing the guesswork that comes with charcoal or wood-only options. You’ll spend less time monitoring and more time learning how smoke flavor develops in your food.
Electric smokers work like outdoor ovens with wood chip trays, offering remarkable temperature consistency—perfect for understanding how different meats respond to various heat levels. After seasoning your electric smoker, simply set your desired temperature and add wood chips for smoke. Gas models provide similar reliability with slightly more traditional smoky character.
Both options use significantly less fuel than traditional smokers, making them eco-friendly choices that align with sustainable cooking practices. They’re also forgiving of mistakes, so you can focus on learning meat selection, timing, and flavor combinations without worrying about temperature swings that might ruin your first attempts.
What You Really Need to Get Started
You don’t need to break the bank or fill your garage with equipment to start smoking meat. Think of it like building your first fire—you need the essentials, not every tool in the catalog.
**Your starter kit:**
A basic smoker is your foundation. Charcoal models like the Weber Kettle or a simple offset smoker offer excellent results at reasonable prices. Electric smokers work beautifully for set-it-and-forget-it convenience, though they sacrifice some of that authentic smoky flavor.
Beyond the smoker itself, invest in a reliable meat thermometer—this is non-negotiable. Digital instant-read models take the guesswork out of doneness, helping you avoid the heartbreak of overcooked brisket.
You’ll also need quality charcoal or wood chunks (not treated lumber!). Hardwoods like hickory, apple, or cherry add wonderful flavor while burning cleanly—an eco-friendly choice that respects both your food and the environment.
A sturdy pair of heat-resistant gloves, a chimney starter for lighting charcoal without lighter fluid, and a simple spray bottle for moisture complete your essential toolkit.
Skip the fancy injectors, multiple probe systems, and specialty rubs for now. Master the basics with simple equipment first—you can always expand your collection as your skills grow.
The Three Cuts That Forgive Beginner Mistakes
Pork Shoulder: Your Safety Net
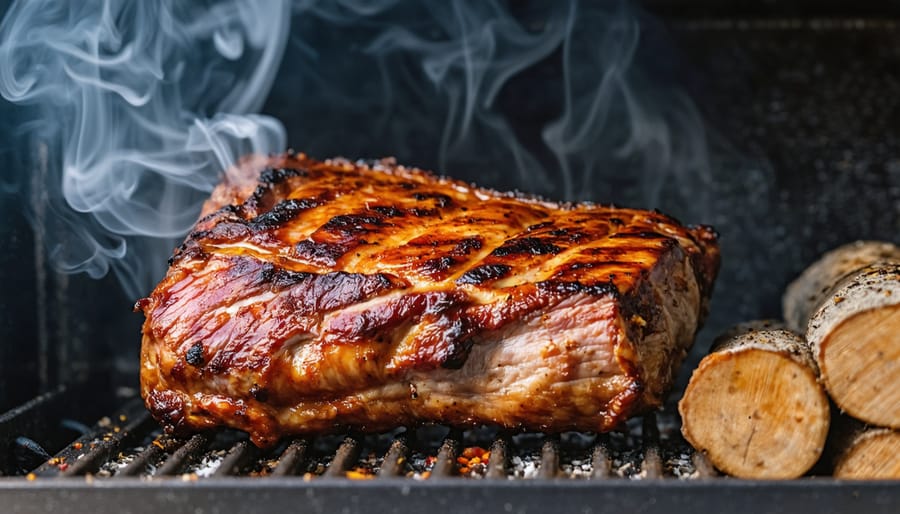
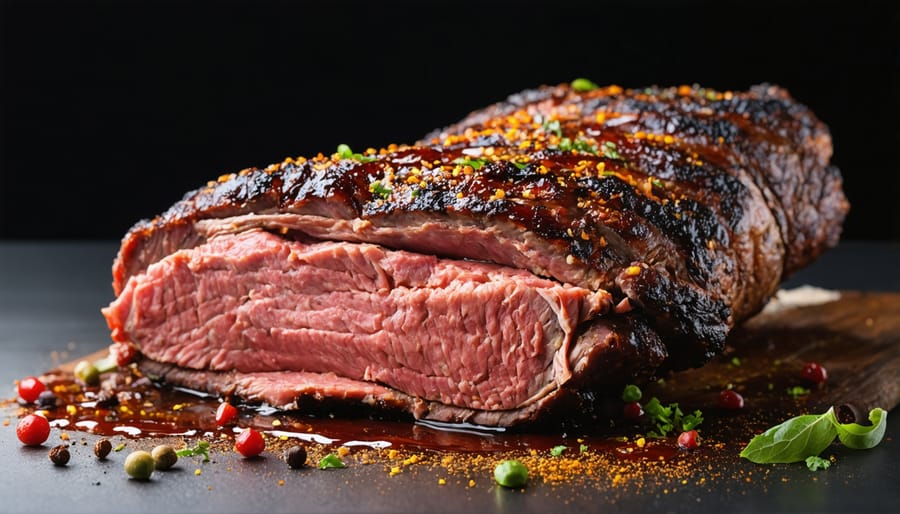
Pork shoulder is your best friend when you’re just starting your smoking journey. This forgiving cut contains generous marbling and connective tissue that transforms into tender, juicy meat even if your temperature fluctuates—something that’s bound to happen as you’re learning fire management. Unlike expensive steaks that punish minor mistakes, pork shoulder actually improves with long, slow cooking, giving you plenty of time to adjust and learn. You can smoke it anywhere between 225°F and 275°F for 12-16 hours, and it’ll still turn out beautifully. The high fat content keeps the meat moist, while the thick bark that develops creates impressive visual results that’ll have your guests thinking you’re already a pitmaster. Best of all, it’s budget-friendly, so you can practice without financial pressure.
Chicken Thighs Over Breasts
Chicken thighs are your secret weapon when starting your smoking journey. Unlike lean chicken breasts that dry out quickly if you overshoot the temperature by even a few degrees, dark meat thighs forgive mistakes beautifully. Their higher fat content keeps them moist and flavorful, even if you’re still mastering your fire management skills.
Another advantage? Speed. Chicken thighs typically finish smoking in just 60-90 minutes at 275°F, giving you that satisfying accomplishment without the all-day commitment that larger cuts require. This makes them perfect for weekend experiments where you can try different wood flavors or test your temperature control without a huge time investment.
The rendered fat from thighs also creates wonderful smoky flavors that penetrate the meat thoroughly, rewarding you with crispy, golden skin and tender, juicy bites underneath—exactly the kind of quick win that builds your confidence for tackling bigger smoking projects ahead.
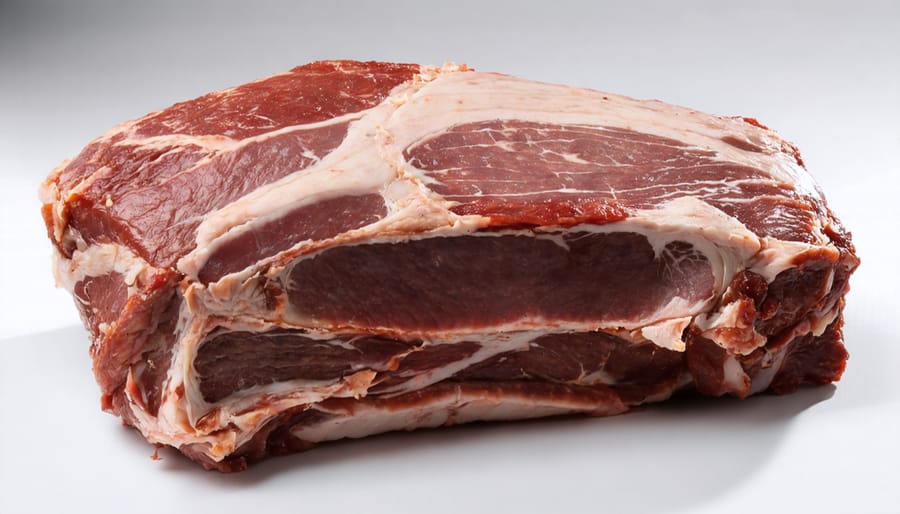
Beef Ribs for Bold Flavor
Beef ribs offer an incredibly rewarding experience for beginner smokers who want impressive results without fussy techniques. These thick, meaty cuts are surprisingly forgiving—their generous fat content keeps them moist even if your temperature fluctuations aren’t perfect yet.
Start with plate short ribs or chuck ribs, which are more affordable than prime cuts but deliver that melt-in-your-mouth texture you’re after. A simple salt-and-pepper rub lets the natural beef flavor shine through while you focus on mastering your smoker’s heat management—skills that translate directly from tending your fireplace.
Smoke at 250-275°F for about six hours, spritzing occasionally with beef broth to maintain moisture. The beauty of beef ribs lies in their resilience; they’ll signal when they’re ready by pulling back from the bone. You’ll achieve that coveted smoke ring and bark that rivals any steakhouse, all while learning fire control fundamentals that enhance both your outdoor cooking and indoor hearth management skills.
Wood Selection: Matching Fuel to Flavor
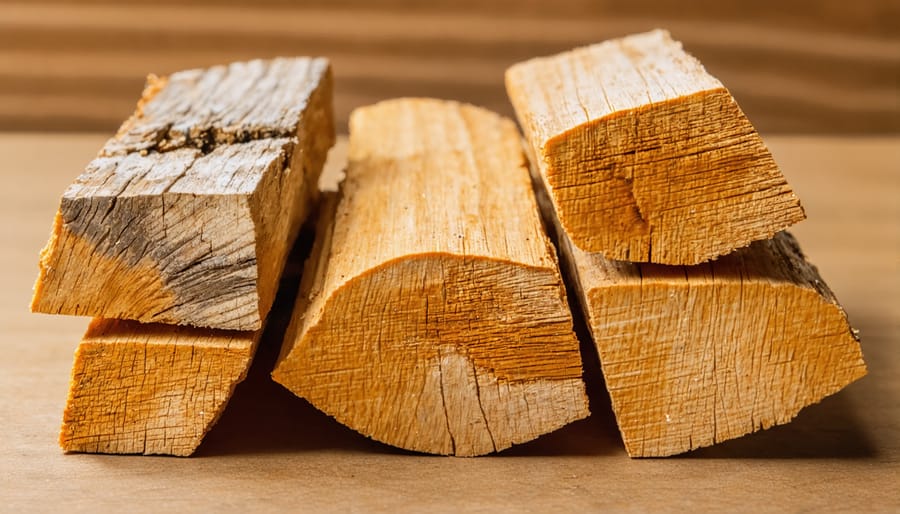
The Big Three: Hickory, Oak, and Apple
If you’ve built fires in your fireplace, you already understand how different woods burn differently—that same principle applies to smoking meat. For beginners, three woods stand out as your reliable starting lineup: hickory, oak, and apple.
**Hickory** is the workhorse of smoking woods, delivering that classic smoky flavor you recognize from barbecue restaurants. It’s bold without being overpowering, making it perfect for pork and beef. Think of it as the equivalent of seasoned hardwood for your fireplace—dependable and consistent.
**Oak** burns clean and mild, providing a steady, balanced smoke that won’t dominate your meat’s natural flavors. It’s forgiving if you accidentally use a bit too much, and it pairs beautifully with everything from brisket to chicken. Oak is your everyday smoking wood, similar to how you might keep a reliable stack of hardwood for regular fires.
**Apple** brings a lighter, slightly sweet profile that’s ideal for poultry and pork. It’s nearly impossible to over-smoke with apple, making it exceptionally beginner-friendly. The gentle smoke complements rather than competes with your meat.
Start with these three, and focus on using wood chips properly before experimenting with more exotic varieties. You’ll develop confidence while creating delicious results every time.
What to Avoid (And Why)
Just as you wouldn’t burn treated lumber in your fireplace, certain woods have no place in your smoker. **Avoid softwoods like pine, fir, cedar, and spruce**—they contain high resin levels that create acrid, sooty smoke and can leave your meat tasting like turpentine. These woods also produce creosote buildup, a concern familiar to anyone maintaining a chimney.
**Never use wood from unknown sources** or lumber scraps that might contain chemicals, paint, or preservatives. These can release toxic fumes when burned, turning your delicious dinner into a health hazard. Similarly, steer clear of **eucalyptus and most evergreens**, which produce overpowering, medicinal flavors.
**Green or unseasoned wood** is another common mistake. It smolders rather than burns cleanly, creating excessive smoke that leaves bitter, unpleasant flavors. Just like proper firewood needs seasoning time, smoking wood should be dried to around 20% moisture content for optimal results.
When in doubt, stick with proven hardwoods. Your safety and your family’s enjoyment depend on making smart, informed choices about what you’re burning—whether it’s in your smoker or your fireplace.
Temperature Control: The One Skill That Changes Everything
The 225°F Sweet Spot
Think of 225°F as your trusted companion in the smoking journey—it’s forgiving enough to prevent disasters while delivering consistently delicious results. This temperature allows collagen in tougher cuts to break down slowly into tender, flavorful gelatin without drying out the meat. Unlike higher temperatures that demand constant attention, 225°F gives you breathing room to learn your smoker’s personality and adjust airflow gradually.
Maintaining this sweet spot is surprisingly straightforward once you understand the basics. Start by filling your firebox with quality hardwood chunks or charcoal, then adjust your intake and exhaust vents to find that gentle, steady smoke. You’re aiming for thin, wispy smoke—not billowing clouds. Check your smoker thermometer every hour or so, making small vent adjustments as needed. Most beginners find they only need to add fuel every few hours at this temperature, making it manageable even for your first attempt. The slow, steady heat mimics the patience required for tending a home fireplace, creating that same sense of rewarding warmth.
Reading Your Fire (Not Just Your Thermometer)
If you’ve tended a fireplace, you already possess valuable instincts for reading fire—now it’s time to translate those skills to your smoker. Just as you’ve learned to gauge your fireplace’s heat by the flame color and ember glow, smoking meat relies on similar visual and sensory cues that go beyond simple thermometer readings.
Look for thin, bluish-white smoke billowing from your smoker’s vents—this “clean smoke” produces the best flavor and indicates ideal combustion. Thick, white or gray smoke signals incomplete burning, creating bitter, acrid flavors on your meat. If you see this, adjust your airflow just as you would damper adjustments on your fireplace.
The smoke’s aroma tells its own story. It should smell sweet and pleasant, reminiscent of the wood you’re burning. If it smells harsh or sooty, you’re not getting complete combustion—a concept familiar from maintaining your home hearth.
Touch the smoker’s exterior (carefully!) to sense heat distribution. Check that smoke flows steadily but not excessively. These sensory skills you’ve honed fireside translate directly to smoking mastery, helping you create an environment where meat transforms into something extraordinary while honoring sustainable, wood-based cooking traditions.
Quick Fixes When Temperature Swings
Don’t panic when you see that temperature gauge spike or dip—it happens to everyone, especially when you’re learning. Think of your smoker like managing a fireplace: small, steady adjustments work better than dramatic changes.
**When temperature jumps too high:** First, close your intake vents about halfway. If you’re using charcoal, this reduces oxygen flow and calms the fire naturally. Avoid opening the lid repeatedly—that actually feeds the fire with fresh air. Wait 10-15 minutes between adjustments to see the real effect.
**When temperature drops:** Open your intake vents gradually and resist adding fuel immediately. Sometimes you just need better airflow. If you do need more fuel, add just a few pieces at a time. Wood chunks the size of your fist work beautifully for maintaining steady heat without overwhelming spikes.
**The golden rule:** Temperature swings of 25 degrees either way won’t ruin your meat. You’re aiming for a range, not a precise number. Most beginner-friendly cuts like pork shoulder are incredibly forgiving—they’ll turn out delicious even if your temperature wasn’t perfect. Keep notes on what adjustments worked so you’ll feel more confident next time.
Your First Smoke: A Step-by-Step Timeline
Let’s walk through your first smoking session together—a simple pork shoulder that’s incredibly forgiving and perfect for building your confidence. Think of this as creating a slow, steady warmth, much like maintaining a cozy fire on a winter evening.
**Morning Setup (8:00 AM)**
Start your day by removing your pork shoulder from the refrigerator about 30 minutes before smoking. Apply your rub generously—don’t be shy. While the meat comes to room temperature, fire up your smoker. Use natural lump charcoal or sustainably-sourced wood chunks for an eco-friendly approach that also delivers superior flavor. Aim for a steady 225°F, watching your thermometer closely as it stabilizes. This patience in the beginning sets you up for success throughout the day.
**The First Hour (9:00-10:00 AM)**
Place your seasoned pork shoulder on the grate, insert a probe thermometer into the thickest part, and close the lid. Resist the urge to peek—every time you open that lid, you’re adding 15 minutes to your cook time. Check your temperature gauge every 20 minutes and make minor adjustments to your vents. You’re managing airflow just like adjusting dampers on a fireplace.
**The Long Haul (10:00 AM-4:00 PM)**
This is where smoking teaches patience. Your meat will climb steadily to around 160°F internal temperature, then hit “the stall”—a plateau that can last hours. Don’t panic; this is normal. Add wood chunks every hour for consistent smoke. Keep your water pan filled to maintain moisture and temperature stability.
**The Homestretch (4:00-6:00 PM)**
Once your pork shoulder reaches 195-203°F internally, it’s ready. The meat should feel tender when you probe it—like pressing into warm butter. Remove it, wrap loosely in foil, and let it rest for at least 30 minutes. This resting period allows juices to redistribute, ensuring moist, flavorful results.
Your total time? About 9-10 hours for an 8-pound shoulder. Yes, it’s an investment, but like building the perfect fire, the process itself becomes part of the pleasure. You’ve just created something extraordinary through patience and attention.
The Mistakes Everyone Makes (And How to Recover)
Let’s be honest—everyone who’s learned to smoke meat has opened their smoker to find a piece that’s drier than cardboard or discovered their brisket transformed into charcoal. These aren’t signs you should give up; they’re simply part of the journey, much like learning to maintain the perfect fire in your fireplace took some practice.
**The “I Fell Asleep” Disaster** is probably the most common. Your smoker temperature spiked or dropped dramatically because you dozed off or got distracted. If you catch it early and the meat isn’t burned, don’t panic. Lower the temperature immediately if it’s too high, wrap your meat in foil to retain moisture, and finish cooking. The result might not be competition-worthy, but it’ll still be delicious. Next time, set phone alarms every hour or invest in a wireless thermometer that alerts you to temperature changes.
**The Dry Meat Dilemma** happens when you overcook or choose lean cuts. If you’ve already pulled dry meat off the smoker, slice it thin and serve it with plenty of sauce, or chop it for tacos and sandwiches where moisture from toppings helps. For future sessions, stick with fattier cuts like pork shoulder or chicken thighs, and remember that a good meat thermometer prevents this issue entirely.
**The Bitter, Over-Smoked Taste** occurs when beginners add too much wood or use it incorrectly. If your meat tastes like an ashtray, you’ve learned a valuable lesson about smoke management—similar to how too much smoke billowing back into your living room means your chimney needs attention. Use less wood next time, and ensure it’s properly seasoned and producing thin, blue smoke rather than thick white clouds.
Every pitmaster you admire has a graveyard of mistakes behind them. Your learning curve is completely normal.
Safety First: Outdoor Fire Management Basics
Before you light your first smoker, let’s talk about creating a safe outdoor cooking space—many of the same principles that keep your indoor fireplace safe apply here too.
Choose your smoker location thoughtfully. You’ll want a level, stable surface at least ten feet from your house, deck railings, overhanging branches, and any flammable materials. Just like positioning a fireplace away from curtains and furniture, your smoker needs breathing room. Concrete patios or pavers work beautifully, giving you a heat-resistant foundation that won’t spark concerns.
Weather matters more than you might think. Wind can turn a controlled smoke into a neighborhood event, sending embers where they shouldn’t go. Light breezes are fine, but save your smoking sessions for calmer days when you’re starting out. Also check local fire restrictions—dry conditions sometimes mean outdoor cooking bans, and it’s worth respecting these guidelines for everyone’s safety.
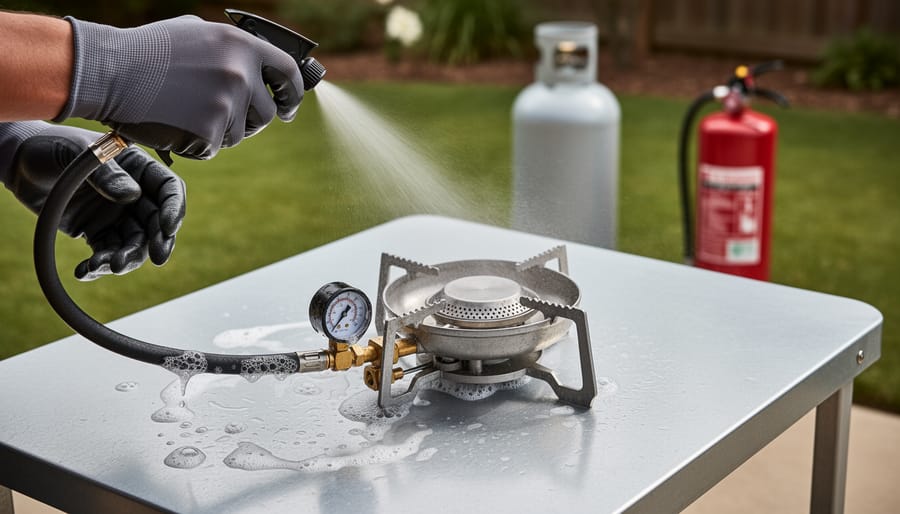
Keep a fire extinguisher or garden hose nearby. This isn’t being paranoid; it’s being prepared. You’re managing live fire and hot coals, much like tending any wood-burning heat source. The difference? You’ll be doing it for hours at a time.
Never leave your smoker unattended during cooking. Yes, smoking is a slow process, but checking your setup every 30-45 minutes ensures everything stays under control. Think of it as the outdoor equivalent of monitoring your fireplace—responsible fire management creates the best results while keeping your home and family safe.
You’ve already mastered the art of managing fire—whether you’re tending to your fireplace on a crisp evening or maintaining the perfect bed of coals for ambiance. Smoking meat is simply the next chapter in that same story. The temperature control, patience, and respect for wood combustion you’ve developed translate beautifully to the smoker. You’re not starting from scratch; you’re expanding skills you already possess.
Don’t feel pressured to achieve competition-level results on your first attempt. Smoking is a journey where each session teaches you something new about fire behavior, wood selection, and flavor development. Start simple, enjoy the process, and celebrate the small victories—even if your first brisket isn’t perfect, it’ll still taste incredible with your perfect BBQ side dishes.
As you explore this rewarding craft, you’re also embracing a more sustainable approach to cooking. Using wood efficiently, minimizing waste, and gathering loved ones around smoked meals aligns perfectly with the eco-conscious, warmth-centered lifestyle you’ve cultivated. Light that smoker with confidence—your fire management expertise has prepared you well.


")