


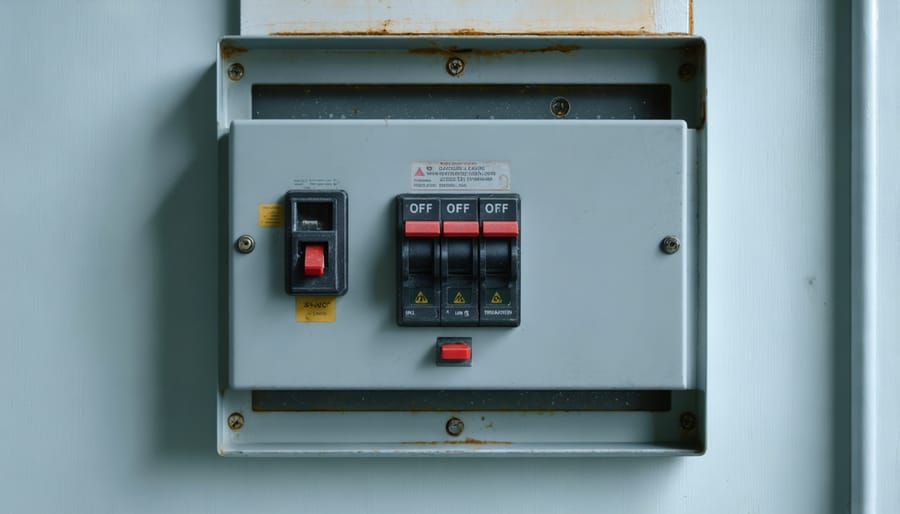
**Check your circuit breaker first**—flip it completely off, then back on, as electric stovetops often trip breakers during power surges or when multiple burners run simultaneously. If your stovetop powers on but burners won’t heat, test different burners to isolate whether you’re dealing with a single faulty element or a broader control issue.
**Inspect the burner elements themselves** by removing them (they typically pull straight out) and examining the metal prongs for burn marks, corrosion, or damage. A blackened connection point signals a failed element that needs replacement—a straightforward DIY fix costing $20-50 per element.
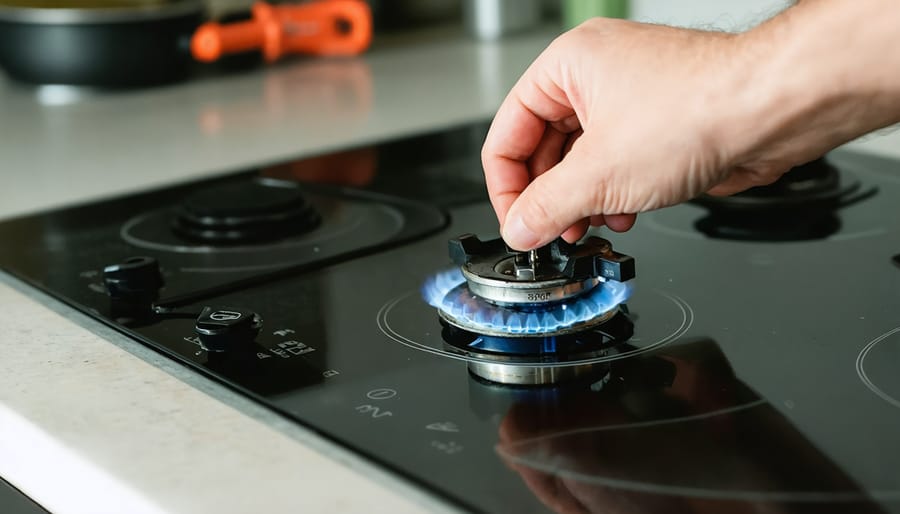
**Listen for clicking sounds** when you turn the burner dial, which indicates the infinite switch is attempting to complete the circuit. No click usually means a failed switch, while clicking without heating points to the element itself. For glass-top models, check that the radiant elements beneath the surface haven’t loosened from their connections.
**Test the terminal block** where burner elements plug in—wiggle elements gently while observing whether intermittent heating occurs, revealing loose connections that may need tightening or terminal replacement.
When multiple burners fail simultaneously, suspect deeper electrical issues with your home’s wiring or the stovetop’s main control board. While simple element swaps are weekend-friendly projects, problems involving the control board, wiring behind the unit, or persistent tripping breakers require a licensed electrician’s expertise. Your stovetop is the heart of your home’s warmth—keeping it functional ensures you’re never left in the cold during meal preparation.
Safety First: What to Check Before You Start Troubleshooting
Before you dive into diagnosing why your electric stove top isn’t working, let’s talk about keeping yourself safe—because no repair is worth risking your well-being. Think of this like tending to a fireplace: you’d never add wood to roaring flames without taking proper precautions first.
**Power Down Completely**
Your first step is cutting the power supply. Head to your home’s electrical panel and flip the breaker that controls your stove. Don’t just rely on turning off the stove’s control knobs—this doesn’t eliminate electrical current running to the unit. If you’re unsure which breaker controls your stove, it’s better to shut off the main breaker temporarily. For extra peace of mind, use a voltage tester to confirm there’s no electrical current before touching any components.
**Give It Time to Cool**
If you’ve been attempting to use your stove, wait at least 30-60 minutes before troubleshooting. Electric burners retain heat much longer than you might expect, similar to how fireplace stones radiate warmth long after the flames have died down. Touching a hot element can cause serious burns, so patience here is essential.
**Know Your Limits**
While many stove issues are straightforward to diagnose, some repairs require professional expertise. If you notice any of these warning signs, stop immediately and call a licensed electrician:
– Burning smells or visible scorch marks
– Sparking or unusual sounds when powered on
– Damaged wiring or melted components
– Any uncertainty about electrical safety
Remember, your home’s safety systems—whether your heating appliances or cooking equipment—deserve respect and proper care. There’s no shame in calling a professional when a situation exceeds your comfort level or expertise.
The Quick Fixes: Simple Problems You Can Solve in Minutes
Check Your Power Source
Before diving into complex diagnostics, let’s start with the basics—your stove needs power to work, just like your fireplace needs fuel. First, verify that your electric stove is properly plugged into its outlet. These appliances typically use heavy-duty 240-volt connections that can occasionally work loose, especially if you’ve recently moved the stove for cleaning.
Next, head to your electrical panel and check if any circuit breakers have tripped. A tripped breaker will be in a middle position or flipped to “off.” Reset it by switching it fully off, then back on. Some homes have electric stove fuses instead of breakers—look for any that appear blackened or have a broken metal strip inside.
To confirm your outlet is working, test it with another high-powered appliance if possible, though be cautious not to overload the circuit. If you have a voltage tester, that’s even better for a quick check. Remember, safety comes first—if you’re uncomfortable working around electrical systems, there’s no shame in calling a professional. Think of this like ensuring your chimney is properly vented before lighting a fire—some fundamentals are worth getting right.
Inspect the Burner Connections
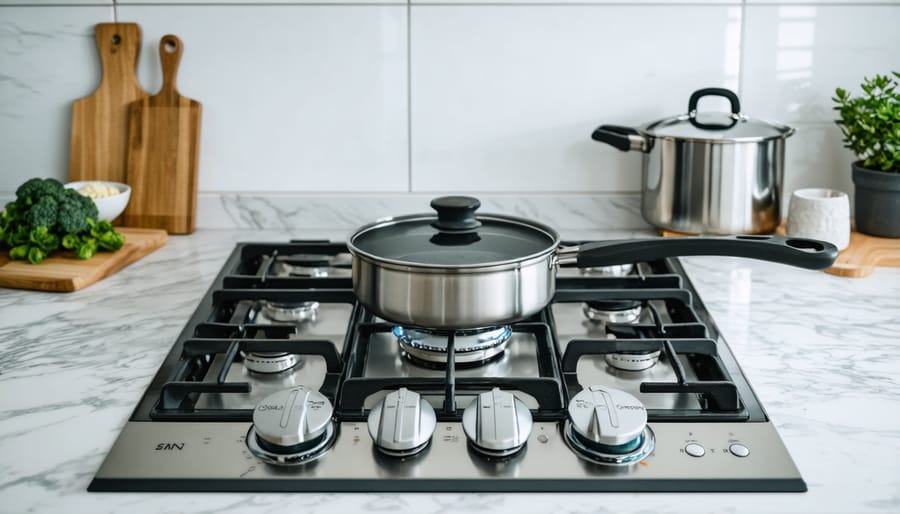
If you have a coil burner stovetop, connection issues are often the culprit when a burner stops working. Think of it like ensuring a good connection in any heating system—proper contact is essential for efficient operation.
Start by making sure the burner is completely cool, then gently lift and remove it from its socket. You’ll notice two prongs that plug into the receptacle. Examine these connection points carefully for any signs of corrosion, which appears as a greenish or white crusty buildup, or burn marks that look like blackened spots. These issues prevent proper electrical flow, much like how soot buildup affects fireplace efficiency.
Clean the metal prongs with a dry cloth or fine steel wool to remove any residue. Check inside the receptacle for similar problems—dust and grease can accumulate there too. A cotton swab works well for this task.
When reinstalling the burner, ensure it’s seated firmly and evenly. You should feel a solid connection when the prongs slide completely into the socket. A loose fit means poor contact, which can cause intermittent heating or complete failure. If the burner still wobbles or doesn’t make good contact after cleaning, the receptacle itself may be damaged and require replacement—a straightforward fix for maintaining your kitchen’s reliable warmth.
Test the Control Knobs and Settings
Sometimes the simplest solutions are the easiest to overlook, especially when you’re in the middle of preparing a meal. Before diving into more complex troubleshooting, let’s examine your stove’s control knobs and settings—you’d be surprised how often this solves the problem.
Start by ensuring each control knob is turned completely to the “off” position, then try turning your desired burner back on. These knobs can sometimes get stuck in an in-between position, particularly if they’ve accumulated grease or cooking residue. Give them a gentle but firm twist through their full range of motion. If a knob feels loose or wobbly, it might not be engaging properly with the control mechanism beneath it.
Modern electric stoves often include child safety locks—a wonderful feature for families, but one that can catch you off guard. Check your control panel for a small lock icon or a combination of buttons that might have been accidentally pressed. Your owner’s manual will show you exactly how to deactivate this feature, though it typically involves holding down specific buttons for several seconds.
For digital or touch-control models, verify you’ve selected the correct burner. These sleek, contemporary designs sometimes feature layouts that aren’t immediately intuitive. Take a moment to match the control icon with the actual burner position on your cooktop. Also, ensure the display screen itself is responding—if it’s completely dark or unresponsive, you might be dealing with a power supply issue rather than a settings problem.
When One Burner Won’t Work: Diagnosing Individual Heating Elements
Testing a Faulty Coil Burner
One of the simplest yet most effective diagnostic methods is the burner swap test. Most electric stove burners are interchangeable within the same size category, which gives you a straightforward way to pinpoint whether the problem lies with the burner element itself or the socket it plugs into.
Start by ensuring your stove is completely cool and unplugged. Remove the suspected faulty burner by gently pulling it straight out from its socket. Now take a burner from another location that you know works properly and plug it into the problematic socket. Turn the power back on and test it. If the working burner now fails in that socket, you’ve identified a socket issue rather than a burner problem. Conversely, if your “problem” burner fails when plugged into a different socket, the burner element needs replacement.
During this process, perform a visual inspection of both the burner and socket. Look for obvious signs of damage like blistering, burn marks, corrosion, or breaks in the coil. Check the burner’s prongs for any warping or discoloration. If you notice a burner stuck on high or unresponsive to temperature adjustments, this often indicates internal element failure.
Replace the burner if you spot visible damage, if it fails the swap test, or if it’s heating unevenly. Replacement burners are relatively inexpensive and easy to install yourself—simply match the size and wattage to your original element for safe, efficient cooking performance.
Troubleshooting Glass Top Burners
Glass top stoves bring a sleek, modern aesthetic to your kitchen while providing efficient heating—much like how contemporary gas fireplaces blend style with functionality. However, when your smooth cooktop stops working, the problem often lies hidden beneath that beautiful glass surface.
**Understanding What’s Underneath**
Your glass cooktop uses radiant heating elements positioned just below the ceramic glass. These elements glow red-hot when activated, transferring heat through the glass to your cookware. Think of it as similar to radiant floor heating—the warmth radiates upward through a protective barrier. When these elements fail, you’ll notice specific burners won’t heat at all, or they’ll heat unevenly.
**Identifying a Burned-Out Element**
A faulty radiant element often reveals itself clearly. Turn on the problem burner and wait about a minute. A working element should glow evenly with a bright red color visible through the glass. If you see no glow, or only partial glowing in certain sections, that element has likely burned out. You might also notice the burner worked intermittently before failing completely—a telltale sign of element deterioration.
**When the Glass Needs Replacement**
Sometimes the issue isn’t the element but the glass itself. Cracks in the cooktop surface, even hairline fractures, compromise both safety and heating efficiency. If you spot any cracks, stop using that burner immediately. Cracked glass can allow heat to escape improperly and poses safety risks. Additionally, severe staining or discoloration that won’t clean off may indicate heat damage to the glass that affects performance.
While replacing elements is often manageable for confident DIYers, glass replacement typically requires professional installation to ensure proper sealing and safety—similar to how specialized fireplace glass installations need expert handling.
When Nothing Works: Whole-Stove Electrical Problems
Understanding Your Stove’s Power Requirements
Electric stoves are powerhouses in your kitchen, requiring significantly more electricity than most other appliances. Unlike your toaster or coffee maker that run on standard 120V outlets, electric stoves need a dedicated 240-volt circuit to function properly. This robust power requirements ensures your cooktop can generate the intense heat needed for everything from simmering soups to searing steaks.
A dedicated circuit means your stove has its own direct line to your home’s electrical panel, not sharing power with other appliances. This prevents overloading and ensures consistent performance. If your stovetop suddenly stops working, inadequate power supply could be the culprit.
Watch for these warning signs of power issues: other appliances on the same circuit flickering when you use the stove, the cooktop heating slower than usual, or only some burners working while others remain cold. You might also notice your breaker tripping repeatedly. These symptoms suggest your electrical system isn’t delivering the steady, powerful current your stove needs. Before diving into component-level repairs, confirming your stove receives proper voltage is essential for safe, effective troubleshooting.
Internal Wiring and Terminal Block Issues
Sometimes the problem lies hidden beneath the cooktop surface, where wires connect components to terminals. These internal connections can deteriorate over time, especially in well-loved kitchens where your stove has faithfully served countless meals.
Watch for telltale signs that something’s amiss inside. If you notice a burning smell when attempting to use your stovetop, or if certain burners work intermittently—heating one moment and going cold the next—you may be dealing with loose or damaged internal wiring. Discoloration around control knobs or unusual sounds like buzzing or crackling are red flags that shouldn’t be ignored.
Terminal blocks, which distribute power to different burners, can also develop problems. Corrosion, overheating, or physical damage can cause these crucial connection points to fail. You might notice blackened or melted plastic near terminals, or connections that appear loose or disconnected.
Here’s where safety becomes paramount: internal wiring issues require professional expertise. Unlike replacing a burner element—a straightforward DIY task—accessing internal wiring means working with high-voltage electrical systems. This isn’t the time for experimentation. Contact a qualified appliance technician who can safely diagnose and repair these issues, ensuring your kitchen remains the warm, functional heart of your home without compromising your family’s safety.
Control Board and Switch Failures
Modern electric stoves rely on control boards—essentially the brain of your cooktop—to regulate burner temperatures and respond to your commands. When these digital control panels fail, you might notice burners that won’t heat at all, erratic temperature fluctuations, or error codes flashing on the display. Sometimes the touchpad becomes unresponsive, leaving you unable to adjust settings even though the unit has power.
If you have an older model stove, infinite switches control each burner individually. These rotary knobs contain switches that can wear out over time. When an infinite switch fails, you’ll typically notice one specific burner not working while others function normally, or a burner that only works on certain settings. You might hear clicking sounds or smell burning plastic near the control knob—clear warning signs.
Testing these components requires a multimeter and some electrical knowledge. If you’re uncomfortable working with electrical systems, this is the moment to call a qualified appliance technician. Control board replacements can be costly, so professional diagnosis ensures you’re investing in the right solution for your home’s heating needs.
The Repair-or-Replace Decision: What Makes Financial Sense
When your electric stovetop stops working, you’re faced with a question that goes beyond just getting dinner on the table tonight: should you repair or replace? Let’s walk through this decision together with a practical, wallet-friendly approach.
**The Age Factor**
First, consider your stovetop’s age. If it’s less than five years old, repair almost always makes financial sense—these appliances are built to last 13-15 years on average. Between 5-10 years, evaluate the repair cost against replacement. A good rule of thumb: if the repair exceeds 50% of a new unit’s cost, replacement might be your smarter move. Beyond 10 years, you’re entering the zone where repairs become less economical, especially if you’ve already fixed other components.
**Crunching the Numbers**
A basic heating element replacement typically runs $150-300 including labor, while a new control board might set you back $300-600. Compare this to a quality new electric stovetop ranging from $600-2,000. If you’re looking at multiple repairs within a short timeframe, those costs add up quickly.
**Energy Efficiency Matters**
Here’s where newer models shine—and align with eco-friendly living principles many of us value. Modern electric stovetops use 10-20% less energy than models from a decade ago, thanks to improved heating element design and better temperature regulation. While this won’t revolutionize your utility bill overnight, those savings accumulate over the appliance’s lifetime, making replacement a greener choice in the long run.
**The Environmental Perspective**
Before rushing to replace, consider that manufacturing new appliances carries environmental costs too. If your stovetop just needs a simple repair, fixing it keeps functional components out of landfills. However, if you’re constantly repairing an energy-guzzling older model, upgrading to an efficient unit reduces your carbon footprint while improving your cooking experience. It’s about finding that sweet spot between practical economics and environmental responsibility.
Keeping Your Electric Stove Running Smoothly: Prevention Tips
A little preventive care goes a long way toward keeping your electric stove running reliably for years to come. Think of it like maintaining any heating element in your home—whether it’s your beloved fireplace or your trusty kitchen stove, regular attention prevents those frustrating breakdowns when you need them most.
Start with a consistent cleaning routine. Food spills, grease buildup, and debris aren’t just unsightly—they can interfere with electrical connections and cause overheating. Make cleaning stove coils part of your weekly kitchen maintenance. Always wait until burners are completely cool, then gently remove them and wipe down both the coils and drip pans. This simple habit prevents many common electrical issues.
Handle your burners with care. Avoid yanking or forcing coil burners in and out of their sockets, as this can loosen connections over time. When removing them for cleaning, gently lift straight up and disconnect. The same gentleness applies to glass or ceramic cooktops—use only approved cleaners and soft cloths to prevent scratches that can affect heat distribution.
Mind your cookware choices too. Warped or damaged pots and pans create uneven heating, forcing your burners to work harder. Flat-bottomed cookware sized appropriately for each burner maximizes efficiency and extends the life of your heating elements.
Here’s something homeowners often overlook: your stove’s performance connects to your home’s overall energy efficiency. Just as you’d optimize your fireplace for eco-friendly heating, ensure your stove operates on a dedicated circuit without overloading. This prevents voltage drops that can damage sensitive electronic controls.
Finally, schedule an annual inspection, especially if you notice any performance changes. Catching small issues early—a slightly loose connection or a weakening element—prevents complete failures and keeps your kitchen running smoothly season after season.
When your electric stove top stops working, it’s natural to feel frustrated—after all, the kitchen is the heart of your home, where warmth and comfort begin. The good news is that many electric stove issues are surprisingly straightforward to resolve. Start with the simplest solutions first: check your power supply, inspect visible wiring, and test individual burners before assuming the worst. Often, a tripped breaker or loose connection is the only culprit standing between you and a hot meal.
Remember, safety always comes first. If you’re uncomfortable working with electrical components or the problem seems beyond a basic fix, calling a qualified technician is the smart choice. There’s no shame in seeking professional help—it’s an investment in your home’s safety and your family’s well-being.
A functional kitchen does more than prepare food; it creates gathering spaces and generates the inviting warmth that makes a house feel like home. Whether you’re troubleshooting a minor issue or planning a kitchen upgrade, maintaining your appliances ensures your home remains the comfortable sanctuary you deserve.
")