

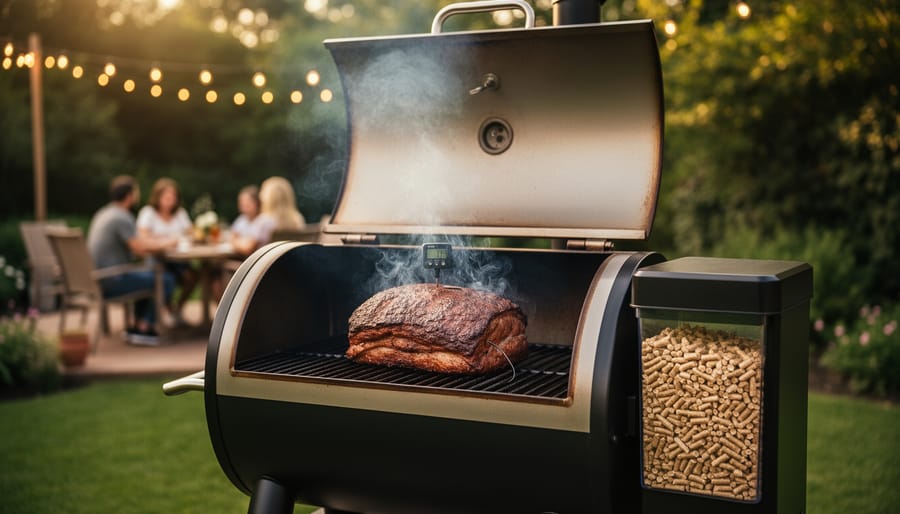

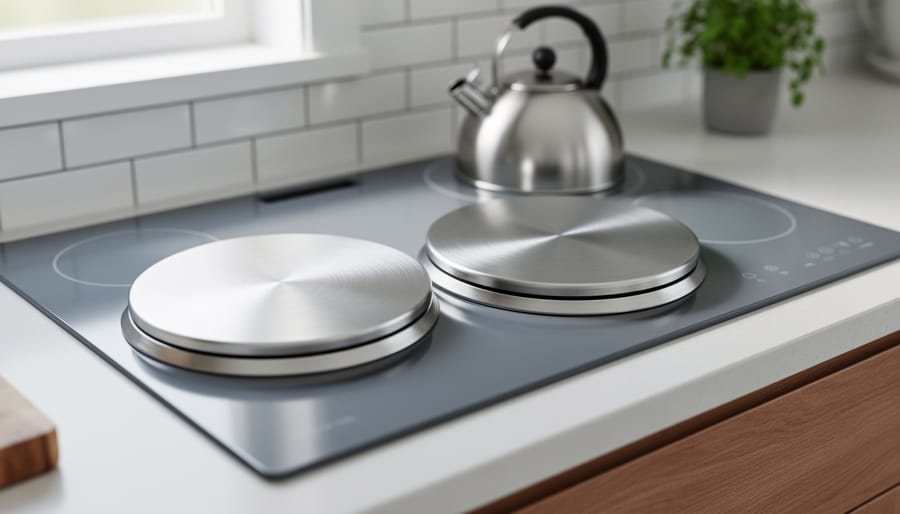
Preheat your Z Grill to 225°F and let it run for 10 minutes to establish a clean smoke before adding food—this initial burn-off creates the ideal environment for that rich, smoky flavor you’re after. Fill the hopper with quality hardwood pellets suited to your protein, keeping in mind that hickory and mesquite deliver bold flavors for red meats while fruit woods like apple and cherry complement poultry and pork with subtle sweetness. Place your meat on the grates away from direct heat zones, insert a digital probe thermometer to monitor internal temperature, and resist the urge to open the lid frequently since each peek releases precious heat and smoke that extends cooking time. Clean your fire pot and grease trap after every 2-3 smoking sessions to maintain consistent performance and prevent flare-ups that compromise both safety and flavor. These foundational steps transform your Z Grill from an intimidating appliance into a reliable outdoor cooking companion that creates memorable meals while extending your living space into a warm, inviting gathering spot where family and friends naturally congregate around the enticing aroma of slow-smoked perfection.
Why Z Grill Makes Smoking Easy for Beginners
If you’ve never smoked meat before, the idea might seem intimidating, but Z Grills are specifically designed to make the process remarkably straightforward. Think of it as the difference between manually stoking a traditional fireplace and simply adjusting a thermostat on a modern heating system—the warmth and results are there, but without the constant attention.
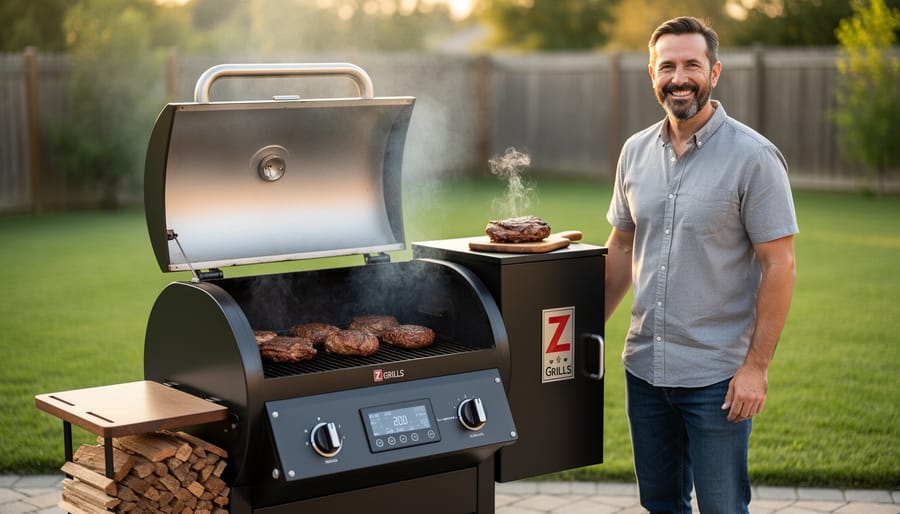
The magic lies in Z Grill’s automated systems that handle the complicated parts for you. The digital control panel lets you set your desired temperature with a simple turn of a dial, much like setting your home’s thermostat for optimal comfort. Once you’ve selected your temperature, the grill’s automatic pellet feeding system takes over, delivering wood pellets to the fire pot at precisely the right rate to maintain steady heat. No more worrying about temperature spikes or drops that can ruin your food.
This set-it-and-forget-it approach means you can spend time with family and friends rather than hovering over your grill making constant adjustments. The consistent temperature control also ensures your meat cooks evenly, reducing the likelihood of beginner mistakes like overcooking or undercooking.
Z Grills also embrace eco-friendly principles by using natural wood pellets as fuel, creating authentic smoky flavor while being more sustainable than charcoal or propane alternatives. You’re not just preparing delicious meals; you’re creating memorable outdoor experiences that bring warmth and connection to your home, all while keeping things refreshingly simple for newcomers to the smoking tradition.
Setting Up Your Z Grill for the First Time
Assembly and Placement Basics
Before you fire up your Z Grill for that first glorious smoking session, let’s make sure everything’s properly assembled and positioned. Think of this step as creating the foundation for countless memorable meals with family and friends gathered around great food.
Start by double-checking all bolts and screws from your initial assembly. Give each connection a gentle tug to ensure stability. Verify that the hopper lid closes securely and the grease management system is properly installed—these small details make a big difference in your smoking experience.
When choosing your grill’s outdoor home, placement is everything. Position your Z Grill on a flat, stable surface at least 10 inches away from any walls or structures. This clearance isn’t just about safety—it allows proper airflow and makes accessing your grill from all sides much easier. Never place your smoker under covered patios or overhangs where smoke can accumulate.
Consider convenience too. You’ll want easy access to power outlets and a comfortable distance from your kitchen for shuttling ingredients. While Z Grills are built to withstand the elements, investing in a quality weather-resistant cover extends your grill’s life and keeps it ready for spontaneous smoking sessions. Position it where morning sun won’t create excessive heat buildup, creating a more sustainable and efficient outdoor cooking space that becomes part of your home’s natural flow.
Seasoning Your Grill (The Burn-In Process)
Before your Z Grill becomes the centerpiece of memorable outdoor gatherings, it needs a proper introduction to heat. This initial burn-in process is essential for removing any manufacturing oils, protective coatings, and residues from the cooking surfaces. Think of it as preparing a canvas before painting your culinary masterpiece.
Start by ensuring your grill is assembled and placed in a well-ventilated outdoor area, away from structures and overhanging branches. Fill the hopper with your choice of pellets, then power on the unit and set the temperature to the highest setting, typically around 450-500°F. Let it run empty for 30-45 minutes with the lid closed.
You’ll likely notice some smoke and possibly a chemical smell during this first burn—this is completely normal and expected. The process is similar to seasoning your smoker, creating a protective layer while eliminating unwanted residues. This step not only cleans your grill but also helps seal the interior surfaces, improving heat retention and creating a non-stick barrier on your grates.
After the burn-in completes, allow the grill to cool completely, then wipe down the grates with a damp cloth. Your Z Grill is now ready to deliver perfectly smoked meals while providing that wonderful warmth and ambiance that makes outdoor cooking such a special experience.
Choosing and Loading Your First Pellets
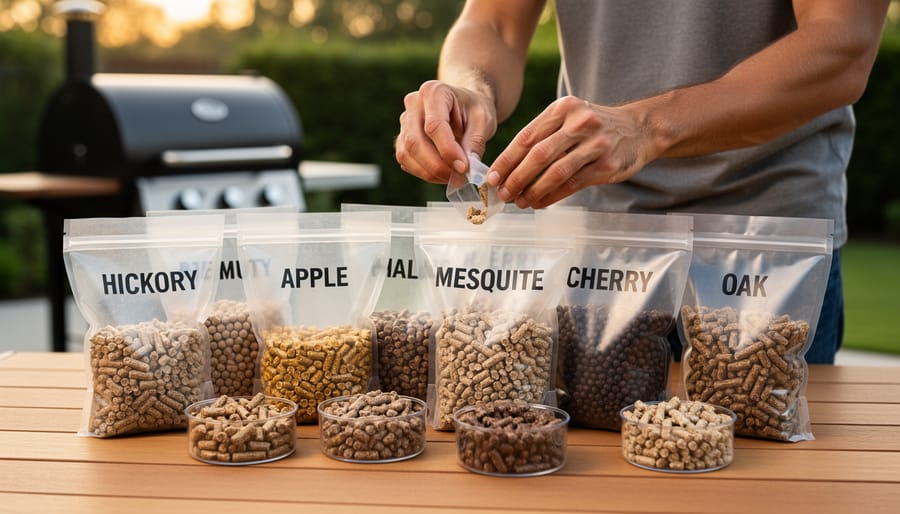
Starting your smoking journey begins with selecting the right pellets to complement your food. For beginners, mild hardwoods like apple, cherry, or maple offer subtle, sweet flavors that enhance rather than overpower your meats and vegetables. These gentle options forgive minor temperature fluctuations while you’re learning your grill’s personality. As you gain confidence, experiment with stronger varieties like hickory or mesquite for bold, traditional barbecue flavors.
Proper wood pellet selection goes hand-in-hand with smart storage. Keep your pellets in a dry, sealed container away from moisture, as damp pellets create inconsistent smoke and temperature problems. Many manufacturers now offer eco-friendly options made from sustainably sourced hardwoods without fillers or binding agents, supporting both better flavor and environmental responsibility.
When filling your Z Grill’s hopper, pour pellets gradually to avoid jamming the auger system. Fill to about three-quarters capacity, leaving room for expansion and proper airflow. Before your first cook, run the grill through a brief burn-in cycle to clear any manufacturing residues. This simple preparation step ensures clean smoke flavor from the start, setting you up for delicious results that’ll have family and friends gathering around your outdoor cooking space all season long.
The Basic Steps to Smoke Anything on Your Z Grill
Starting Your Z Grill Safely
Before you begin your smoking adventure, let’s walk through the startup process to ensure everything runs smoothly and safely. First, inspect your Z Grill for any shipping debris or obstructions in the firebox. Check that the grease bucket is properly positioned and the drip tray is in place—these protect against flare-ups and make cleanup easier later.
Fill your hopper with high-quality wood pellets, choosing flavors that complement your planned meal. Hickory and mesquite offer bold, traditional smoke, while apple and cherry provide gentler, sweeter notes that work beautifully with poultry and pork.
Turn on your Z Grill and set it to the “Smoke” setting with the lid open for about 4-5 minutes. This allows the auger to feed pellets into the firebox and helps prevent excess smoke buildup. You’ll hear the igniter working—that clicking sound means everything’s functioning properly.
Once you see thin, bluish smoke and flames in the firebox, close the lid and adjust to your target temperature. Your Z Grill will automatically maintain heat, making it wonderfully user-friendly. Allow 10-15 minutes for preheating, giving you time to prepare your food and enjoy the anticipation of creating something delicious. Always keep children and pets at a safe distance during operation, and position your grill on a stable, heat-resistant surface away from your home’s exterior.
Temperature Control and Monitoring
Setting the right temperature is your gateway to smoking success, and the good news is that your Z Grill makes this wonderfully straightforward. For your first smoking session, aim for the sweet spot between 225°F and 250°F—this range gives you enough forgiveness to learn while producing beautifully tender, flavorful results.
Start by turning your Z Grill’s dial to your target temperature and giving it about 10-15 minutes to stabilize. You’ll notice the digital display might fluctuate by 10-15 degrees in either direction, and that’s completely normal. Think of it like maintaining a cozy fire in your living room—small variations are natural and won’t affect your final results. The pellet-fed system automatically adjusts to maintain your set temperature, creating an eco-friendly, efficient heating environment similar to modern sustainable home heating solutions.
During longer smokes, check your temperature gauge every hour or so. If you notice the temperature dropping significantly, ensure your hopper has enough pellets and that the fire pot isn’t overloaded with ash. On particularly cold or windy days, your grill might work harder to maintain temperature—consider using a welding blanket or moving to a more sheltered location if drops exceed 25 degrees. Remember, patience is key: resist the urge to constantly adjust settings, as each change takes time to stabilize.
Adding Your Food and Managing Smoke
Once your Z Grill has been preheating for about 10-15 minutes and is producing that beautiful thin, blue-tinged smoke, it’s time to add your food. This steady smoke is what you’re looking for rather than thick white billows, which can make your food taste bitter and acrid. Think of smoke like seasoning – a little goes a long way in creating that rich, smoky flavor we all love.
Place your food directly on the grates, leaving some space between pieces for proper air circulation. This helps the smoke envelope each item evenly, much like how warm air circulates around a cozy fireplace to heat a room efficiently. For most smoking sessions, resist the urge to constantly check on your food. Every time you open the lid, you’re releasing heat and smoke, which extends cooking time and wastes wood pellets – not exactly an eco-friendly approach.
A good rule of thumb is to check your food only when you need to spritz it with liquid, flip it, or verify internal temperature. Most Z Grills maintain remarkably stable temperatures, so trust the process. If you notice excessive smoke production, your pellets might be smoldering rather than burning cleanly. This usually means your grill needs better airflow or the fire pot needs cleaning.
Remember, over-smoking is a real concern. After the first few hours, meat stops absorbing smoke flavor significantly, so there’s no benefit to marathon smoking sessions beyond what the recipe requires. Your goal is creating an inviting, flavorful experience that brings people together around great food.
Three Beginner-Friendly Foods to Smoke First
Chicken Thighs: The Most Forgiving Starter
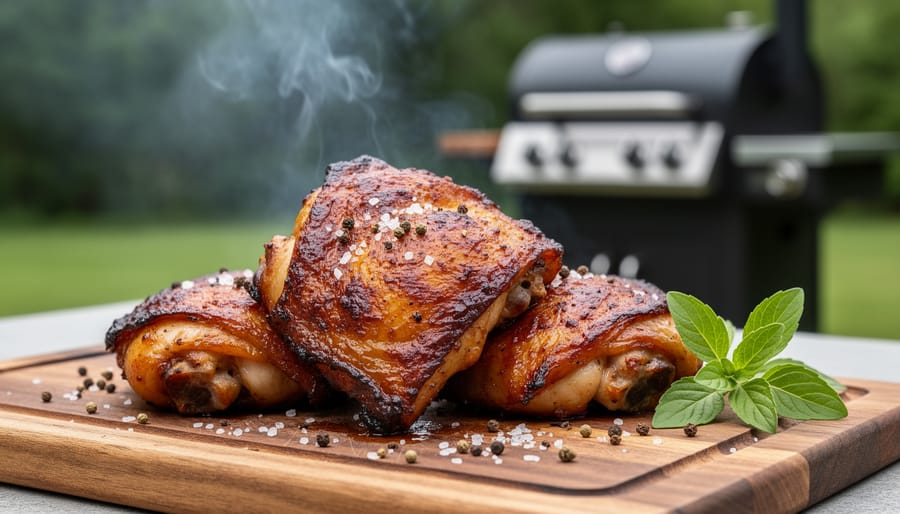
Chicken thighs are your perfect companion for your first Z Grill smoking adventure. Unlike delicate chicken breasts that dry out quickly, thighs contain more fat and connective tissue, which means they stay moist and tender even if your temperature fluctuates a bit while you’re learning the ropes. This forgiving nature makes them ideal for building your confidence as a pitmaster.
Set your Z Grill to 225°F and plan for about 2 to 2.5 hours of smoking time. You’ll know they’re ready when the internal temperature reaches 175°F—slightly higher than breast meat, which allows the fat to render beautifully. The result is juicy, flavorful chicken with that gorgeous mahogany color and smoke ring.
For seasoning, keep it simple your first time out. A classic combination of salt, pepper, garlic powder, and paprika works wonderfully and lets the natural smoke flavor shine through. You can always get more adventurous once you’ve mastered the basics. Remember, smoking on your Z Grill creates not just delicious food, but a gathering point that brings warmth and community to your outdoor space.
Pork Ribs: Your First Impressive Smoke
Pork ribs represent the perfect starting point for your Z Grill smoking journey, offering forgiving cooking times and impressive results that’ll make you look like a backyard pitmaster. The beauty of ribs lies in their natural fat content and connective tissue, which break down slowly during smoking, creating tender, flavorful meat that’s hard to mess up.
The 3-2-1 method simplifies the entire process: smoke unwrapped for three hours at 225°F, wrap in foil with a splash of apple juice for two hours, then unwrap and finish for one final hour with your favorite sauce. This straightforward approach creates that coveted bark while ensuring fall-off-the-bone tenderness.
Before smoking, remove the membrane from the bone side for better seasoning penetration and texture. A simple dry rub applied an hour before smoking enhances flavor without complicated preparation. Your Z Grill’s consistent temperature control makes maintaining that ideal smoking environment effortless, letting you focus on enjoying the experience rather than constantly adjusting vents like traditional smokers require.
Salmon: Quick and Elegant
Salmon ranks among the most forgiving and rewarding choices for your first smoking adventure on the Z Grill. This elegant fish requires just 1-3 hours of smoking time at 180-220°F, making it perfect for an afternoon project that still delivers restaurant-quality results. The natural oils in salmon keep it moist throughout the process, creating a safety net for beginners still learning their grill’s personality.
Set your Z Grill to 180°F for a delicate, silky texture, or bump it up to 220°F if you prefer a firmer finish with deeper smoke flavor. The lower temperature produces that prized translucent appearance while higher heat creates more traditional cooked fish. Either way, you’re aiming for an internal temperature of 145°F.
The most common mistake? Oversmoking. Salmon’s delicate flesh absorbs smoke quickly, so stick with milder woods like apple or cherry rather than heavy mesquite. Remove your salmon when it flakes easily with a fork but still looks slightly glossy in the center—carryover cooking will finish the job. This quick-cooking protein helps you master temperature control without the lengthy commitment of larger cuts, building confidence for more ambitious smoking projects ahead.
Common Beginner Mistakes (And How to Avoid Them)
Temperature Troubles and Pellet Problems
Even the most reliable Z Grill can occasionally hiccup, but most temperature troubles have simple fixes that’ll get you back to smoking in no time. If you experience a flame-out where your grill suddenly shuts down, first check your hopper to ensure you haven’t run out of pellets. It happens to the best of us! Next, inspect the firepot for excess ash buildup, which can smother the flame and prevent proper airflow.
Temperature swings are usually related to outdoor conditions or pellet quality. Wind can wreak havoc with your grill’s ability to maintain steady heat, so consider positioning your grill in a sheltered spot or investing in a thermal blanket for colder months. Using high-quality, dry pellets makes a tremendous difference in consistent burning and temperature control.
Pellet jams typically occur when moisture gets into your hopper or you’re using low-grade pellets that create excessive sawdust. Always store your pellets in a dry location and empty the hopper if you won’t be using your grill for extended periods. If pellets stop feeding, turn off the grill, clear the auger carefully, and restart following your startup procedure. These simple troubleshooting steps will keep your outdoor cooking experience smooth and enjoyable.
Opening the Lid Too Often and Other Timing Issues
We understand the temptation. That beautiful brisket is in there, and you want to check on it. But here’s the truth: every time you open that lid, you’re releasing precious heat and adding 10-15 minutes to your cooking time. Think of your Z Grill like an oven where peeking comes at a real cost.
The hardest part of smoking for beginners is developing trust in the process. Your grill’s digital controller is working hard to maintain that steady temperature, but it needs your cooperation. When you lift the lid, the temperature plummets, the controller kicks into overdrive, and your carefully maintained smoke environment gets disrupted.
Set a timer and resist the urge to check more than once per hour, and only when you genuinely need to spritz, wrap, or verify doneness. Use a wireless meat thermometer if you’re anxious about internal temperatures. This simple tool lets you monitor progress without ever opening the lid.
Remember, low and slow cooking requires patience. That pork shoulder might take 12 hours, and that’s perfectly normal. Embrace the journey rather than rushing the destination. Your reward for this patience will be tender, smoky perfection that makes every minute of waiting worthwhile. Trust your Z Grill, trust the process, and let the magic happen undisturbed.
Maintaining Your Z Grill After Each Smoke
Post-Cook Cleaning Essentials
After enjoying your perfectly smoked meal, proper cleaning ensures your Z Grill stays ready for your next outdoor cooking adventure. Think of it as caring for a beloved fireplace—regular maintenance keeps everything running smoothly and safely.
Start by letting your grill cool completely, typically 30-45 minutes after shutdown. Once cool, remove the cooking grates and wipe them down with a grill brush or warm soapy water to eliminate grease and food particles. Next, slide out the drip tray and dispose of accumulated drippings—this simple step prevents flare-ups and keeps your smoke flavor clean.
The firepot requires special attention. Remove any ash buildup using a shop vacuum or the grill’s ash cleanout system if equipped. Ash removal is essential for proper airflow and consistent temperature control during your next smoking session.
Finally, wipe down the interior surfaces and empty the grease bucket. This eco-friendly approach to maintenance not only extends your grill’s lifespan but ensures every cook delivers that authentic wood-fired warmth you’re seeking. Regular cleaning takes just 10-15 minutes and makes all the difference.
Regular Maintenance for Long-Term Performance
Keeping your Z Grill in top shape ensures years of delicious smoked meals and makes each grilling session as effortless as the first. Think of it as caring for any cherished element of your outdoor living space—a little regular attention goes a long way.
Weekly, take time to vacuum out the firepot and check the pellet auger for any sawdust buildup that might affect performance. Remove and wash the drip tray and grease bucket with warm, soapy water. This prevents grease fires and keeps your grill functioning safely. Monthly, inspect the door seal for wear and tighten any loose screws or bolts that naturally loosen with temperature changes.
When seasons shift, protect your investment with a quality weather-resistant cover. This eco-friendly approach extends your grill’s lifespan and reduces the need for replacement parts. Before winter storage, run a complete burn-off cycle at high heat, then thoroughly clean all components and store pellets in an airtight container away from moisture.
These simple maintenance rituals keep your Z Grill ready for spontaneous weekend cookouts and planned family gatherings, ensuring your outdoor cooking space remains a warm, welcoming hub for years to come.
Now that you’ve discovered how approachable smoking really is with your Z Grill, there’s no reason to wait any longer. The beauty of these pellet grills is that they’ve removed the intimidation factor from outdoor cooking, transforming what once seemed like an art form requiring years of practice into an accessible weekend activity for anyone. Whether you’re preparing brisket for a family reunion or experimenting with the best meats to smoke for a casual dinner, your Z Grill becomes more than just cooking equipment. It’s a gathering point that brings warmth and connection to your outdoor living space.
There’s something special about the aroma of wood smoke drifting through your backyard, inviting neighbors over and creating memories that last far beyond the meal itself. This is the lifestyle element that makes outdoor cooking so rewarding. Your journey doesn’t end here, though. MyFire.Place offers a wealth of resources to help you continue enhancing your outdoor spaces, from sustainable heating solutions to inspiration for creating the perfect ambiance. Take the leap, fire up that grill, and embrace the warmth of outdoor cooking today.

")