


Inspect your Weber grill grates after every cook session, brushing away food debris while they’re still warm—this 60-second habit prevents stubborn buildup that leads to uneven heating and flare-ups. Empty the ash catcher on charcoal models weekly to maintain proper airflow and prevent rust from moisture-trapped residue. Check burner tubes monthly for spider webs and insect nests that block gas flow, causing yellow flames instead of the crisp blue you need for optimal cooking temperatures.
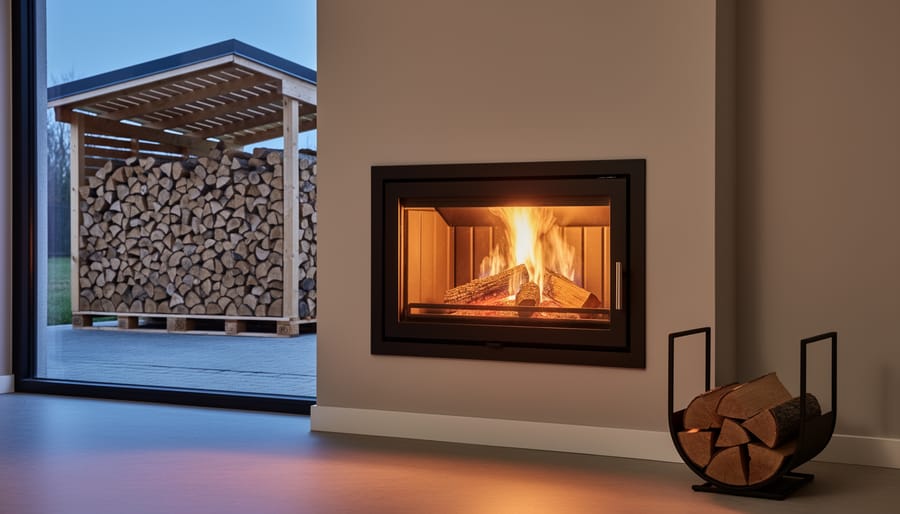
Your Weber grill represents more than backyard equipment—it’s an extension of your outdoor living space, much like a quality fireplace transforms your home’s ambiance. Just as you wouldn’t neglect the hearth that brings warmth to family gatherings, your grill deserves consistent care to deliver years of perfect sear marks and smoke-kissed flavors.
Regular maintenance prevents the costly repairs that plague neglected grills. Porcelain-coated surfaces crack when grease buildup causes hotspots. Ignition systems fail when corrosion spreads from accumulated moisture. Grease fires erupt from years of layered drippings. These problems aren’t inevitable—they’re completely avoidable with straightforward seasonal deep-cleans and simple weekly routines.
Whether you own a classic kettle, a Genesis gas grill, or a premium Summit series, the maintenance principles remain consistent. This guide breaks down exactly what to clean, when to clean it, and how to troubleshoot issues before they escalate. You’ll discover time-saving strategies that protect your investment without consuming your weekends, plus eco-friendly cleaning methods that skip harsh chemicals while delivering professional results.
Why Weber Grills Need Regular Attention
Your Weber grill represents more than just outdoor cooking equipment—it’s an investment in memorable gatherings, delicious meals, and the lifestyle that comes with mastering the art of grilling. Just like the hearth inside your home needs regular attention to perform safely and efficiently, your Weber requires consistent care to deliver its best performance year after year.
Weber grills are thoughtfully engineered with specific materials designed for durability and heat retention. The porcelain-enameled lid and bowl resist rust and weather damage, while cast-iron cooking grates provide exceptional heat distribution. However, these premium materials need proper maintenance to preserve their protective coatings and prevent deterioration. Without regular cleaning, grease buildup can compromise the porcelain finish, while moisture and food residue can cause even high-quality grates to rust prematurely.
Regular maintenance directly impacts your grill’s lifespan and your wallet. A well-maintained Weber can serve your family for decades, while neglect can lead to costly repairs or premature replacement. Most Weber warranties also require evidence of proper care, meaning routine maintenance protects your investment in more ways than one.
Beyond longevity, consistent upkeep ensures food safety and optimal cooking performance. Accumulated grease poses fire hazards and creates flare-ups that char your food unevenly. Old residue can harbor bacteria and impart stale flavors to fresh meals. Clean burners maintain proper heat distribution, while cleared vents ensure efficient airflow—essential for achieving those perfect sear marks and maintaining consistent temperatures.
Think of grill maintenance as an eco-friendly practice too. A well-maintained grill operates more efficiently, using less fuel and producing cleaner combustion. You’re not just protecting your investment—you’re being a responsible outdoor cooking enthusiast.
Essential Cleaning After Every Grilling Session
The Brush-Down Routine
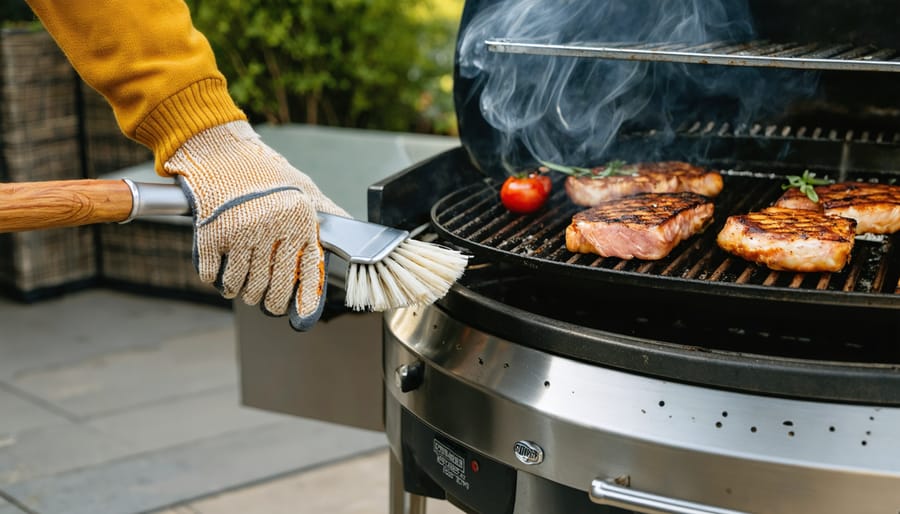
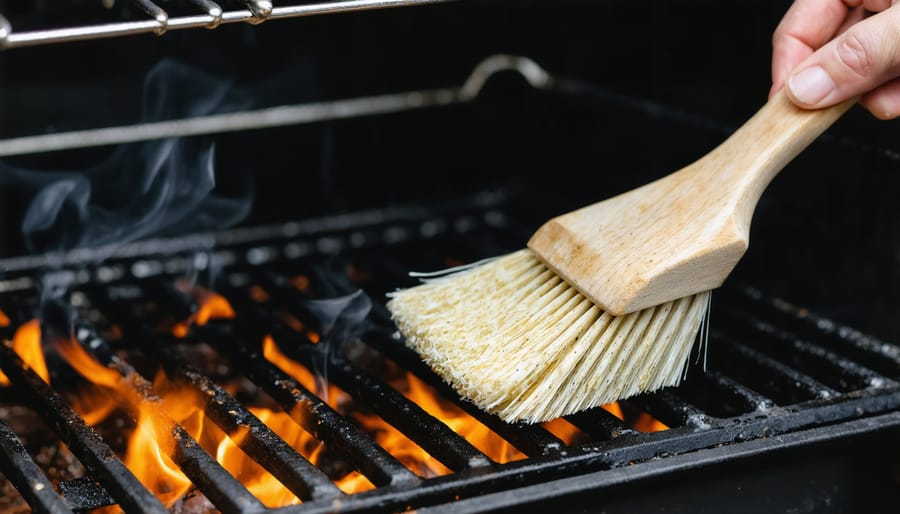
The best time to clean your Weber grill grates is right after cooking, while they’re still warm. This simple 5-minute habit will save you from scrubbing stubborn, baked-on residue later. Once you’ve removed your food, crank up the heat for about 10 minutes to carbonize any remaining bits, then use a quality brass or stainless steel grill brush to scrape the grates clean with firm, steady strokes following the direction of the grates.
Choosing the right brush matters tremendously for both effectiveness and safety. Look for brushes with tightly secured bristles or consider bristle-free options like scraper-style cleaners, which eliminate any risk of stray bristles ending up in your food. A good brush should have a long handle to keep your hands safely away from the heat and an angled head that reaches between grates easily.
After brushing, give your grates a quick wipe with a damp cloth or paper towel using your tongs. This removes loose debris before it hardens. When your grates are completely cool and clean, take a moment to properly oil grill grates to prevent rust and maintain that perfect non-stick surface for your next cookout.
Grease Management That Actually Works
Let’s be honest—nobody enjoys dealing with grease, but a well-managed drip system makes all the difference between a quick cleanup and a messy ordeal. Your Weber’s grease management system is actually quite thoughtful once you understand how it works.
The drip tray sits beneath your grill grates, catching drippings and funneling them toward the grease catch pan. Check this pan after every 2-3 grilling sessions, or more frequently if you’re cooking fattier foods like burgers or ribs. When it’s about two-thirds full, it’s time to empty it—waiting too long risks overflow and potential flare-ups.
Here’s a game-changing trick: line your drip tray with heavy-duty aluminum foil before grilling. When cleanup time arrives, simply remove and dispose of the foil—no scrubbing required. For the grease catch pan, drop in a few paper towels or use disposable aluminum pans that fit inside for even easier maintenance.
During colder months, grease solidifies quickly, making removal simpler but requiring more frequent attention. Think of grease management like tending your fireplace—regular care prevents bigger problems down the road. A clean grease system also reduces smoke and helps your grill maintain consistent heat, giving you better cooking results every time.
Quick Exterior Wipe-Down
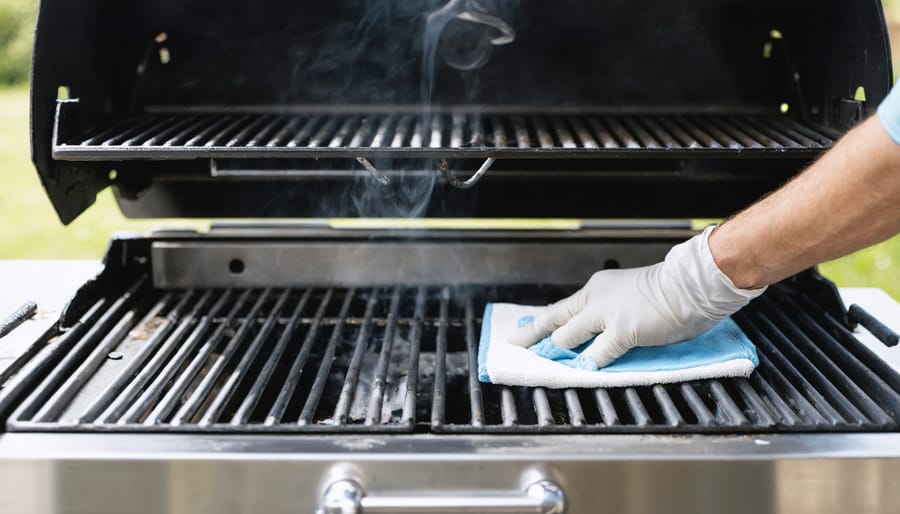
After each grilling session, give your Weber’s exterior a quick once-over to maintain its showroom shine. For porcelain enamel finishes, simply use a soft, damp cloth with warm water and mild dish soap. Gently wipe down the lid and body, following the natural curves of your grill. Avoid abrasive scrubbers that can scratch the finish—think of it like caring for your favorite cookware.
Stainless steel exteriors benefit from wiping in the direction of the grain using a microfiber cloth. For stubborn fingerprints or grease spots, specialized stainless steel cleaners work wonders, but vinegar diluted with water is an effective, eco-friendly alternative. Always dry thoroughly to prevent water spots. This simple ritual, taking just two minutes, protects your investment and keeps your outdoor cooking centerpiece looking as inviting as a well-maintained hearth.
Deep Cleaning Your Weber: The Seasonal Approach
Taking Apart the Cooking System
Before diving into deep cleaning, you’ll want to ensure your grill is completely cool and disconnected from the gas supply—safety always comes first when working with your outdoor cooking companion.
Start by lifting out the cooking grates. Most Weber models feature porcelain-enameled or stainless steel grates that simply lift straight up. Give them a good soak in warm, soapy water while you tackle the other components. Once cleaned and dried, remember that oiling your grates helps maintain their non-stick surface and prevents rust.
Next, remove the flavorizer bars—those angled metal pieces that sit above the burners and create that delicious smoky flavor. These typically lift out easily once the grates are removed. Brush off any buildup with a grill brush or scraper, working gently to preserve their protective coating.
Now for the burner tubes, which require a gentle touch. Carefully lift these out, noting how they’re positioned for easier reassembly. Use a soft brush or pipe cleaner to clear the burner ports of any debris or spider webs—yes, spiders love making homes in these cozy spots during off-season! Never use sharp objects that might enlarge the gas ports.
Finally, clear out the catch pan beneath everything. This collects grease and drippings, so dispose of accumulated debris responsibly. A clean catch pan not only improves performance but also reduces fire risk, keeping your outdoor cooking space safe and efficient for seasons to come.
Burner and Venturi Tube Inspection
Your burner tubes and venturi are the heart of your grill’s flame system, yet they’re surprisingly vulnerable to some unexpected visitors. Spiders and small insects love to nest in these tubes during off-season, and their webs can seriously disrupt gas flow and create uneven flames or even dangerous flashback situations.
Start by removing the cooking grates and heat deflectors to access your burner tubes. Look closely for any blockages in the burner ports—those small holes along the tube—and check the venturi openings where air and gas mix. You’ll want to gently clear any debris using a thin wire or a specialized venturi brush, working carefully to avoid damaging the metal.
Corrosion appears as rust or flaking metal, particularly in coastal or humid climates. Light surface rust can be brushed away, but if you notice holes or significant deterioration, it’s time for replacement parts. This isn’t just about performance—it’s about safety for you and your family.
Make this inspection part of your seasonal routine, ideally before grilling season begins. It takes just ten minutes but ensures consistent, safe heat distribution for all those memorable outdoor meals ahead.
The Inside Story: Cleaning the Firebox
The firebox is where the magic happens—and where the mess accumulates. Over time, grease drippings and carbon deposits build up on the inner walls and bottom of your grill, potentially affecting performance and creating fire hazards. The good news? A thorough cleaning two to three times per grilling season keeps things safe and efficient.
Start by ensuring your grill is completely cool and disconnected from the gas source. Remove the cooking grates, flavorizer bars, and burner tubes to access the firebox. Using a plastic putty knife or grill scraper, gently remove the larger chunks of carbonized buildup from the walls and bottom. Don’t worry about getting it perfectly clean—some residue actually protects the porcelain enamel.
For stubborn grease, create a simple solution of warm water and mild dish soap. Wipe down the interior surfaces with a soft cloth or sponge, avoiding harsh chemicals that could damage the finish or leave residues. Always push debris toward the grease management system rather than letting it accumulate in corners. This mindful approach to maintenance not only extends your grill’s life but reduces waste—a small eco-friendly win for your outdoor cooking setup.
Protecting Your Weber From the Elements
Choosing and Using Grill Covers
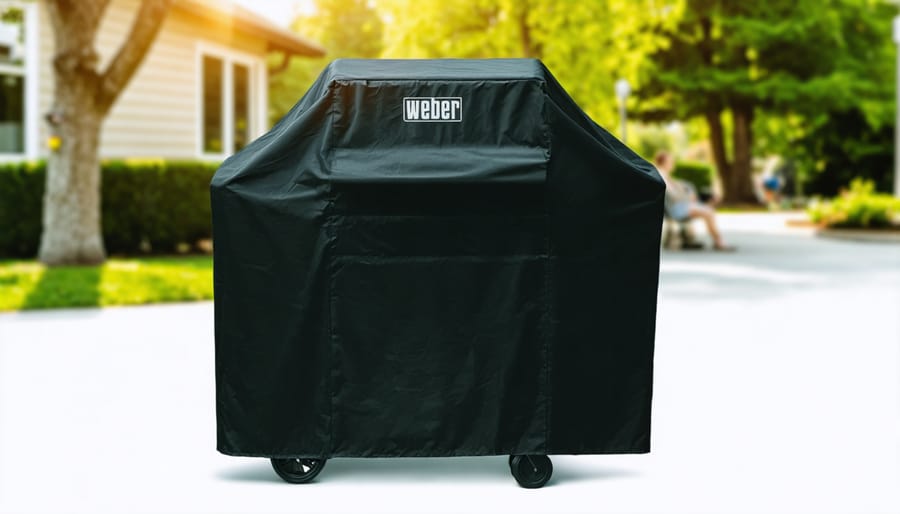
A quality grill cover is your first line of defense against the elements, much like how a fireplace screen protects your hearth. Look for heavy-duty, water-resistant materials with reinforced seams and fastening straps to withstand wind. The cover should fit snugly but not too tightly—proper airflow is essential.
Here’s the key: never cover a hot grill, and ensure it’s completely cool and dry before protecting it. Moisture trapped under a cover creates the perfect environment for rust and mildew, defeating your protective efforts entirely. If you live in humid climates, consider leaving small vents partially open or occasionally removing the cover during dry weather to allow air circulation.
For seasonal storage, give your Weber a thorough cleaning first, then apply a light coating of cooking oil to grates to prevent rust. Store covers in a dry location during off-seasons to extend their lifespan. If you’re storing your grill in a garage or shed, keep the propane tank outside in a well-ventilated area for safety. Think of this winter prep as similar to closing down a chimney for the season—proper care now means effortless enjoyment when grilling season returns.
Winter Care and Off-Season Storage
When the outdoor grilling season winds down, a little preparation goes a long way in keeping your Weber ready for next spring’s cookouts. Think of winterizing your grill like closing up a vacation home—you’re protecting a valued investment from harsh conditions.
Start by giving your grill a thorough cleaning while removing any food residue that could attract moisture and pests during storage. For gas grills, disconnect and remove the propane tank, storing it upright in a well-ventilated outdoor area away from your home. Never store propane tanks indoors or in enclosed spaces. Consider bringing the regulator and hose inside to prevent weather damage to these components.
Apply a light coating of cooking oil to grates and other metal surfaces to create a protective barrier against rust. If you’re storing your grill outdoors, invest in a quality, breathable cover that fits snugly—this prevents moisture buildup while shielding against snow and ice. Position the cover to allow some air circulation underneath.
For those storing grills in unheated garages or sheds, ensure the space stays dry. Tuck a few moisture-absorbing packets near the cooking chamber to combat humidity. When spring arrives, you’ll appreciate finding your grill exactly as you left it—clean, protected, and ready for that first flame-kissed meal of the season.
Common Weber Problems You Can Fix Yourself
Uneven Heating and Hot Spots
Nothing disrupts a perfect grilling session quite like hot spots that char one side of your burger while leaving the other barely warm. If you’re experiencing uneven heating, start by conducting a simple test: light your grill and hold your hand about six inches above each section of the grate for a few seconds. Significant temperature differences indicate a problem that needs attention.
The most common culprit is clogged burner tubes. Turn off the gas and remove the grates and flavorizer bars, then inspect each burner for debris, spider webs, or rust that might block the flame ports. Use a thin wire or specialized burner cleaning tool to gently clear each hole. While you’re there, check that all burners ignite evenly—partial flames suggest blockages or a failing igniter.
Sometimes the issue lies with worn-out flavorizer bars that no longer distribute heat properly. These protective barriers don’t last forever, and replacing them restores even heating while protecting your burners. Also verify that your burner valves open fully and that gas flows consistently to each section. A well-maintained Weber should provide reliable, even heat that makes outdoor cooking a joy rather than a guessing game.
Ignition Issues Made Simple
Nothing puts a damper on grilling night quite like a clicking igniter that won’t spark. The good news? Most ignition problems are surprisingly easy to fix. Start by checking your igniter button—a weak or absent clicking sound often means the battery needs replacing (typically a standard AA). If you hear clicking but see no spark, spider webs or grease buildup around the electrode might be blocking the connection. Gently clean around the small metal tip with a cotton swab and rubbing alcohol.
When your igniter takes an unexpected vacation, don’t let it derail your cookout. Keep long matches or a refillable lighter handy as your backup lighting method. Simply turn on the gas, hold the flame near the burner tubes, and you’re back in business. Consider this your grill’s equivalent of keeping candles ready during a power outage—simple preparedness that keeps the warmth and comfort flowing when you need it most.
When Rust Appears
Spotting rust on your Weber doesn’t mean panic—it means action. Surface rust, that light orange dusting on grates or interior surfaces, is cosmetic and easily fixable. Structural rust, however, penetrates deeper and compromises metal integrity, requiring more serious attention.
For surface rust on cooking grates, use a wire brush or crumpled aluminum foil to scrub affected areas, then season the grates with oil. This is part of regular grate maintenance that protects against future oxidation. Interior rust spots respond well to gentle scraping followed by high-heat burning to create a protective carbon layer.
Prevention beats treatment every time. Keep your grill covered when not in use, store it in a dry location during harsh weather, and maintain that protective oil coating on grates. Think of rust prevention like caring for cast iron cookware—consistent attention yields decades of reliable service. If structural rust appears on the firebox or burner tubes, assess whether replacement parts make sense, as these components are the heart of your outdoor cooking experience.
Smart Maintenance Products That Make Life Easier
Keeping your Weber grill in top shape doesn’t have to be complicated or expensive. The right tools make maintenance feel less like a chore and more like caring for a treasured outdoor investment.
Start with Weber’s own stainless steel grill brush, which features angled bristles designed specifically for their cooking grates. For those concerned about bristle safety, consider switching to a bristle-free scraper or a nylon brush alternative. These eco-friendly options work beautifully without the risk of loose bristles ending up in your food.
For deep cleaning, look for plant-based degreasers that cut through carbonized grease without harsh chemicals. Brands like Simple Green and Therapy make biodegradable formulas that are tough on grime but gentle on the environment. They’re perfect for porcelain-enameled surfaces and won’t damage your grill’s finish.
A good grill cover is your best preventive maintenance tool. Weber’s custom-fit covers protect against weather while allowing proper ventilation. They’re an investment that pays off by extending your grill’s lifespan significantly.
Don’t overlook proper grill grate care—a simple oil mop or spray bottle filled with high-heat cooking oil makes seasoning effortless. Microfiber cloths are excellent for wiping down exterior surfaces without scratching, and they’re reusable, reducing waste.
Finally, keep a dedicated tool caddy near your grill stocked with these essentials. When everything’s within reach, you’re more likely to maintain that quick-clean routine that keeps your Weber performing beautifully season after season.
Taking care of your Weber grill doesn’t have to feel like a chore—in fact, it can become a satisfying ritual that extends the life of your investment and enhances every outdoor meal you create. Just a few minutes of attention after each cookout and occasional deeper cleaning sessions will reward you with consistent performance, delicious food, and countless memorable gatherings around the flames.
At MyFire.Place, we believe that maintaining your outdoor cooking equipment is part of creating a warm, functional home where comfort and connection thrive. Whether you’re tending to your Weber, caring for your indoor fireplace, or exploring eco-friendly heating solutions, these maintenance routines become moments of mindfulness—small acts that keep your home’s heart beating strong.
Your Weber is built to last, but it needs your partnership. By making maintenance a pleasant part of your grilling routine rather than an obligation, you’re not just protecting a piece of equipment—you’re preserving years of smoky flavors, backyard celebrations, and the simple joy of cooking outdoors. So grab your grill brush, embrace the process, and keep those burners blazing bright for seasons to come.
")