
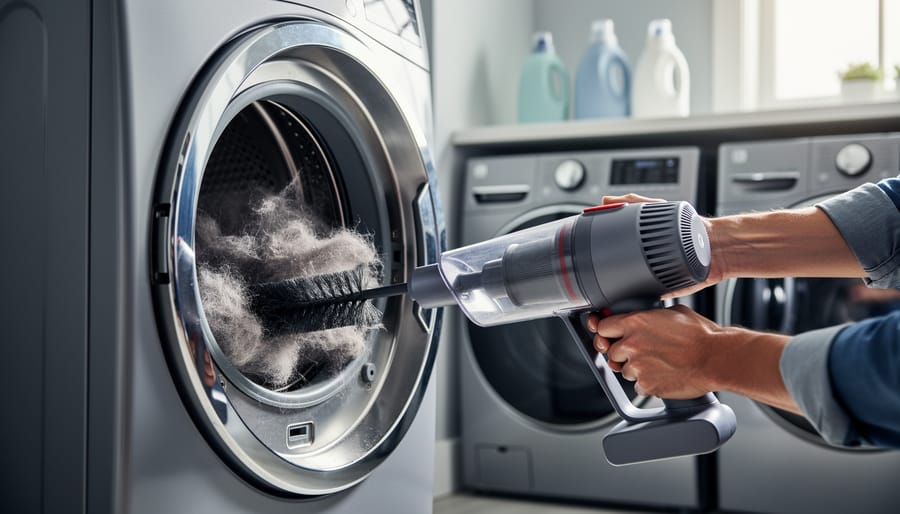


Cleaning your dryer vent regularly isn’t just about preventing fires or boosting efficiency. It’s one of the simplest ways to shrink your household carbon footprint while saving real money on energy bills. When lint builds up in your dryer vent, your machine works harder and longer to dry each load, wasting electricity or natural gas with every cycle. In 2026, as homeowners look for straightforward ways to reduce energy consumption without major renovations, this fifteen-minute maintenance task delivers outsized environmental returns.
A clogged dryer vent can force your appliance to run 30% longer per load, turning what should be a 45-minute cycle into an hour or more of unnecessary energy use. Multiply that across the average household doing eight loads weekly, and you’re looking at hundreds of kilowatt-hours wasted annually. That excess energy doesn’t just inflate your utility bill. It translates directly into avoidable carbon emissions from power plants, particularly if your home runs on grid electricity rather than renewable sources.
The good news? You don’t need professional tools or special training to tackle this job. With a vacuum, a dryer vent brush, and about twenty minutes of your time, you can restore your dryer’s efficiency and cut energy waste immediately. This guide walks you through the complete process, from disconnecting your dryer safely to verifying airflow afterward, so you can make this eco-friendly habit part of your seasonal home maintenance routine.
Why a Clean Dryer Vent Is One of the Best Eco-Friendly Home Upgrades
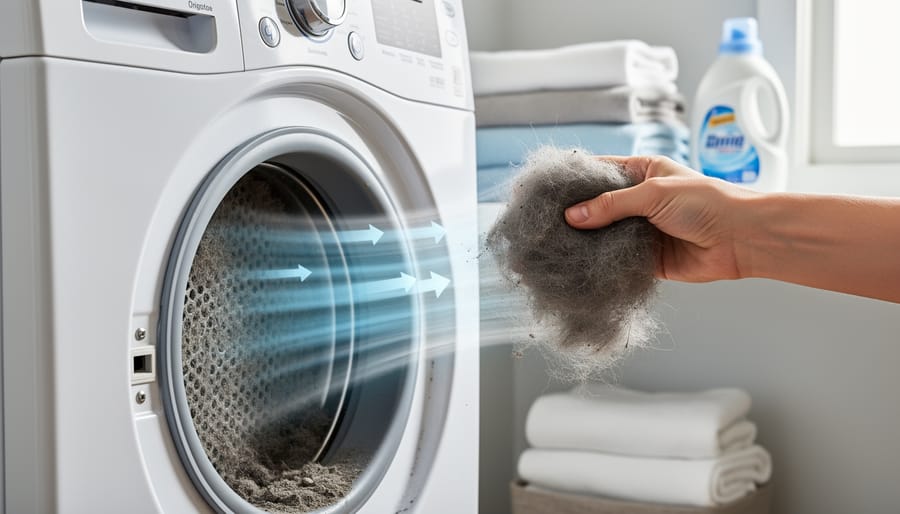
A clogged dryer vent forces your appliance to work significantly harder than it should, creating a cascade of environmental problems that most homeowners never see coming. When lint and debris block the airflow, your dryer can use up to 30% more energy to dry the same load of laundry. That’s substantial wasted electricity or gas, roughly equivalent to leaving a 100-watt light bulb burning constantly for an extra eight hours each week.
The numbers get worse when you factor in extended drying cycles. A restricted vent might double your drying time from 45 minutes to 90 minutes, which doesn’t just inconvenience you, it directly increases your home’s carbon footprint with every load. For perspective, that’s similar to the energy waste from running an inefficient refrigerator or keeping your water heater set unnecessarily high.
This inefficiency contributes to greenhouse gas emissions in two ways. Electric dryers draw from the power grid, which in many regions still relies heavily on fossil fuels. Gas dryers burn natural gas directly. Either way, a blocked vent means more fuel burned for the same result. Professional services like Dryer Vent Cleaning Spring Hill report that properly maintained vents restore dryers to their designed efficiency levels almost immediately.
What makes dryer vent cleaning particularly valuable as an eco-friendly upgrade is its simplicity and permanence. Unlike installing solar panels or replacing windows, you can complete this maintenance yourself in about an hour, and the energy savings begin with your very next load of laundry.
What You’ll Need: Tools and Materials for Dryer Vent Cleaning
Gathering the right tools before you start makes the job faster and less frustrating. You probably already have most of these items around your house, and the few you might need to buy are inexpensive and reusable for years.
- Dryer vent cleaning kit or flexible brush (reaches deep into ducts to dislodge compacted lint)
- Vacuum with hose attachment (captures loosened debris without spreading it around)
- Screwdriver (disconnects vent clamps and exterior covers)
- Work gloves (protects hands from sharp edges and dirty buildup)
- Dust mask (prevents inhaling airborne lint particles)
- Flashlight (illuminates dark duct interiors so you can see what you’re cleaning)
- Leaf blower, optional (clears stubborn blockages in long vent runs)
For the cleaning brush, look for kits with flexible rods that connect together to reach the full length of your vent. Some models attach directly to a power drill, which speeds up the scrubbing process. If you’re buying new tools specifically for this project, choose durable options made from recycled materials when available. Many hardware stores now carry brushes with handles made from reclaimed wood or recycled plastic.
A standard household vacuum works fine, but if yours has a HEPA filter, that’s even better for trapping fine lint particles and keeping your indoor air clean. The entire setup costs less than a single professional cleaning appointment, and you’ll use these tools for maintenance cleanings year after year.
Safety First: Important Warnings Before You Start
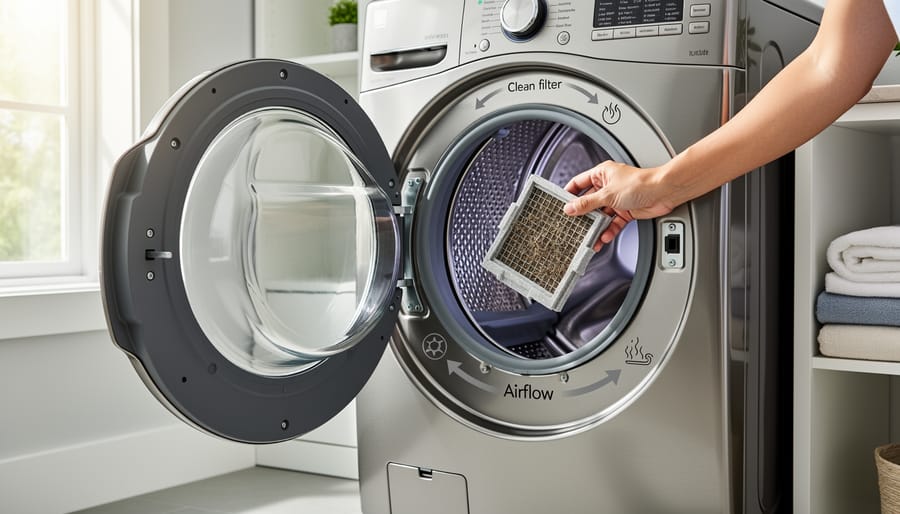
Before you start cleaning your dryer vent, you need to understand that this task involves potential fire hazards and requires careful preparation. A clogged dryer vent isn’t just an energy problem, it’s responsible for thousands of house fires each year, making safety precautions non-negotiable.
First, disconnect your dryer completely from its power source. For electric dryers, unplug the unit from the wall outlet. If you have a gas dryer, turn off the gas supply valve before starting any work. Never attempt to clean a dryer vent while the appliance is connected to power or fuel.
Inspect your vent hose carefully before you begin. Look for cracks, holes, or compression that could create airflow problems or allow lint to escape into your home. A damaged vent defeats the purpose of cleaning and creates new safety risks. Replace any compromised sections before proceeding.
Wear a dust mask during the cleaning process, especially if you’re sensitive to dust or have respiratory issues. Lint particles become airborne when disturbed, and you’ll be working in confined spaces where ventilation is limited. Work gloves protect your hands from sharp metal edges inside the vent duct.
Keep your workspace well-ventilated and consider using safe vacuum cleaning techniques to minimize airborne particles. If your vent runs longer than 25 feet, has multiple bends, or you haven’t cleaned it in several years, hiring a professional with specialized equipment might be the safer and more effective choice.
Step-by-Step: How to Clean Your Dryer Vent from Start to Finish
Disconnect and Access the Dryer Vent
Pull the dryer’s plug from the wall outlet, or if you have a gas dryer, turn off the gas supply valve behind the unit. Electric dryers typically have a heavy-duty three or four-prong plug that requires a firm tug. Once powered down, carefully slide the dryer away from the wall. You’ll need at least two feet of clearance to work comfortably behind it.
Look for the vent hose connection at the back of the dryer. Most homes use a flexible aluminum or rigid metal duct secured with a hose clamp or metal tape. Loosen the clamp with a screwdriver, turning counterclockwise, or carefully peel away the tape. Gently twist and pull the hose free from the dryer’s exhaust port. The connection might be tight from years of heat and lint accumulation, so work it loose gradually.
Next, locate where the vent enters the wall. This is usually a short section of rigid duct disappearing into the drywall. You now have access to three critical cleaning points: the dryer’s exhaust port, the flexible hose itself, and the wall duct opening. Shine your flashlight into each opening to assess the lint buildup you’re about to tackle.
Clean the Vent Duct and Hose
Now comes the core of the job: getting lint and debris out of the ductwork itself. Start by inserting your dryer vent brush into the wall duct opening where the hose disconnected. Push it in as far as it will reach, then rotate the brush while pulling it back out. The spinning bristles grab lint clinging to the duct walls. You’ll likely pull out clumps of lint, dust, and possibly small fabric pieces that have built up over months or years.
Work the brush through the entire length of the duct. For longer vent runs, you may need to attach extension rods to your brush kit. Push in, rotate, pull out, and repeat several times until you’re not bringing out significant lint anymore. Once you’ve loosened everything, use your vacuum’s hose attachment to suck out the remaining debris from both the wall opening and as far into the duct as the hose reaches.
Next, clean the flexible transition hose that connects your dryer to the wall. This accordion-style hose traps lint in its ridges. Run your brush through it thoroughly, then either vacuum it out or take it outside and shake it vigorously. If it’s severely clogged, cracked, or made of plastic or foil (older, less safe materials), replace it with a metal duct instead. A clean, unobstructed hose means your dryer doesn’t have to push air through resistance, cutting energy waste immediately.
Before moving on, shine your flashlight into both the wall duct and the cleaned hose to verify you’ve removed all visible blockages.
Clean the Exterior Vent Cap and Reconnect
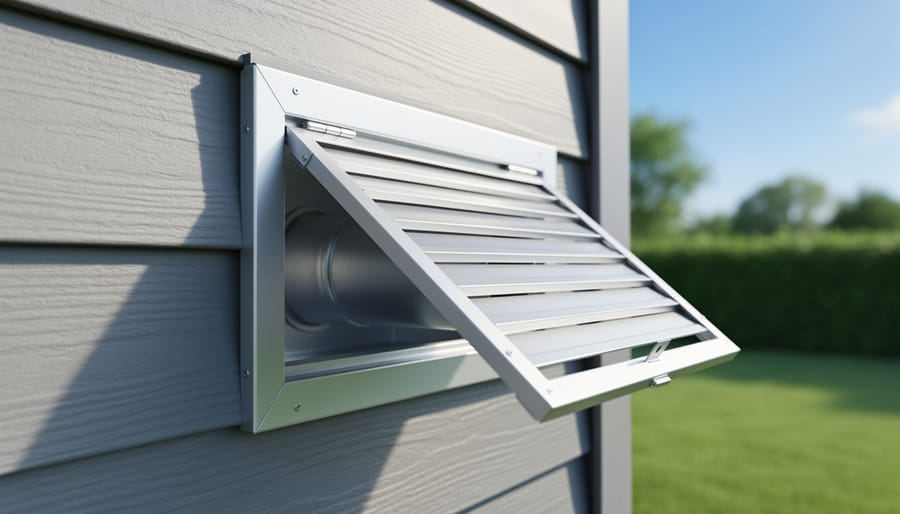
Go outside and locate your dryer vent cap on the exterior wall. You’ll typically find it near ground level, often covered with a plastic or metal hood. Remove any visible lint, leaves, or debris from around the cap using your hands or a brush.
Open the vent cap (some flip up, others unscrew) and check the flapper or louvers inside. These should move freely when you push them. Clear away any lint buildup that’s preventing them from opening fully. A blocked flapper forces your dryer to work against resistance, wasting energy with every load.
Use your vacuum or brush to clean the last few feet of ductwork you can reach from outside. This exterior section often traps the most debris because lint combines with outdoor moisture and hardens.
Head back inside and reconnect the vent hose to both the dryer and wall duct. Secure it with foil tape or metal clamps, not plastic ties or duct tape, which degrade over time. Make sure the hose has minimal bends and isn’t kinked or crushed. Carefully push your dryer back into position, leaving a few inches between the wall and dryer to prevent the hose from getting compressed.
Test Your Work and Verify Proper Airflow
Once everything is reconnected, run a quick test cycle to confirm your cleaning worked. Start the dryer on a timed setting (no clothes needed) and immediately head outside to check the exterior vent. You should feel strong, steady airflow, if it’s weak or barely noticeable, there’s still a blockage somewhere that needs addressing.
Back inside, listen for any rattling, vibrating, or unusual sounds that might indicate a loose connection. Place your hand on the dryer’s top and sides after five minutes of running. The exterior should feel warm but not excessively hot. An overheating dryer signals restricted airflow and wasted energy.
For the ultimate verification, run a full load of damp towels. They should dry completely in one normal cycle. If you’re still seeing extended drying times, recheck your work or consider whether the vent duct itself needs replacing due to damage or excessive length.
How to Tell Your Dryer Vent Is Clean and Working Efficiently
You’ll know your cleaning effort succeeded when you notice these clear signs. Head outside while your dryer runs and hold your hand near the exterior vent, you should feel strong, warm air pushing out steadily. If the airflow feels weak or intermittent, you may have missed a blockage.
Inside, your laundry should dry noticeably faster. A load that previously took two cycles should now finish in one standard cycle, typically 40-50 minutes for a full load of cotton towels. Track your drying times for a week to establish your new baseline.
Touch the top of your dryer halfway through a cycle. A properly vented machine feels warm but not hot to the touch. You can check dryer heat more precisely if you want exact temperature readings. The absence of any burning smell during operation confirms lint isn’t smoldering in hidden pockets.
Monitor your next utility bill. Improved airflow efficiency typically reduces energy consumption by 15-30%, which translates to measurable savings depending on your usage patterns. Keep a simple log noting drying times and monthly energy costs, these numbers prove your environmental impact and help you identify when it’s time to clean again.
Maintaining Your Results: How Often to Clean and What’s Next
You’ve done the hard work of cleaning your dryer vent, and now it’s about keeping those energy-saving benefits going. Plan to clean your dryer vent every six to twelve months under normal circumstances. If you’re running multiple loads daily, have long hair shedding household members, or dry heavy items like towels and bedding frequently, bump that up to every three to six months. Large families should absolutely lean toward the more frequent end of that range.
Watch for the telltale signs it’s time to clean again: clothes taking longer than one cycle to dry completely, the dryer exterior feeling unusually hot to the touch, a musty smell on freshly dried laundry, or visible lint accumulating around the dryer door seal. These symptoms mean lint is building up again and your dryer is working harder than it should.
Between deep cleans, maximize your dryer’s efficiency and shrink your environmental footprint with these simple habits:
- Clean the lint trap after every single load without exception
- Toss in three or four wool dryer balls to speed drying time by 25% and reduce static naturally
- Air-dry heavy items like jeans and sweatshirts on a drying rack when weather permits
- Run full loads rather than small ones to maximize energy efficiency per item dried
- Shake out clothes before tossing them in the dryer to prevent tangling and improve airflow
- Skip dryer sheets, which leave residue that clogs your lint trap and reduces airflow over time
These small adjustments compound over weeks and months, keeping your vent cleaner longer while cutting your energy use even further. Think of dryer vent maintenance as part of a bigger picture: every efficiency gain in your laundry routine means less electricity consumed and a smaller carbon footprint for your household.
Common Questions About Eco-Friendly Dryer Vent Cleaning
Many homeowners have specific questions about the environmental benefits and practical aspects of dryer vent cleaning. Here are answers to the most common concerns.
Can I use a leaf blower to clean my dryer vent?
Yes, a leaf blower can be effective for dryer vent cleaning, especially for longer vent runs. Just make sure someone monitors the exterior vent to catch the lint cloud, and never use a gas-powered blower indoors due to carbon monoxide risks.
How much energy does a clogged vent really waste?
A clogged dryer vent can increase energy consumption by 20-30% per load, forcing your dryer to run longer cycles to achieve the same results. Over a year, this translates to dozens of extra kilowatt-hours and a noticeable bump in your utility bills.
Is dryer vent cleaning worth it for renters?
Absolutely. Even if you don’t own your home, you’ll still benefit from lower energy costs, faster drying times, and reduced fire risk. Check your lease agreement, as some landlords are responsible for vent maintenance, but cleaning it yourself ensures it gets done.
What’s the environmental impact compared to other home improvements?
Dryer vent cleaning offers one of the best effort-to-impact ratios among eco-friendly home tasks. While it won’t match the savings of solar panels or new insulation, it requires minimal investment and delivers immediate energy reduction that compounds with every load of laundry.
You can also prevent excessive lint buildup between cleanings by emptying your lint trap after every single load, avoiding dryer sheets that leave residue, and using mesh lint traps on the exterior vent. Washing heavily lint-producing items like bath mats and fleece blankets separately, then cleaning the vent shortly after, keeps your system running at peak efficiency.
Cleaning your dryer vent is one of those rare home maintenance tasks that delivers immediate results for both your wallet and the planet. By spending just an hour or two on this straightforward project, you’re cutting energy waste, reducing your carbon footprint, and helping your dryer run the way it was designed to. It’s the kind of practical, eco-friendly upgrade that aligns perfectly with creating a sustainable home without sacrificing comfort or convenience.
Make dryer vent cleaning part of your regular routine, just like changing furnace filters or cleaning gutters. Set a reminder for every six months, and you’ll maintain those energy savings year after year. Your dryer will thank you with faster cycles, your energy bills will drop, and you’ll be doing your part to lighten your environmental impact.
The tools are simple, the process is manageable, and the benefits are real. Why not tackle it this weekend?