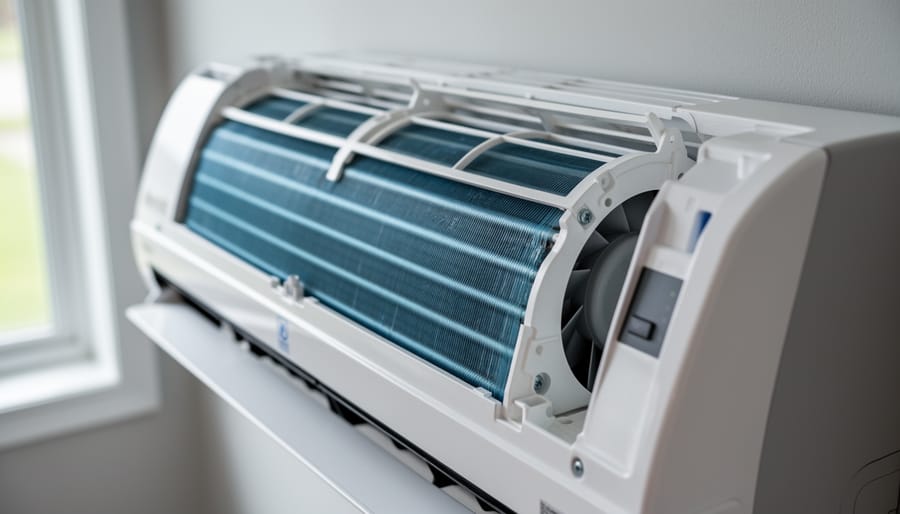


Cleaning a fan coil unit takes about 30 to 45 minutes and requires only basic tools: a screwdriver, soft brush, vacuum with attachments, microfiber cloths, and mild detergent. You’ll remove the front grille, vacuum the coil fins and fan blades, wipe down the drain pan with soapy water, and reassemble everything once dry. This straightforward maintenance task improves air quality, cuts energy costs by up to 15 percent, and extends the life of your HVAC system, making it as essential to home comfort as maintaining your primary heating source.
Fan coil units work silently in the background, circulating conditioned air throughout your home while you focus on more visible comfort elements like a crackling fire on winter evenings. But neglected coils collect dust, pet dander, and mold spores that restrict airflow and force the system to work harder. The result? Higher utility bills, uneven temperatures between rooms, and poor indoor air quality that undermines all your efforts to create a welcoming space.
Most homeowners can handle this job without calling a technician. The process is forgiving and low-risk if you follow safety precautions: turn off power at the breaker, let the unit cool completely, and avoid bending the delicate aluminum fins. You’ll know you’ve succeeded when airflow feels stronger, the unit runs more quietly, and musty odors disappear. Regular cleaning every three to six months keeps your whole-home climate system running efficiently, complementing eco-friendly heating solutions and ensuring every room stays comfortable year-round.
Why Regular Fan Coil Cleaning Matters for Your Home
Your fan coil unit works hard to keep your home comfortable year-round, but it can only perform at its best when it’s clean. Over time, dust, pet dander, pollen, and other airborne particles accumulate on the coils and fan blades, creating a barrier that forces your system to work harder to move air and transfer heat. This extra strain doesn’t just wear down your equipment, it directly impacts your wallet and your family’s wellbeing.
When coils become clogged with debris, your system’s efficiency plummets. A dirty fan coil can reduce heating and cooling capacity by 20-30%, meaning your unit runs longer cycles to achieve the same temperature. Studies confirm that HVAC cleaning lowers energy use substantially, translating to lower monthly utility bills and a smaller carbon footprint. For homeowners committed to eco-friendly living, this simple maintenance task aligns perfectly with sustainable home management.
Beyond efficiency, there’s the health factor. Every time your fan coil runs, it circulates air throughout your living space. If the coils and blades are coated in dust and allergens, you’re essentially pumping those irritants into the rooms where your family gathers. Clean coils mean cleaner air, which is especially important for households with allergies, asthma, or young children.
Finally, regular cleaning extends your equipment’s lifespan. Fan coil units aren’t cheap to replace, and neglected systems often fail prematurely due to motor strain and corrosion. A unit that receives consistent care can last 15-20 years, while a neglected one might struggle to reach 10. Whether you heat primarily with a fireplace or rely on your HVAC system, maintaining all your heating components ensures your home stays comfortable and efficient for years to come.
What You’ll Need: Tools and Materials
You don’t need a cart full of specialized equipment to tackle this job. Most of what you’ll need is probably already in your home, and the few specialty items are worth picking up for the long-term health of your heating system.
Your Essential Toolkit:
- Screwdrivers (Phillips and flathead) for removing access panels
- Vacuum cleaner with soft brush attachment to gently remove loose debris without damaging fins
- Coil cleaner (HVAC-specific) or mild dish detergent mixed with warm water
- Spray bottle for applying cleaning solution evenly
- Microfiber cloths (several) for wiping surfaces and absorbing moisture
- Fin comb (optional but helpful) to straighten bent coil fins and restore proper airflow
- Protective gloves to keep your hands clean and safe from sharp edges
- Safety glasses to protect your eyes from dust and cleaning spray
A word about coil cleaners: while you can use a gentle dish soap solution in a pinch, proper coil cleaner does a better job cutting through the oily residue that accumulates on HVAC components. Look for a no-rinse formula at your local hardware store. It’s designed specifically for these delicate aluminum fins and won’t leave a film that attracts more dust.
The fin comb deserves special mention. These inexpensive tools have different tooth spacings to match various coil configurations. If your unit’s fins look crushed or flattened, a fin comb can restore them to their original spacing, dramatically improving airflow and efficiency.
Safety First: What to Know Before You Start
Before you begin cleaning your fan coil unit, taking proper safety precautions isn’t optional, it’s essential for protecting yourself and your equipment. Start by locating your home’s electrical panel and switching off the breaker that controls the fan coil unit. Don’t just use the thermostat or wall switch; these don’t guarantee the power is truly off. If you’re unsure which breaker controls the unit, shut off the main power to be safe, or consult with a professional.
Next, confirm the unit has cooled down completely if it’s been running recently. Touch the exterior housing gently to check; a warm or hot unit needs more time to cool. While you wait, gather your protective equipment: wear safety glasses to shield your eyes from falling debris and dislodged dust, and put on protective gloves to guard your hands from sharp metal fins and cleaning solutions.
As you prepare, assess the scope of the job honestly. If your fan coil unit shows signs of significant corrosion, water damage, or electrical issues beyond surface dust accumulation, this is the moment to call an HVAC professional rather than proceed. Similarly, if you’re uncomfortable working with electrical equipment or can’t safely access the unit, there’s no shame in hiring help. The goal is to remove dust buildup safely and effectively, not to tackle repairs that exceed DIY limits. When it comes to home maintenance, knowing your boundaries is just as important as knowing the steps.
Step-by-Step: Cleaning Your Fan Coil Unit
Accessing the Unit
Start by locating your fan coil unit’s access panels, which are typically held in place by Phillips-head or flathead screws along the panel edges. Some newer models use snap-fit panels or thumb screws that require no tools at all. Before touching anything, double-check that power is off at the breaker, this isn’t optional.
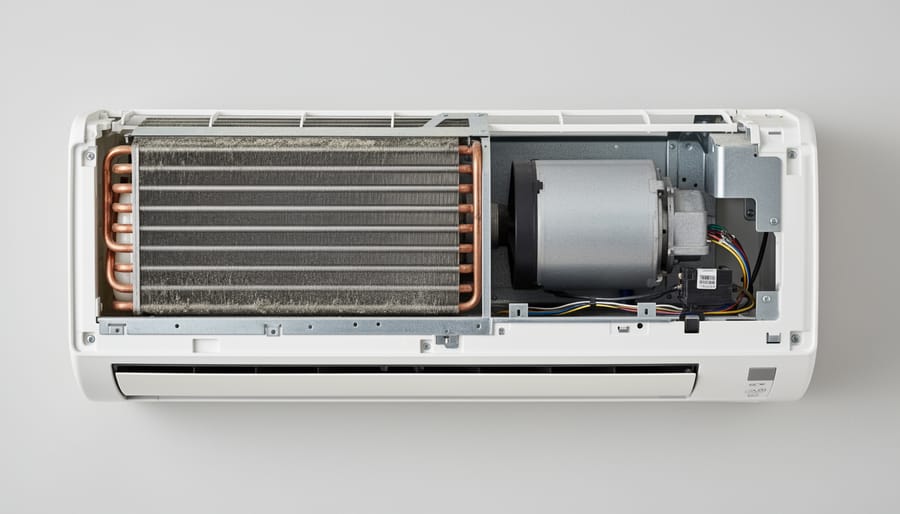
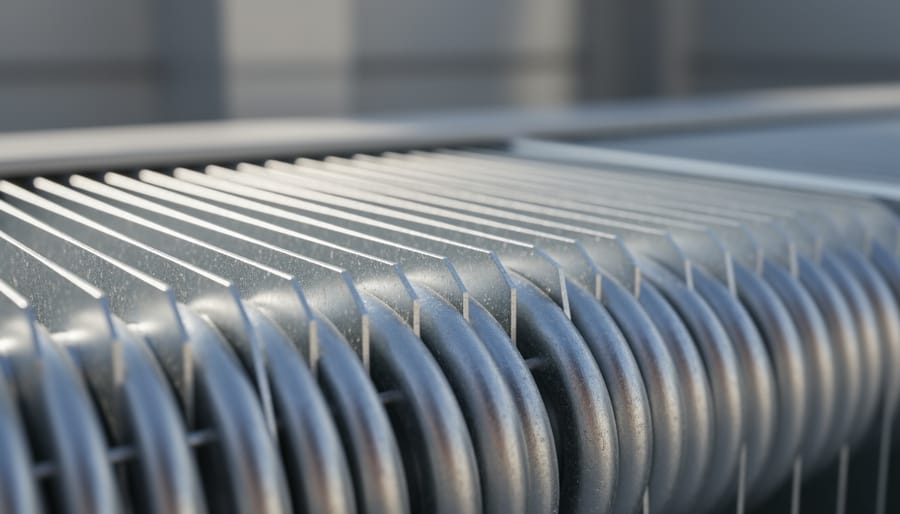
Gently remove the fasteners and set them aside where they won’t roll away. Lift the access panel straight out or swing it open depending on the hinge design. You’ll now see the coils, which look like rows of thin metal fins, and the fan assembly behind them.
If your unit has multiple panels, start with the largest one first to assess what you’re working with. In humid environments, you might notice dust accumulation or signs of moisture that can affect mold and air quality throughout your home. Take a moment to mentally map the layout before proceeding, knowing where everything goes makes reassembly far easier later.
Removing Loose Debris
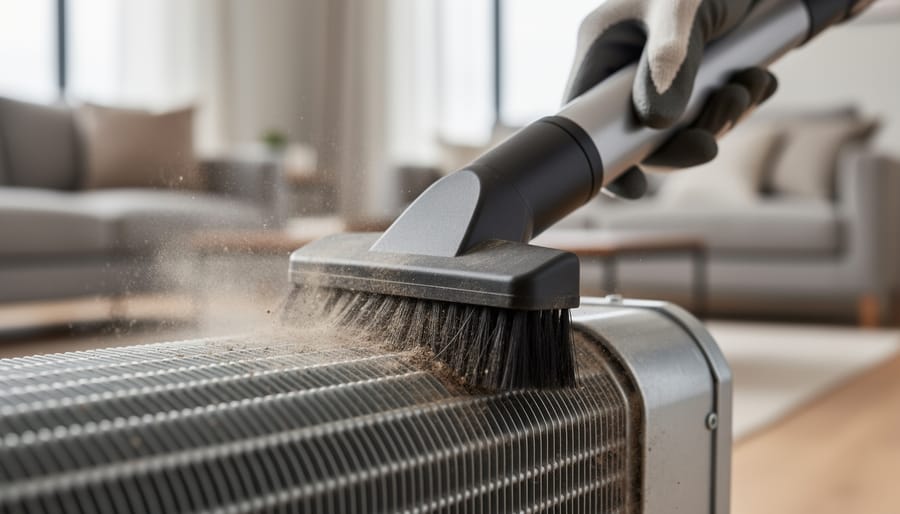
With the access panels removed, you’ll likely see a layer of dust, pet hair, and debris coating the coils and surrounding areas. Start with your vacuum’s soft brush attachment, this is crucial because coil fins are incredibly delicate and bend easily under pressure.
Hold the vacuum wand at a slight angle and use gentle, sweeping motions along the direction of the fins, never across them. Think of it like brushing hair: you’re following the natural pattern, not fighting it. Work systematically from top to bottom, paying special attention to the spaces between fins where dust loves to hide.
For stubborn debris that won’t vacuum away, resist the urge to scrape or poke at it. Instead, use a soft-bristled paintbrush to loosen it first, then vacuum again. Pet owners often find matted fur wedged deep in the fins, patience wins here. Multiple gentle passes beat one aggressive assault that could bend fins and restrict airflow.
Don’t rush this step. Removing loose debris now makes the deep cleaning that follows much more effective and prevents you from just smearing dirt around with cleaner.
Deep Cleaning the Coils
With the coils now free of loose debris, you’re ready for the deep clean. This is where you’ll actually cut through the grime and buildup that vacuuming alone can’t touch.
Start by mixing your cleaning solution. If you’re using a commercial coil cleaner, follow the manufacturer’s instructions carefully, these products are formulated to break down grease and scale without damaging aluminum fins. For a gentler approach, mix a few drops of mild dish detergent with warm water in your spray bottle. Skip harsh chemicals like bleach or ammonia, which can corrode metal components.
Spray the cleaning solution onto the coils using a sweeping motion, working from top to bottom. You want the coils thoroughly moistened but not dripping excessively. Pay special attention to areas with visible buildup or discoloration. The solution needs contact time to work its magic, so let it sit for 5-10 minutes. Don’t rush this step.
If your unit has both evaporator and condenser coils accessible from your vantage point, treat both the same way. The evaporator coil is typically the colder one that absorbs heat, while the condenser releases it, both accumulate different types of grime but benefit from the same cleaning process.
After the dwell time, gently rinse with a spray bottle of clean water or carefully wipe down with a damp microfiber cloth. Some no-rinse coil cleaners are designed to evaporate on their own, eliminating this step entirely. Check your product label.
Cleaning Fan Blades and Housing
With the coils sparkling clean, turn your attention to the fan assembly itself. The fan blades accumulate a surprising amount of dust and grime that can throw off balance and reduce airflow efficiency.
Dampen a microfiber cloth with your mild detergent solution, never spray directly onto the fan or motor. Wring the cloth until it’s barely moist, then carefully wipe each fan blade from hub to tip. Work slowly to avoid bending the blades or pushing moisture toward the motor bearings.
For stubborn buildup, use a soft-bristled brush dipped in cleaning solution, but keep it away from electrical connections and the motor itself. These components should never get wet. If you see significant grime near the motor housing, use a dry cloth or vacuum with a brush attachment instead.
Once the blades are clean, gently wipe down the fan housing and surrounding cabinet interior. You’ll often find dust bunnies hiding in corners and along mounting brackets. This is purely cosmetic work, but it prevents debris from recirculating when the unit fires back up.
Let everything air-dry completely before moving to reassembly, moisture and electricity don’t mix.
Straightening Bent Fins
If you notice bent or flattened fins during your inspection, you can improve airflow by carefully straightening them, but this step is entirely optional. Bent fins restrict air movement through the coils, reducing efficiency, though minor bending won’t dramatically impact performance.
A fin comb is the proper tool for this job. These inexpensive devices have teeth spaced to match different fin densities (typically measured in fins per inch). Match your comb to your unit’s fin spacing for best results.
Work slowly and gently. Insert the comb at the base of the bent section, then pull upward in smooth, even strokes. Never force the comb or try to straighten severely crushed areas, you’ll cause more damage than you fix. The aluminum fins are surprisingly delicate.
Focus on areas where multiple fins are bent together, creating noticeable airflow blockages. A few scattered bent fins here and there? Not worth the risk of creating new damage. Think of this as refinement, not perfection.
If fins crumble or break off when you touch them, stop immediately. That level of deterioration signals corrosion issues that need professional assessment, not DIY fixes.
How to Know Your Fan Coil Is Truly Clean
You’ve done the work, now let’s make sure it actually paid off. A truly clean fan coil unit should show immediate, visible improvements. Start with a close visual inspection of the coils themselves. They should look silver or copper (depending on your unit’s design) rather than grey or fuzzy with dust. Run your finger lightly along the fins, if it comes away clean instead of grimy, you’re on the right track. Check that all access panels are securely fastened and any screws or clips are back in place exactly as you found them.
Now restore power at the breaker and turn the system on. Listen carefully during the first few minutes of operation. You’re checking for several success indicators:
- Strong, consistent airflow from all vents without weak spots or whistling
- Quiet operation with no rattling, scraping, or grinding sounds
- No visible dust puffing from vents during startup
- Clean, odor-free air instead of musty or burnt smells
- Faster temperature response in the room compared to before cleaning
The unit should feel noticeably more powerful, like it’s breathing easier. If you’re still getting weak airflow despite clean coils, check your filter first; it might be overdue for replacement. Just as proper air circulation fixes smoke issues with fireplaces, clean coils restore your HVAC system’s ability to move conditioned air effectively throughout your space.
Give the system 24-48 hours to reach full efficiency. You should notice lower energy bills within the first month and more consistent room temperatures within a day or two.
What to Do Next: Maintenance Schedule and Tips
Now that your fan coil unit is running clean, let’s lock in those efficiency gains with a smart maintenance schedule. Mark your calendar for a thorough cleaning every three to four months, ideally at the start of each season when your heating or cooling demands shift. If you have pets, live in a dusty area, or run your system heavily, bump that up to every two months.
Between deep cleans, check your air filters monthly. A clogged filter forces your fan coil to work harder, burning more energy and potentially shortening its lifespan. Swap disposable filters every 30-90 days depending on conditions, or wash reusable ones according to manufacturer specs.
Watch for telltale signs that cleaning is overdue: weaker airflow from your vents, musty odors when the system kicks on, visible dust buildup on grilles, or a noticeable spike in your energy bills. Any of these signals means it’s time to grab your tools, even if it’s ahead of schedule.
Think of fan coil maintenance as part of your broader fan maintenance routine that keeps your whole home comfortable and efficient. Clean coils move air more effectively, which means your heating system, whether it’s radiant heat, a furnace, or your beloved fireplace, doesn’t have to compensate for poor circulation. That’s money saved and a smaller carbon footprint, all from staying on top of simple seasonal tasks.
Common Questions About Fan Coil Cleaning
Can I use regular household cleaners on my fan coil?
Stick with cleaners specifically designed for HVAC coils or a mild dish soap and water solution. Harsh chemicals, bleach, or ammonia-based products can damage the aluminum fins, corrode metal components, and leave residues that affect air quality when the unit runs.
How do I know if I need professional service instead of DIY cleaning?
Call a professional if you notice refrigerant leaks (oily residue around connections), hear grinding or squealing noises that persist after cleaning, see visible corrosion or damaged coils, or if the unit doesn’t cool or heat properly after a thorough cleaning. Also seek help if you’re uncomfortable working around electrical components.
What if I accidentally got water into the motor housing?
Turn off power immediately and let everything dry completely for at least 24 hours before attempting to restart. If water entered electrical connections or the motor itself, have an HVAC technician inspect it before powering up to prevent shorts or permanent damage.
Is cleaning a fan coil unit the same as furnace maintenance?
No, they’re different systems with distinct maintenance needs. Fan coil units circulate hot or cold water through coils to condition air, while furnaces burn fuel or use electric elements to generate heat. Both need regular cleaning, but furnaces require additional safety checks for combustion and gas lines.
Can dirty fan coils actually affect my fireplace’s heating efficiency?
Indirectly, yes. When your fan coil system struggles due to dirty coils, it runs longer and works harder, which can create pressure imbalances and drafts that pull warm air from rooms where your fireplace is heating. Clean coils help maintain even temperature distribution throughout your home, letting your fireplace warmth spread more effectively rather than being immediately drawn away by an overworked HVAC system.
These questions reflect what homeowners worry about most when tackling this project themselves. The concern about water and motors is particularly common, people spray too enthusiastically and then panic. Remember that patience pays off here: if something seems wrong after cleaning, giving the system time to dry and settle often resolves minor issues. That said, trust your instincts. If the unit behaves strangely or you spot damage you can’t explain, getting a professional opinion protects your investment and keeps your home’s heating and cooling running safely.
Cleaning your fan coil unit might not have the cozy appeal of tending a fireplace, but it’s just as essential to maintaining a comfortable, efficient home. You’ve now got the knowledge and the roadmap to tackle this task yourself, transforming what seemed like intimidating HVAC maintenance into a straightforward seasonal routine.
The hour or two you invest in this cleaning pays back through lower energy bills, fresher indoor air, and equipment that performs reliably when you need it most. Whether you’re supplementing fireplace warmth on chilly evenings or relying on your fan coil for year-round comfort, clean coils mean your system works smarter, not harder.
Make fan coil cleaning part of your spring and fall home care rhythm, right alongside checking smoke detectors and inspecting your heating systems. It’s a small effort that compounds over time, extending equipment life while supporting the eco-friendly, well-maintained home you’re building.
You don’t need to be an HVAC technician to keep your systems running beautifully. Armed with basic tools, a clear process, and a commitment to regular care, you’re ensuring the warmth and comfort your family deserves.