

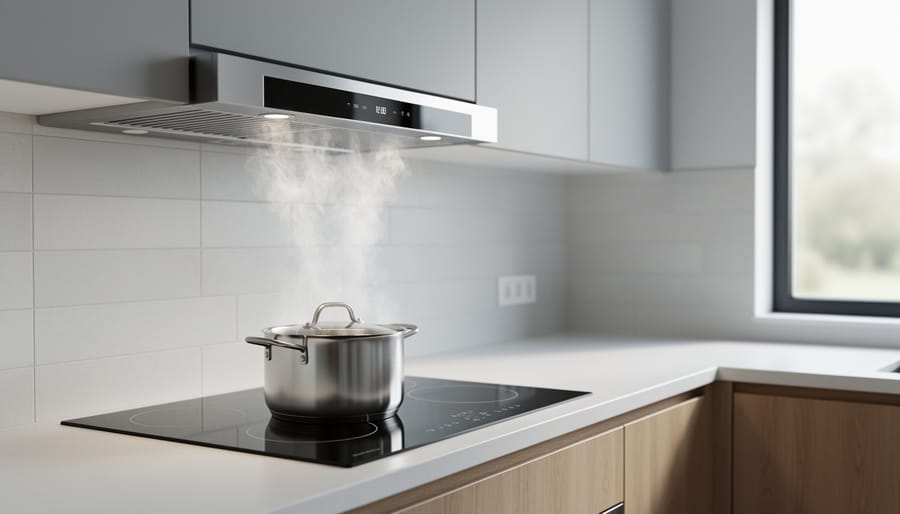

Position your new vent fan directly above the cooking surface, ensuring the exhaust duct runs the shortest possible route to an exterior wall or roof vent—this maximizes airflow efficiency and reduces cooking odors, steam, and grease buildup that can compromise your home’s air quality. Turn off power at your circuit breaker before beginning any electrical work, and verify the existing wiring can support your fan’s amperage requirements, typically between 3-7 amps for standard residential units.
Measure your existing hood opening or cabinet space carefully, as vent fans come in standard widths of 24, 30, and 36 inches, and purchasing the wrong size turns a manageable afternoon project into a frustrating ordeal requiring returns and delays. Calculate your kitchen’s cubic footage and multiply by 15 to determine the minimum CFM (cubic feet per minute) rating you need—a 200-square-foot kitchen with 8-foot ceilings requires at least 240 CFM for adequate ventilation during everyday cooking.
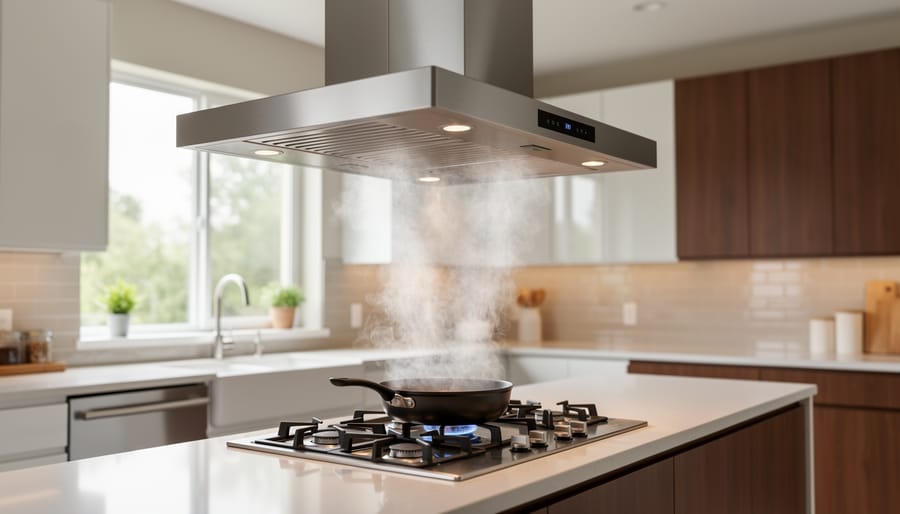
Choose between ducted and ductless models based on your home’s configuration, understanding that ducted systems vent directly outside and remove moisture more effectively, while ductless options filter and recirculate air, making them suitable for apartments or homes where external venting isn’t feasible. Consider how this kitchen appliance installation fits within your broader home comfort strategy—proper ventilation works alongside your heating systems to maintain consistent air quality and temperature throughout your living spaces.
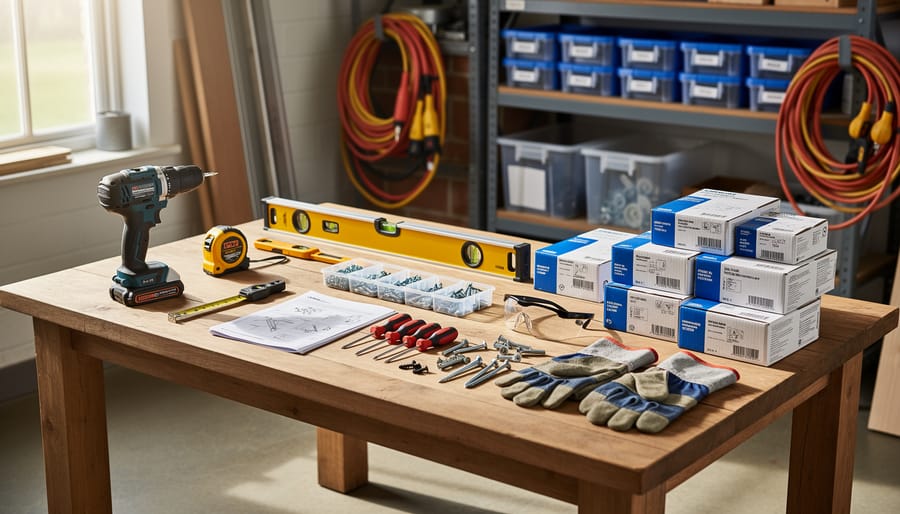
Gather essential tools including a drill, jigsaw, screwdrivers, wire strippers, duct tape, and metal screws before starting, as stopping mid-installation to hunt for supplies disrupts workflow and extends what should be a 2-4 hour project into an all-day affair.
Why Your Kitchen Desperately Needs Better Ventilation
Your kitchen works harder than almost any other room in your home. Every time you cook, you’re creating an invisible cocktail of moisture, smoke, cooking oils, and airborne particles that need somewhere to go. Without adequate ventilation, all of that stays right where you are, creating problems that extend far beyond a lingering smell of last night’s fish dinner.
Just as proper ventilation safety matters for fireplaces and heating stoves, your kitchen needs effective airflow to protect both your home and your family’s wellbeing. Poor ventilation leads to grease particles settling on every surface, creating that sticky film on cabinets and walls that’s tough to clean and tougher to ignore. Over time, this buildup doesn’t just look unpleasant; it becomes a maintenance nightmare and can even affect your home’s resale value.
Moisture is another silent troublemaker. When steam from boiling pasta or simmering soups has nowhere to escape, it condenses on cooler surfaces like windows and walls. This excess humidity creates the perfect breeding ground for mold and mildew, which can trigger allergies and respiratory issues while damaging paint, drywall, and wooden cabinets.
The air quality concerns go deeper still. Cooking releases nitrogen dioxide, carbon monoxide, and volatile organic compounds into your indoor environment. Without proper ventilation, these pollutants accumulate, especially in today’s well-sealed, energy-efficient homes. You wouldn’t tolerate smoke filling your living room from a poorly vented fireplace, so why accept the same situation in your kitchen?
A quality vent fan transforms your cooking space into a healthier, more comfortable environment. It’s an investment in your home’s atmosphere that pays dividends every single day, creating the kind of fresh, welcoming kitchen where families naturally gather.
Choosing the Right Kitchen Vent Fan for Your Space
Understanding CFM Ratings
CFM stands for cubic feet per minute, and it measures how much air your kitchen vent fan can move. Think of it as the breathing capacity of your ventilation system—just as a properly sized fireplace needs adequate airflow to burn efficiently, your kitchen needs the right CFM rating to effectively remove cooking smoke, steam, and odors.
Calculating your ideal CFM is straightforward. For most home kitchens, multiply your kitchen’s square footage by 2. A 150-square-foot kitchen would need about 300 CFM. However, if you’re an enthusiastic cook who loves searing steaks or stir-frying regularly, consider bumping that number up by 50 percent to handle the extra heat and smoke. Professional-style ranges with high BTU output require even more power—typically 1 CFM for every 100 BTUs.
Your cooking style matters as much as kitchen size. Light cooking like reheating and simple meals needs less ventilation, while frequent frying, grilling, or wok cooking demands higher CFM ratings. Island installations also require about 50 percent more CFM than wall-mounted units because they lack the natural containment of surrounding cabinets.
Remember, choosing the right CFM creates a comfortable, healthy kitchen environment while maintaining energy efficiency—an eco-friendly approach that keeps your home fresh without wasting power.
Ducted vs. Ductless Systems
Choosing between ducted and ductless systems is one of the most important decisions you’ll make when installing your kitchen vent fan, and it significantly impacts both air quality and energy efficiency in your home.
Ducted systems vent cooking fumes, smoke, and moisture directly outside through ductwork, making them the gold standard for kitchen ventilation. They effectively remove odors, grease particles, and humidity from your home entirely, creating a fresher, healthier cooking environment. This is particularly valuable if you do a lot of high-heat cooking or enjoy frequent family meals that generate steam and aromas. The tradeoff? They require exterior wall or roof access and more complex installation, which means additional time and potentially higher costs.
Ductless systems, also called recirculating fans, filter air through charcoal or carbon filters before returning it to your kitchen. They’re considerably easier to install since they don’t need exterior venting, making them ideal for apartments, condos, or homes where running ductwork isn’t feasible. However, they don’t remove moisture or heat from your space, and the filters require regular replacement to maintain effectiveness.
From an eco-friendly perspective, ducted systems prevent conditioned air loss when properly installed with backdraft dampers, while ductless systems avoid the energy needed to heat or cool replacement air. Consider your cooking habits, home layout, and budget when making this choice—your kitchen’s comfort depends on selecting the right fit for your lifestyle.
Noise Levels and Sone Ratings
When selecting your kitchen vent fan, noise level deserves just as much attention as airflow capacity. After all, the goal is creating a comfortable, inviting space where your family gathers, not installing an appliance that sounds like a jet engine every time you sauté vegetables.
Fan noise is measured in sones, a scale that quantifies how loud a sound actually feels to the human ear. Here’s a helpful reference: one sone equals the sound of a quiet refrigerator humming in your kitchen. Most range hoods fall between 1 and 8 sones. For context, normal conversation registers around 4 sones, while a vacuum cleaner reaches about 8 sones.
For the best balance between peace and performance, aim for a fan rated at 3 sones or lower. Modern fans with ratings between 1 and 2 sones operate whisper-quiet, making them ideal for open-concept homes where kitchen sounds carry into living areas. These quieter models often cost slightly more, but the investment pays dividends in daily comfort, especially if you cook frequently.
Keep in mind that higher CFM ratings typically produce more noise, so finding that sweet spot between ventilation power and peaceful operation is key. Many quality manufacturers now design fans with insulated housings and vibration-dampening features that significantly reduce operational noise without sacrificing performance.
Tools and Materials You’ll Need
Before you begin your kitchen vent fan installation, gathering the right tools and materials will make your project run smoothly and safely. Think of this preparation phase as setting yourself up for success, much like arranging everything you need before starting a cozy evening project by the fireplace.
For the installation itself, you’ll need a power drill with both standard and masonry bits (the latter if you’re venting through brick or stone), a jigsaw or reciprocating saw for cutting through wall or ceiling materials, and a screwdriver set. A stud finder is essential for locating ceiling joists or wall studs to ensure secure mounting. You’ll also want measuring tape, a level to keep everything straight, and a pencil for marking cut lines. Wire strippers and electrical tape are necessary for making safe electrical connections.
Material-wise, your shopping list should include the vent fan unit itself, appropriate ductwork (typically 6-inch diameter metal ducting works best for most installations), duct tape or metal clamps to secure connections, and an exterior vent cap to prevent weather and pests from entering. Don’t forget wire nuts for electrical connections and possibly a new electrical box if your current setup doesn’t support the fan’s requirements.
Safety equipment is non-negotiable. Protect yourself with safety glasses to shield your eyes from debris, work gloves for handling sharp metal edges, and a dust mask since cutting into walls creates plenty of airborne particles. If you’re working on a ladder, ensure it’s sturdy and properly positioned. Consider having a voltage tester on hand to confirm power is off before working with electrical connections, keeping your installation as safe as the warm, controlled environment of a well-maintained heating system.
Safety First: Preparing Your Workspace
Before you pick up a single tool, let’s talk about creating a safe workspace—because just like when you’re working around your fireplace, taking proper precautions protects both you and your home.
Start by locating your home’s electrical panel and switching off the breaker that controls your kitchen’s electrical circuits. Don’t just flip the wall switch and assume you’re safe. Test the area where you’ll be working with a non-contact voltage tester to confirm there’s no live current. This simple step can prevent serious electrical shocks and is absolutely non-negotiable.
Next, investigate what’s already happening above your ceiling. Before cutting into anything, use a stud finder to locate ceiling joists and check for existing electrical wiring, plumbing, or ductwork. You might be surprised what’s hiding up there, and accidentally sawing through a water pipe or electrical cable turns a manageable DIY project into an expensive emergency.
Now, let’s protect your kitchen surfaces. Cover your countertops, stove, and any furniture with drop cloths or old sheets. Working overhead means debris, dust, and tools will inevitably fall, and drywall dust has an uncanny ability to settle everywhere. Move any decorative items, plants, or small appliances to another room entirely.
Keep a sturdy step ladder nearby—not a wobbly chair or stacked boxes. You’ll be working at heights and need stable footing. Have a fire extinguisher accessible, wear safety glasses to protect your eyes from falling debris, and consider a dust mask if you’ll be cutting through drywall or insulation.
Taking these safety measures seriously means you’ll complete your installation without incident, creating better air quality in your home while keeping everyone safe.
Step-by-Step Installation Process
Marking and Cutting the Vent Opening
Before you make any cuts, take your time with this crucial step—precision here prevents headaches later. Start by using a stud finder to locate any studs or joists in the area where your vent will pass through. Mark these locations clearly with painter’s tape, as you’ll need to navigate around them or through them depending on your vent path.
Next, hold your vent fan’s template against the ceiling or wall where you want to install it. Most quality vent fans include a paper template for this exact purpose. If yours didn’t come with one, trace the unit’s outline onto cardboard. Position the template carefully, ensuring it aligns with your ductwork plan and maintains proper clearance from cabinets and lighting fixtures.
Once you’re satisfied with the placement, trace the outline onto the surface using a pencil. Double-check your measurements before proceeding—measure twice, cut once, as the saying goes. For cutting through drywall, use a drywall saw or reciprocating saw with a fine-tooth blade. If you’re cutting through cabinet bottoms, a jigsaw works beautifully for cleaner edges.
Safety first: wear protective eyewear and a dust mask, and cover your countertops and appliances with drop cloths. Turn off power to any nearby electrical outlets before cutting. Start with a small pilot hole using a drill, then carefully follow your traced line. Work slowly and steadily—rushing leads to mistakes that compromise both function and the finished appearance of your kitchen’s new ventilation system.
Installing the Ductwork
Running ductwork to the outside is where your vent fan truly comes to life, creating that crucial pathway for steam, smoke, and cooking odors to escape your home. Think of it as building a chimney for your kitchen, a channel that efficiently whisks away unwanted air while keeping your living space fresh and comfortable.
The shortest route to the outside is always your best friend here. Whether you’re venting through an exterior wall, up through the roof, or into the attic space, aim for the most direct path with the fewest turns possible. Each bend in your ductwork reduces airflow efficiency by about 10 percent, so a straight shot means better performance and a more effective kitchen environment.
For most homeowners, rigid metal ductwork is the gold standard. It’s durable, fire-resistant, and maintains consistent airflow far better than flexible alternatives. Use 6-inch diameter ducting for most range hoods, though always check your manufacturer’s specifications. If you absolutely must navigate around obstacles, limit yourself to gentle 45-degree angles rather than sharp 90-degree turns.
Proper sealing is non-negotiable for both safety and efficiency. Use aluminum foil tape, not standard duct tape which degrades over time, to seal all joints and connections. Apply it generously, wrapping completely around seams. This prevents moisture from escaping into your walls or attic, which could lead to mold growth and structural damage down the road.
Don’t forget the exterior termination point. Install a quality wall cap or roof jack with a damper that closes when the fan isn’t running. This prevents cold drafts from sneaking back inside during winter months, keeping your home cozy and energy-efficient. Local building codes typically require specific clearances from windows, doors, and property lines, so check with your municipal office before finalizing your route.
Electrical Connections
Before touching any wires, turn off the power at your circuit breaker and verify it’s off using a voltage tester. This simple step could save your life. Working with electricity deserves the same respect you’d give any heating appliance in your home.
Most vent fans connect to your home’s electrical system through a junction box. You’ll typically find three wires: black (hot), white (neutral), and green or bare copper (ground). Match these to your fan’s corresponding wires using wire nuts, twisting them securely clockwise. The ground wire is especially important as it protects you from electrical shocks, much like proper installation protects your home from cooking fumes.
If your kitchen doesn’t have existing wiring where you need it, or if you’re uncomfortable working with electricity, calling a licensed electrician is the smart choice. There’s no shame in recognizing when a project exceeds your comfort zone. Many homeowners handle the ductwork themselves but bring in a professional for the electrical connection, creating a safe, cost-effective approach.
Remember to secure all wire connections inside the junction box and ensure no bare wires are exposed. Once everything is connected, restore power and test your fan before completing the installation. A properly grounded, safely wired vent fan will serve your kitchen reliably for years to come.
Mounting the Fan Unit
Now comes the satisfying part where your new kitchen vent fan takes its permanent place. Carefully lift the fan housing into position, aligning it with the ductwork opening you prepared earlier. This might require an extra set of hands, so don’t hesitate to ask for help—it makes the job easier and safer.
Begin securing the housing to the ceiling joists or mounting bracket using the manufacturer-provided screws. Work in a cross pattern to ensure even pressure distribution, which prevents warping and reduces future vibration issues. Connect the housing to your ductwork using metal foil tape or duct clamps, never standard duct tape, which deteriorates over time.
Check that all connections are snug and airtight. Give the housing a gentle shake to test stability—any wobbling now means noise and rattling later. If you notice movement, reinforce the mounting points with additional screws or adjust your support brackets.
Take a moment to verify everything sits level and flush against the ceiling. This attention to detail creates a professional-looking installation while ensuring your fan operates quietly and efficiently, contributing to a more comfortable, healthier kitchen environment for years to come.
Final Assembly and Testing
Now comes the rewarding moment where you bring everything together and see your hard work in action. Start by securing the exterior vent cap to the outside wall, making sure it fits snugly against your home’s siding. Apply a generous bead of weatherproof caulk around the edges to seal out moisture and drafts, just as you would protect your home from the elements around any exterior opening.
Head back inside and slide the filters into their designated slots in the fan housing. Most kitchen vent fans use aluminum mesh or charcoal filters that capture grease and odors, keeping your kitchen air fresh and clean. Think of these filters as your first line of defense in maintaining a healthy, comfortable cooking environment.
Before securing any cover panels, turn on the power and test your fan at all speed settings. Place your hand beneath the hood to feel the airflow, which should pull strongly upward. Listen for any unusual rattling or vibration that might indicate loose components. Step outside to verify that air is flowing freely through the exterior vent cap and nothing is obstructing the path.
Finally, attach the fan’s cover panels or decorative housing, and give everything one last inspection. A properly installed kitchen vent fan operates quietly and efficiently, creating a more pleasant cooking experience while protecting your home’s air quality for years to come.
Common Installation Mistakes and How to Avoid Them
Even experienced DIYers can stumble when installing a kitchen vent fan, but recognizing these common pitfalls ahead of time can save you considerable frustration and expense.
One of the most frequent mistakes is choosing the wrong ductwork size or material. Many homeowners assume they can reuse existing ducts without checking compatibility. However, using undersized ductwork is like trying to breathe through a straw—it dramatically reduces your fan’s efficiency and can create annoying noise. Always match your ductwork diameter to your fan’s specifications, and opt for rigid metal ducts whenever possible. Flexible ducts may seem easier to work with, but they restrict airflow and collect grease more readily.
Another common error involves improper venting direction. Some installers take shortcuts by venting into an attic or crawl space rather than directing exhaust outside. This approach invites moisture damage, mold growth, and potential fire hazards from grease accumulation. Your vent should always terminate outdoors through an exterior wall or roof, with a proper damper to prevent backdrafts. Think of it like your fireplace chimney—proper ventilation protects your home’s structure and air quality.
Inadequate support and mounting also plague many installations. Kitchen vent fans are heavier than they appear, and skimping on secure fasteners leads to vibration, noise, and eventual failure. Always anchor your fan to ceiling joists or use appropriate reinforcement, never just to drywall alone.
Finally, many DIYers forget to account for makeup air. Powerful range hoods can create negative pressure in tightly sealed homes, potentially causing backdrafting in other appliances. If you’re installing a high-CFM fan in an energy-efficient home, consider how fresh air will enter your space to maintain balanced ventilation and a comfortable living environment.
Maintenance Tips for Long-Term Performance
Your kitchen vent fan is a hardworking appliance that deserves a little attention to keep it running smoothly for years to come. Just like maintaining your fireplace ensures cozy evenings, caring for your ventilation system protects your investment and keeps your kitchen air fresh and healthy.
Start with the filters, which are your fan’s first line of defense against grease and airborne particles. Most manufacturers recommend cleaning or replacing filters every one to three months, depending on how often you cook. Metal mesh filters can be washed in hot, soapy water or run through the dishwasher, while charcoal filters in recirculating models need replacement rather than cleaning. Set a reminder on your phone so this simple task doesn’t slip through the cracks.
Every six months, take a peek at your ductwork from both ends if possible. Look for any buildup of grease or lint that might restrict airflow. A flexible dryer vent brush can help you clean accessible sections, though you may want to call in a professional for a deep cleaning every few years, especially if you do a lot of high-heat cooking.
The fan motor itself typically needs minimal maintenance, but it appreciates an occasional wipe-down of the blades and housing to prevent dust buildup. While you’re at it, listen for any unusual sounds that might indicate worn bearings or loose components.
This kind of preventive care aligns perfectly with sustainable home solutions, helping your appliances work efficiently and last longer. A well-maintained vent fan uses less energy and creates a more comfortable cooking environment, supporting the warm, healthy home you’ve worked hard to create.
Energy Efficiency and Eco-Friendly Considerations
Installing a proper kitchen vent fan isn’t just about removing cooking odors and steam—it’s a smart investment in your home’s overall energy efficiency and environmental footprint. When you create effective ventilation, you’re actually helping maintain more stable indoor temperatures, which reduces the strain on your heating and cooling systems throughout the year.
Look for ENERGY STAR certified models when shopping for your kitchen vent fan. These models use approximately 70% less energy than standard options while delivering the same powerful performance. The investment typically pays for itself within a few years through lower utility bills, and you’ll feel good knowing you’re reducing your home’s carbon footprint with every meal you prepare.
Modern vent fans also feature smart sensors that automatically adjust fan speed based on cooking intensity, preventing unnecessary energy waste. Some models even include LED lighting, which uses a fraction of the electricity compared to traditional bulbs while lasting significantly longer.
Consider the airflow rating carefully during selection. A fan that’s too small for your kitchen will run constantly and inefficiently, while an oversized model wastes energy. Calculate your kitchen’s cubic footage and choose a fan rated appropriately for your space. This thoughtful approach mirrors the same consideration you’d give to selecting an eco-friendly heating solution for your living areas.
By installing an efficient kitchen vent fan, you’re creating a healthier, more comfortable home environment while supporting sustainable living practices that benefit both your family and the planet.
Installing a kitchen vent fan is more than just a home improvement project—it’s an investment in your family’s comfort and health. Just as a well-maintained fireplace creates a cozy gathering spot while safely managing smoke and emissions, your kitchen vent fan works quietly behind the scenes to keep your cooking space fresh and inviting. By tackling this installation yourself, you’ve taken meaningful control over your home’s air quality while potentially saving hundreds of dollars in installation costs.
If you’ve followed along with the steps outlined in this guide, you now have the knowledge to complete this project with confidence. Remember, proper ventilation isn’t a luxury—it’s essential for preventing moisture damage, eliminating cooking odors, and protecting your indoor air from grease particles and combustion byproducts. You’re creating a healthier living environment where your family can gather around home-cooked meals without compromise.
That said, don’t hesitate to call a professional if you encounter electrical complexities or structural challenges beyond your comfort level. There’s wisdom in knowing when expert help ensures both safety and optimal performance. Whether you complete the installation yourself or bring in assistance for specific steps, you’re making a smart choice that enhances your home’s livability for years to come.


")