


Clean your burn pot after every cooking session by removing ash buildup with a shop vacuum or scraper—this single habit prevents the majority of temperature fluctuations and ignition failures that plague pellet grill owners. Inspect and empty your grease trap weekly during heavy use seasons, as accumulated grease isn’t just a fire hazard; it directly impacts smoke flavor and can void your warranty if it causes damage. Replace your grill’s gaskets annually or whenever you notice cracking, because worn seals allow heat to escape, forcing your grill to work harder and consume more pellets while delivering inconsistent results.
Deep clean your entire firebox and heat diffuser plates monthly by scraping away carbonized residue that acts as an insulator, reducing your grill’s efficiency by up to 30 percent. Check your auger system quarterly for sawdust accumulation and pellet jams—a clogged auger is the leading cause of unexpected shutdowns mid-cook. Following these grill longevity tips transforms maintenance from a dreaded chore into a quick routine that protects your investment.
Your pellet grill represents a significant commitment to outdoor cooking excellence, and like any premium appliance, it rewards consistent care with years of reliable performance. Most expensive repairs stem from neglected maintenance rather than manufacturing defects, making prevention dramatically more cost-effective than replacement parts. This comprehensive guide breaks down exactly what to clean, when to clean it, and how to spot problems before they escalate—ensuring your pellet grill delivers perfect smoke rings and tender briskets for decades to come.
Why Pellet Grills Need Different Care Than Traditional Grills
If you’re making the switch from a traditional gas or charcoal grill to a pellet grill, you’re in for some wonderful cooking experiences, but you’ll also need to adjust your maintenance mindset. Pellet grills are sophisticated cooking systems that combine the best of outdoor grilling with precision temperature control, and that complexity means they need a different kind of care.
Unlike gas grills with their simple burners and knobs, or charcoal grills with minimal moving parts, pellet grills feature several components working together in harmony. The hopper stores your wood pellets, the auger feeds them into the fire pot, and an electronic controller manages everything from ignition to temperature regulation. Think of it less like a traditional grill and more like an outdoor appliance that deserves the same attention you’d give your indoor heating systems.
The stakes are higher with pellet grills because moisture is your biggest enemy. When pellets get damp in the hopper, they can swell and jam the auger, leading to frustrating cooking interruptions or costly repairs. The fire pot needs regular ash removal to maintain proper airflow, while the electronic components require protection from the elements. Gas grills simply don’t have these concerns, and charcoal grills are far more forgiving of neglect.
Regular maintenance isn’t just about avoiding breakdowns. It directly impacts your cooking results and helps you maximize your investment. A well-maintained pellet grill delivers consistent temperatures, cleaner smoke flavor, and years of reliable service. Plus, keeping your grill in top condition aligns with eco-friendly practices by ensuring efficient pellet consumption and reducing waste. The good news? Once you understand these unique components, maintaining your pellet grill becomes second nature.
The After-Every-Cook Cleaning Routine (5 Minutes That Save Hundreds)
Cleaning the Grill Grates While They’re Warm
Timing is everything when it comes to keeping your pellet grill grates in top condition. The sweet spot for cleaning is right after you’ve finished cooking, while the grates are still warm but not dangerously hot. This warmth helps loosen stuck-on food particles and grease, making your job significantly easier than tackling cold, hardened residue later.
Start with a high-quality brass or stainless steel grill brush designed specifically for cleaning grates properly. Avoid wire brushes with cheap bristles that can break off and contaminate your next meal. Hold the brush at a 45-degree angle and use firm, consistent strokes along the grate bars, working in the same direction each time.
For stubborn spots, a crumpled ball of aluminum foil gripped with tongs works wonders as a natural scrubber. This eco-friendly approach avoids harsh chemicals while effectively removing residue. If you notice buildup between the grate bars, use a wooden scraper or grill cleaning tool to dislodge debris without scratching the surface.
Never use water on hot cast iron grates, as sudden temperature changes can cause warping or cracking. For porcelain-coated grates, gentle brushing prevents chipping the protective coating, which helps maintain both performance and longevity of your investment.
Emptying the Fire Pot and Checking for Buildup
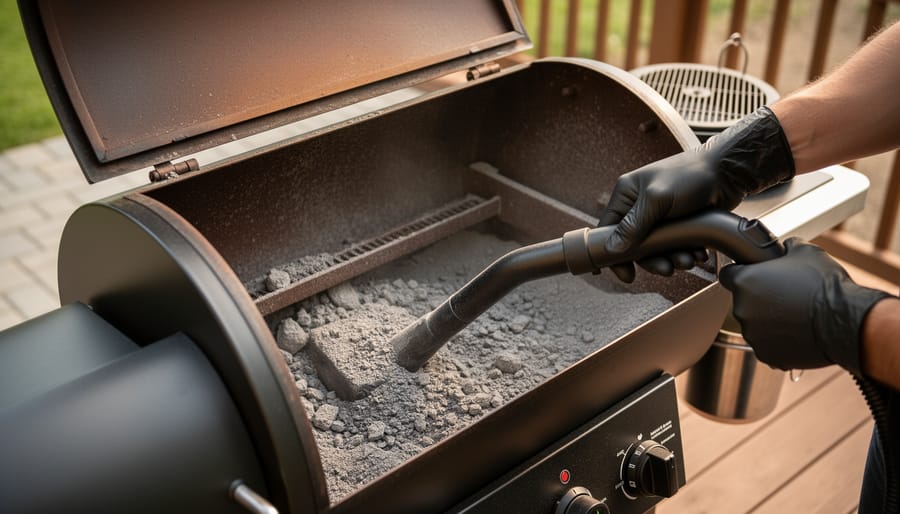
Before each grilling session, make it a habit to check your fire pot for ash accumulation. Once your grill has completely cooled (this is essential for safety), remove the grates, drip tray, and heat baffle to access the fire pot. Using a shop vacuum designed for ash removal or a dedicated ash tool, carefully clear away the ash and any unburned pellets. You’ll want to look for signs of excessive buildup, which often appears as clinker formations or hardened ash chunks that can restrict airflow.
Proper airflow is the heartbeat of your pellet grill’s performance. When ash accumulates around the fire pot’s air holes or igniter, it creates barriers that prevent oxygen from reaching the fire, leading to temperature swings and incomplete combustion. Run your finger along the inside edges of the fire pot to feel for crusty buildup that your vacuum might have missed. If you notice stubborn deposits, gently scrape them away with a putty knife or wire brush.
This simple five-minute routine dramatically improves combustion efficiency, reduces pellet waste, and helps your grill maintain consistent temperatures. Think of it as creating the perfect environment for a clean, eco-friendly burn every time you cook.
Wiping Down the Interior
After each cooking session, give your pellet grill’s interior a quick wipe-down while it’s still slightly warm (but safe to touch). Use a damp cloth or paper towels to remove grease splatters and food residue from the interior walls and lid. Pay special attention to areas where grease tends to collect, as built-up grease can prevent grease fires and ensure your grill operates efficiently. Think of this like maintaining your indoor fireplace—regular attention keeps everything running smoothly and safely. A clean interior also helps your pellet grill maintain consistent temperatures, giving you better cooking results every time. This simple five-minute task makes a big difference in your grill’s longevity and performance.
Deep Cleaning Your Pellet Grill: A Monthly (or Seasonal) Must-Do
Vacuuming Out the Entire System
A good shop vacuum is your best friend when it comes to pellet grill maintenance, and regular vacuuming keeps your grill running efficiently while preventing buildup that can affect heat distribution and flavor. Start by ensuring your grill is completely cool and unplugged for safety.
Begin with the burn pot, which collects the most ash. Use your shop vac’s narrow crevice attachment to get into corners and around the igniter rod. Next, move to the main cooking chamber, vacuuming around the drip tray area and beneath the grates. Don’t forget the hopper area where pellet dust accumulates, as this residue can affect pellet flow and create unnecessary waste.
The real game-changer is tackling those hard-to-reach spaces. Remove access panels to vacuum the exhaust system, fan housing, and any vents where ash tends to hide. These areas directly impact your grill’s efficiency and eco-friendly performance by ensuring complete combustion and minimal waste.
For the best results, invest in a shop vac rated for fine dust particles with a HEPA filter. This prevents ash from recirculating into your outdoor space and protects the vacuum motor. A flexible hose extension helps you reach deep into chambers without disassembling everything. Make this thorough vacuuming part of your monthly routine to maintain optimal performance and extend your pellet grill’s lifespan.
Inspecting and Cleaning the Auger
The auger is your pellet grill’s workhorse, steadily feeding fuel to keep those perfect cooking temperatures humming along. Think of it as the heart of your outdoor cooking companion, and like any hardworking system, it deserves regular attention to keep things running smoothly.
Start by unplugging your grill and removing the hopper to access the auger tube. Look for any pellet jams or sawdust buildup that might restrict flow. These blockages typically happen when moisture gets into your pellets, causing them to swell and stick together. Gently clear any obstructions with a wooden dowel or specialized auger cleaning tool, avoiding metal objects that could damage the tube’s interior.
Every few months, give the auger tube a thorough cleaning. Use a shop vacuum to remove accumulated sawdust and pellet debris, which can create resistance and strain the motor over time. Check the auger’s rotation by briefly running it empty to ensure it turns freely without unusual sounds.
This simple maintenance prevents costly motor replacements and ensures consistent pellet delivery for even heat distribution. A clean, properly functioning auger means better fuel efficiency and fewer temperature fluctuations during your cook, keeping your culinary adventures on track while maximizing the life of your investment.
Checking Seals, Gaskets, and Door Alignment
Just like a cozy fireplace needs a tight damper to maintain efficiency, your pellet grill relies on proper seals to hold heat and smoke where they belong. Over time, gaskets around the lid and door can wear down, creating gaps that let precious heat escape and make your grill work harder than necessary.
Check your gaskets every few months by running your hand around the closed lid’s perimeter while the grill is cool. Feel for any gaps or compressed areas where the seal looks thin. If you notice light peeking through when the lid is closed, it’s time for a replacement. Most gaskets are self-adhesive and easy to swap out yourself.
Door alignment matters too. A warped or misaligned lid won’t seal properly, no matter how good your gasket is. Test the latch mechanism to ensure it pulls the lid down snugly and evenly. If your grill seems to be burning through pellets faster than usual or struggling to maintain temperature, poor seals are often the culprit. This simple inspection saves fuel and keeps your cooking temperatures consistent, making your pellet grill more eco-friendly and cost-effective in the long run.
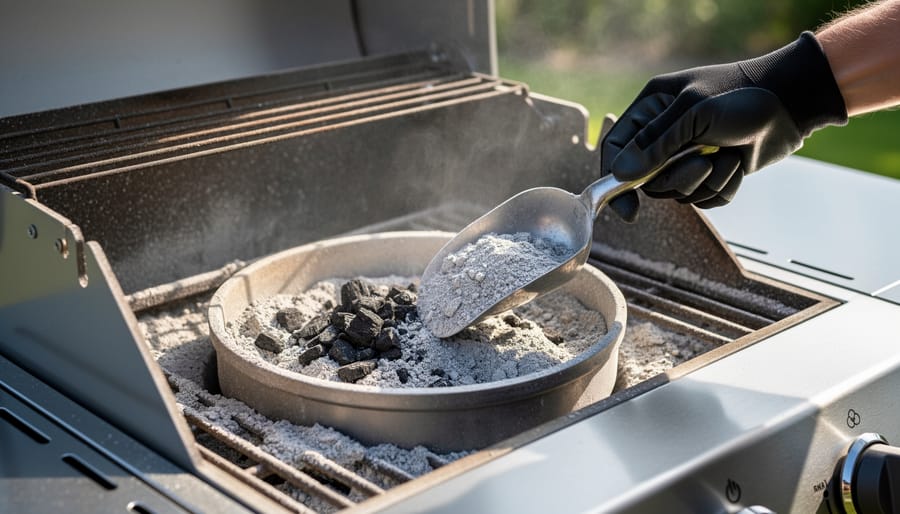
Grease Trap and Drip Pan Maintenance
Your grease trap and drip pan are the unsung heroes that prevent dangerous flare-ups and keep your pellet grill running safely. These components catch drippings and grease during cooking, but if neglected, they become serious fire hazards that can compromise both your grill’s performance and your family’s safety.
Make it a habit to check your drip pan after every cooking session, especially after grilling fatty meats like ribs or brisket. When you notice grease accumulation reaching halfway up the pan, it’s time for a thorough cleaning. Remove the pan carefully, scrape off hardened residue with a plastic scraper, then wash with hot, soapy water. For stubborn buildup, let it soak for 15 minutes before scrubbing.
The grease trap requires similar attention. Empty it regularly before it overflows, which typically means every 3-5 cooks depending on what you’re grilling. Line your drip pan with heavy-duty aluminum foil to make cleanup easier and reduce waste. This simple step transforms a messy 20-minute job into a quick 2-minute task, giving you more time to enjoy the fruits of your grilling labor and less time scrubbing away at yesterday’s cookout.
Protecting Your Investment: Seasonal and Long-Term Storage Tips
Pellet Storage and Moisture Management
Think of wood pellets like kindling for your fireplace – they need to stay absolutely dry to perform their best. Moisture is the enemy of consistent heat and flavor, causing pellets to swell, jam your auger, and produce weak, uneven flames that’ll ruin your cooking experience.
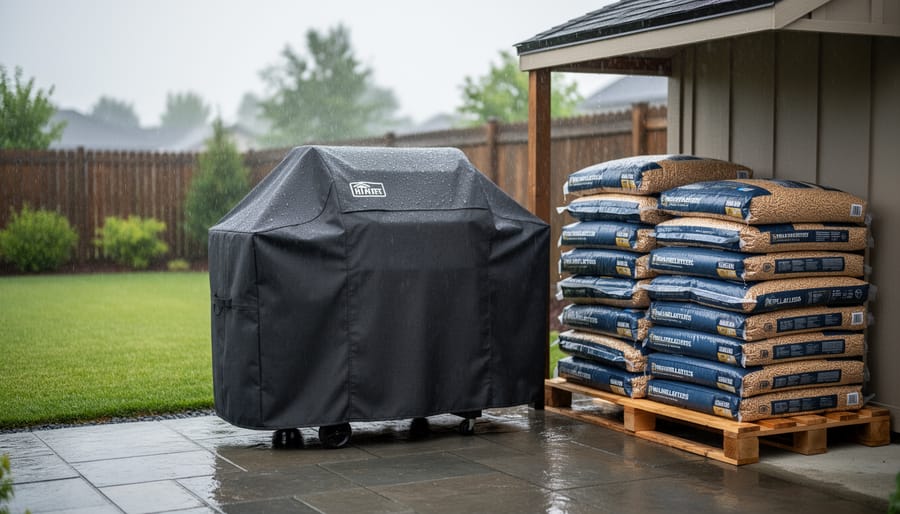
Store your pellets in airtight containers or sealed buckets in a cool, dry location, preferably indoors. Even pellets that seem fine can absorb humidity from the air within days, especially in basements or garages. If you notice sawdust accumulation in your pellet bag or hopper, that’s a telltale sign of moisture damage – those pellets have broken down and should be discarded.
After each cooking session, many grill enthusiasts empty their hoppers to prevent pellets from sitting exposed to the elements. This small habit prevents clumping and ensures you’re always working with fresh fuel. Consider buying pellets in smaller quantities rather than bulk if you don’t grill frequently, as fresher pellets mean better performance.
For the eco-conscious griller, proper storage isn’t just about performance – it prevents waste. Degraded pellets can’t be used and end up in landfills, so protecting your investment also protects the environment.
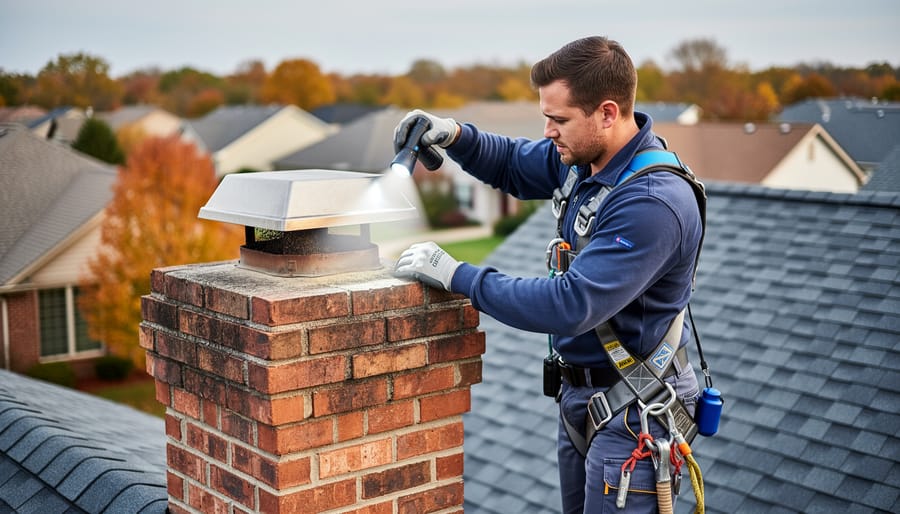
Weatherproofing and Cover Selection
Think of your pellet grill cover as a cozy blanket that protects your investment from nature’s harsher moments. A quality, heavy-duty cover designed specifically for your grill model is essential for shielding sensitive electronics, preventing rust, and keeping moisture out of the hopper and pellet system. Look for covers made from waterproof, UV-resistant materials with reinforced seams and secure tie-downs to withstand wind and weather.
Before covering your grill, always let it cool completely and ensure it’s dry inside to prevent mold and condensation buildup. During winter months or extended periods of non-use, consider storing your grill in a garage or shed if possible. If you must leave it outdoors, check underneath the cover periodically for moisture accumulation or pest activity. For those in especially wet climates, placing your covered grill on a slight incline or using a grill mat can improve drainage. This simple protective step extends your grill’s lifespan significantly while maintaining that reliable performance you count on for those perfect weekend cookouts.
Pre-Season Startup Checklist
Before firing up your pellet grill after winter storage or an extended break, a thorough inspection ensures optimal performance and safety. Start by removing and vacuuming the firepot, burn grate, and heat diffuser to eliminate any accumulated ash or debris that could restrict airflow. Check the auger system by manually turning it to confirm it moves freely without obstructions. Inspect all gaskets and door seals for wear or damage, replacing them if needed to maintain consistent temperatures. Verify that your hopper is completely dry and free from old pellets, which absorb moisture and can cause jams or poor combustion. Clean the temperature probe with a damp cloth, as buildup here affects accuracy. Finally, do a test run without food, allowing the grill to reach your typical cooking temperature. This burn-off removes any dust or residue while confirming everything functions properly. Taking these simple steps protects your investment and guarantees delicious results from your first cook of the season.
Troubleshooting Common Issues Before They Become Expensive Repairs
Temperature Fluctuations and Inaccurate Readings
Temperature inconsistencies can turn your perfectly planned cookout into a frustrating guessing game. If you’re noticing wild swings in temperature or readings that don’t match reality, your thermocouple or temperature probe might be the culprit.
Start by inspecting the thermocouple, the small sensor that monitors your grill’s internal temperature. Look for any buildup of ash, grease, or debris that could interfere with accurate readings. Gently clean it with a soft cloth or paper towel. If the probe appears damaged, corroded, or the wire connection seems loose, replacement is your best option.
To calibrate your temperature probe, use the boiling water method. Bring a pot of water to a rolling boil and insert the probe. It should read 212°F at sea level (adjust for altitude if needed). If it’s off by more than 15 degrees, consult your grill’s manual for calibration instructions or consider replacing the probe. Regular checks ensure your pellet grill maintains that consistent, reliable heat that makes outdoor cooking such a joy.
Ignition Problems and Fire Pot Issues
If your pellet grill refuses to light or the fire keeps dying out, you’re not alone—ignition problems are among the most common frustrations grill owners face. The good news is that most startup failures stem from simple maintenance oversights that you can easily address.
Start by checking your fire pot for excessive ash buildup, which can smother the igniter and prevent proper airflow. Before each use, vacuum out the fire pot completely—this five-minute task prevents most ignition headaches. Next, inspect the hot rod igniter itself. Over time, these heating elements can become covered in soot or ash, reducing their effectiveness. Gently wipe the igniter with a dry cloth, being careful not to damage the element.
Another frequent culprit is old or damp pellets. Pellets absorb moisture from the air, making them difficult to ignite and causing inconsistent burns. Always store your pellets in an airtight container in a dry location, and replace any fuel that’s been sitting open for more than a month.
If your fire pot shows rust or warping, it’s time for a replacement. A compromised fire pot disrupts the airflow patterns essential for consistent ignition and temperature control, affecting both your grill’s performance and your cooking results.
Unusual Smoke or Flame Patterns
Your pellet grill’s flame should burn steady and bright, typically with a crisp blue and orange glow. If you notice unusually lazy, sooty flames or smoke that’s thick and dark instead of thin and almost clear, your grill is telling you something important. These combustion irregularities usually point to poor airflow or low-quality pellets breaking down unevenly.
Black smoke often means incomplete combustion, which happens when your burn pot is clogged with ash or the air intake is restricted. Give your firepot a thorough cleaning and check that nothing is blocking the fresh air supply. Excessive white smoke at startup is normal, but if it persists, you might be dealing with wet pellets that need replacing.
Flames that dance erratically or shoot unusually high suggest inconsistent pellet feeding, which could mean your auger needs attention or your pellets have varying moisture content. Remember, quality pellets are not just better for cooking; they’re an eco-friendly choice that burns cleaner and keeps your system healthier longer. Address these warning signs promptly to maintain both performance and efficiency.
Eco-Friendly Maintenance: Sustainable Practices for Pellet Grill Care
Caring for your pellet grill doesn’t mean you have to compromise your environmental values. In fact, proper maintenance actually enhances your grill’s eco-friendliness by maximizing efficiency and reducing waste.
Let’s start with ash disposal, which is surprisingly simple and earth-friendly. The ash from wood pellets is completely natural and makes an excellent addition to your compost bin or garden soil, as long as you’re burning pure hardwood pellets without additives. Just make sure the ash has cooled completely (we’re talking 24 hours minimum) before adding it to your garden beds. This natural byproduct adds beneficial minerals to soil and helps balance pH levels, turning what could be waste into a resource.
When it comes to cleaning products, you can skip the harsh chemicals entirely. A simple mixture of warm water and white vinegar works wonders for cutting through grease on grates and surfaces. For stubborn buildup, baking soda creates a gentle abrasive paste that won’t harm your grill’s finish or release toxic fumes. These pantry staples are safer for you, your family, and the environment compared to commercial cleaners loaded with harsh chemicals.
Here’s where maintenance truly impacts sustainability: a well-maintained pellet grill burns fuel significantly more efficiently. When you keep your fire pot clean, auger free of debris, and temperature probe accurate, your grill uses fewer pellets to maintain consistent heat. This means less fuel consumption and lower costs over time. Regular vacuuming of your fire pot and burn chamber ensures proper airflow, which translates directly to complete combustion and minimal waste.
By combining these sustainable practices with regular maintenance, you’re not just extending your grill’s lifespan—you’re making every cookout a little kinder to our planet.
Taking care of your pellet grill doesn’t have to be complicated or time-consuming. The truth is, spending a few minutes on regular maintenance is far simpler and more affordable than dealing with unexpected repairs or, worse yet, replacing your entire unit. Think of it as an investment in countless memorable meals and gatherings around the warmth of your outdoor cooking space.
Creating a grill maintenance schedule that works for your lifestyle is the key to success. Whether you jot it down in your phone or mark it on the calendar, having a routine ensures nothing gets overlooked. Your pellet grill is more than just cooking equipment; it’s part of your home’s outdoor living experience, bringing people together and creating that inviting ambiance we all crave.
A well-maintained pellet grill will serve you reliably for years to come, delivering consistent results every time you fire it up. Plus, you’ll enjoy the peace of mind knowing your investment is protected and your cooking adventures can continue uninterrupted, season after season.

")