


Inspect your wood stove flue at least once every 50-60 burns or annually to check for creosote buildup—that dark, crusty substance clinging to your flue walls that can ignite and cause chimney fires. Creosote accumulates faster when you burn unseasoned wood or run your stove at low temperatures, creating a dangerous fire hazard that puts your home and family at risk.
**Recognize the warning signs that demand immediate attention:** difficulty starting fires, smoke backing up into your room instead of drawing upward, a strong smoky odor even when the stove isn’t lit, or visible flaky black deposits when you shine a flashlight up the flue. These indicators mean your flue has moved beyond routine maintenance into urgent territory.
Understanding your flue cleaning options empowers you to make confident decisions about your wood stove’s care. DIY cleaning works beautifully for homeowners comfortable working on roofs and handling specialized brushes, typically saving $150-300 annually while giving you intimate knowledge of your system’s condition. Professional chimney sweeps bring specialized cameras, commercial-grade tools, and trained eyes that spot structural issues you might miss—making them invaluable for first-time cleanings or when you’ve noticed performance problems.
This comprehensive guide walks you through both approaches, helping you assess your comfort level, gather the right equipment, execute effective cleaning techniques, and establish a maintenance schedule that keeps your wood stove burning safely and efficiently season after season.
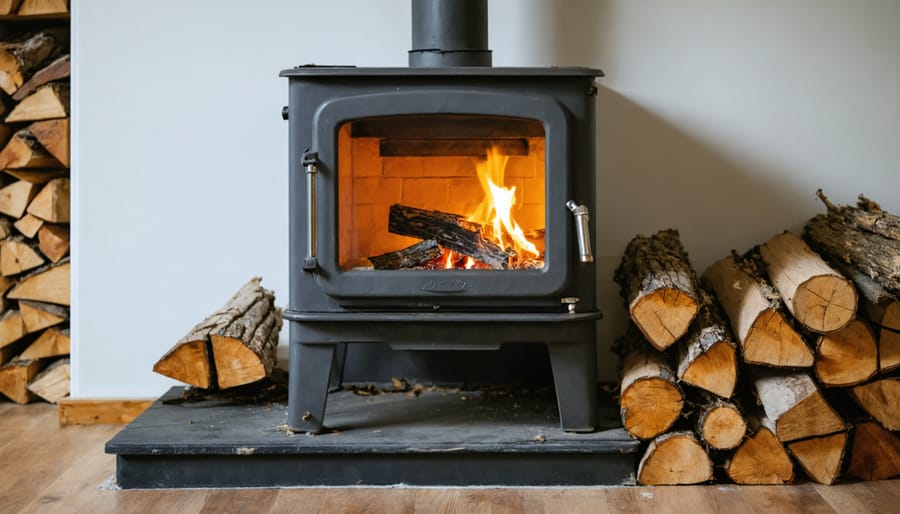
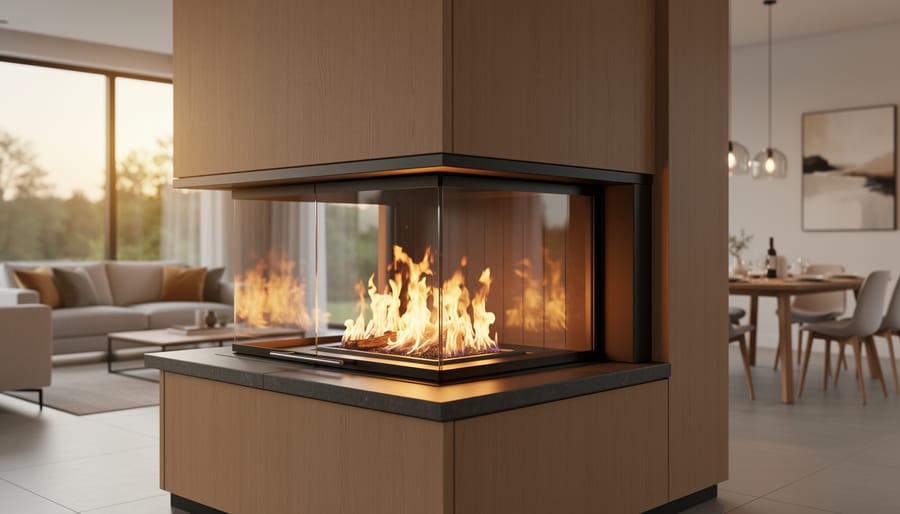
Why Your Wood Stove Flue Needs Regular Cleaning
The Creosote Problem Nobody Talks About
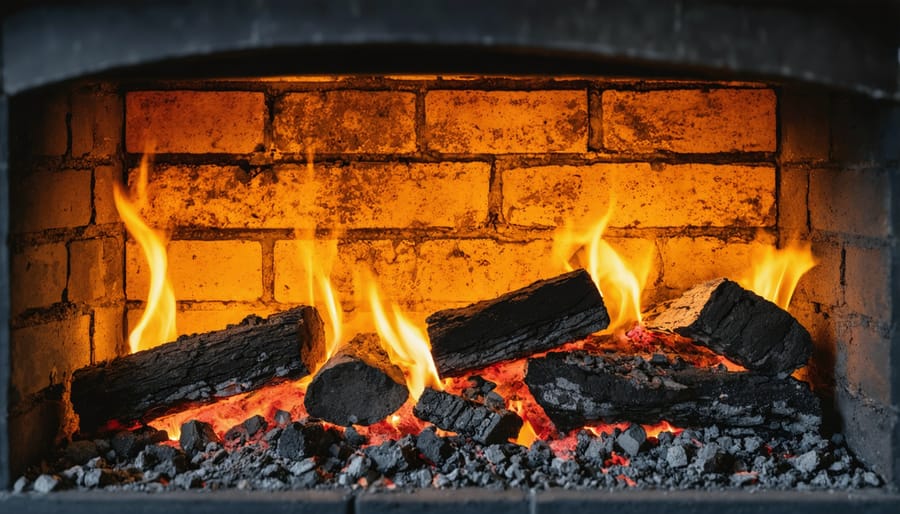
Let’s talk about the invisible threat lurking in your flue—creosote. This tar-like substance is the byproduct of incomplete combustion, and understanding it is crucial for keeping your home safe and your wood stove running efficiently.
When wood burns, it releases smoke, water vapor, and various gases. As these rise through your cooler flue, they condense and stick to the inner walls, forming creosote. Think of it like steam condensing on a bathroom mirror, except what’s left behind is potentially dangerous. Factors like burning unseasoned wood, running your stove at low temperatures, or restricted airflow accelerate this buildup.
Creosote comes in three distinct stages, each progressively more hazardous:
**Stage 1 creosote** appears as a flaky, sooty dust that’s relatively easy to brush away during routine cleaning. It’s light brown or black and hasn’t hardened yet—this is the stage you want to catch it at.
**Stage 2** is the turning point. The deposits become tar-like, shiny, and sticky, clinging stubbornly to your flue walls. Standard brushes struggle here, often requiring specialized tools or professional intervention.
**Stage 3 creosote** is where things get serious. This hardened, glaze-like coating has essentially baked onto your flue, concentrating incredible fuel potential. It’s extremely difficult to remove and represents a significant fire hazard.
Here’s the scary part: all three stages are highly flammable, but Stage 3 can ignite at temperatures your stove regularly reaches, potentially causing a devastating chimney fire.
How Often Should You Really Clean Your Flue?
The National Fire Protection Association recommends inspecting and cleaning your flue at least once a year—but your lifestyle and burning habits might require more frequent attention. Think of it like maintaining your car: the more you use it, the more care it needs.
If you burn your wood stove daily throughout winter, plan on cleaning your flue at least once during the season and again before you start burning next year. Weekend users can typically get by with annual cleanings, though inspection is still wise mid-season.
The type of wood you burn matters tremendously. Softwoods like pine create more creosote buildup than hardwoods like oak or maple, potentially doubling your cleaning needs. Similarly, burning unseasoned or wet wood—even occasionally—accelerates dangerous deposits and warrants more frequent cleaning.
Watch for warning signs between scheduled cleanings: reduced draft, smoke backing into your room, or that distinctive tar smell. If you notice a dull roaring sound, that’s creosote igniting—stop using your stove immediately and call a professional.
For those embracing wood heat as an eco-friendly heating solution, this maintenance rhythm becomes second nature, ensuring your system burns cleanly and efficiently while keeping your home safe and cozy.
Signs Your Flue Desperately Needs Cleaning
Your wood stove may be crying out for attention without you even realizing it. Learning to recognize these warning signs helps you maintain a safer, more efficient heating system while protecting your home and loved ones.
**Black smoke from your chimney** is perhaps the most visible red flag. While a slight haze is normal during startup, thick, dark smoke indicates incomplete combustion—often caused by creosote buildup restricting airflow. Your neighbors might notice this before you do, so keep an eye out when you’re outside.
**A strong, unpleasant odor** when your stove isn’t burning suggests creosote deposits are present. This smell intensifies during humid weather or summer months when trapped moisture activates the tar-like substance. If your living room smells like a campfire when the stove is cold, it’s time for cleaning.
**Difficulty starting or maintaining fires** points to airflow problems. When your flue is clogged, fires struggle to stay lit, burn inefficiently, or produce excessive smoke that backs up into your home. You shouldn’t need multiple attempts to get a fire going in a properly maintained system.
**Visible creosote buildup** inside your stove or at the base of your chimney appears as a black, crusty, or shiny glazed coating. Even a quarter-inch accumulation warrants immediate attention—this substance is highly flammable and responsible for most chimney fires.
**Falling debris or soot** when opening your stove door indicates buildup breaking loose above. You might also notice bits of creosote in your firebox between burns.
**Poor draft performance** manifests as smoke entering your room rather than rising up the flue. This dangerous situation demands immediate investigation, as it exposes your family to harmful gases including carbon monoxide.
Trust your instincts—if something seems off with your wood stove’s performance, it probably is.
What You’ll Need: Tools and Safety Equipment
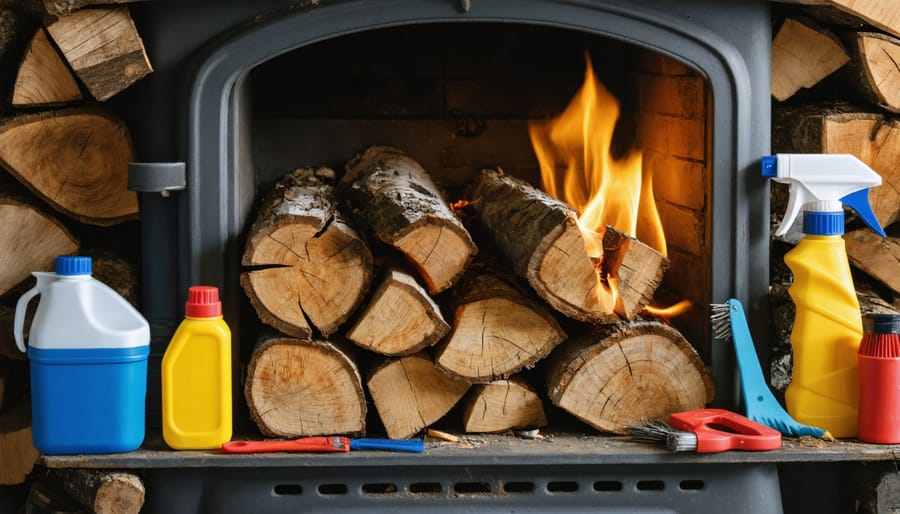
Essential Cleaning Tools
Before you tackle flue cleaning, gathering the right tools makes all the difference between a frustrating afternoon and a job well done. Your most crucial investment is a **chimney brush**, and sizing matters tremendously—measure your flue’s interior dimensions (round flues typically range from 6 to 8 inches, while rectangular ones vary widely) and choose a brush that’s slightly larger to ensure proper scrubbing without getting stuck. Wire brushes work best for metal flues, while poly brushes protect clay tile liners from damage.
You’ll need **extension rods** to reach the entire flue length—flexible fiberglass rods navigate bends more easily than rigid versions. Protect your living space with heavy-duty **drop cloths** around the stove, because creosote dust travels everywhere. A **shop vacuum with a fine filter** captures the mess without redistributing particles into your air, supporting healthier indoor air quality while you work.
Don’t overlook a bright **flashlight and inspection mirror**—they’re essential for spotting problem areas and confirming you’ve removed all buildup. Think of these tools as an investment in your home’s safety and your stove’s efficiency, helping you maintain the eco-friendly heating solution you’ve chosen for your family’s comfort.
Safety Gear You Can’t Skip
Before you climb onto your roof or reach into your flue, let’s talk about protecting yourself. Cleaning a wood stove flue isn’t just messy—it can be genuinely hazardous to your health if you’re not properly equipped.
Creosote dust and soot contain fine particles that you absolutely don’t want in your lungs. When disturbed during cleaning, these substances become airborne and can cause respiratory irritation or worse with repeated exposure. That’s why a quality dust mask or respirator isn’t optional—it’s essential. Look for an N95-rated respirator at minimum to filter out those microscopic particles.
Safety goggles are equally important. Creosote flakes and soot have a sneaky way of falling directly into your eyes when you’re working overhead, causing painful irritation and potentially scratching your cornea.
Heavy-duty work gloves protect your hands from sharp metal edges inside the flue and the caustic nature of creosote buildup. Choose something thick and durable, not your everyday gardening gloves.
Finally, wear old clothes you don’t mind ruining—or better yet, disposable coveralls. Creosote stains are notoriously stubborn, and you’ll want this protective barrier between the grime and your skin. Think of safety gear as your armor for maintaining your eco-friendly heating investment.
Step-by-Step: Cleaning Your Wood Stove Flue
Preparing Your Space and Stove
Before you begin your flue cleaning adventure, proper preparation makes all the difference between a manageable task and a sooty disaster. Think of this stage as creating your safety zone—it’ll save you hours of cleanup later.
Start by clearing the area around your stove completely. Move furniture, rugs, and any decorative items at least six feet back. Lay down heavy-duty drop cloths or old sheets in overlapping layers, extending well beyond your work area. This protective barrier is your first line of defense against the inevitable dust.
Next, seal off the stove opening with plastic sheeting and painter’s tape once you’ve removed the stovepipe sections. This crucial step contains the mess inside your stove rather than letting it billow into your living space. If your stovepipe connects with screws, have a drill ready; otherwise, a gentle twisting motion usually releases friction-fit pipes.
Keep a shop vacuum nearby specifically for ash removal—regular vacuums can’t handle the fine particles. Have a metal bucket with a lid ready for debris collection, since ash can retain heat for days. Similar to cleaning fireplace ashes, moisture control is key, so slightly dampen the drop cloths to help catch airborne particles. Finally, open windows for ventilation and wear protective gear including a quality dust mask, safety glasses, and old clothes you don’t mind sacrificing to the cause.
The Top-Down Cleaning Method
The top-down method is the traditional approach many professionals use, and it’s often more effective at removing stubborn creosote buildup. However, it does require safe roof access, so let’s walk through this carefully.
First, assess your roof situation. If it’s steep, icy, or you’re uncomfortable with heights, this isn’t the time to prove anything—call a professional. Your safety matters more than any cost savings. Assuming you have safe access, wear non-slip shoes and use proper fall protection equipment.
Once on the roof, remove the chimney cap carefully and set it aside. Attach the appropriate-sized brush to your first rod section. The brush should fit snugly in the flue—tight enough to make contact with the walls but not so tight that you’re forcing it.
Now for the technique: Insert the brush into the flue and use firm, steady up-and-down strokes. Think of it like brushing your teeth—aggressive scrubbing isn’t necessary. Work in sections, adding rod extensions as you go deeper. You’ll feel the resistance change as deposits break free, and you might hear debris falling below.
How do you know when it’s clean? The brush should move smoothly without catching on heavy buildup, and you shouldn’t see thick, flaky deposits on the brush when you pull it up. Most flues need 15-30 minutes of thorough brushing.
After finishing, replace the cap securely and head inside to collect the fallen debris—the messy but satisfying proof of your eco-friendly maintenance work.
The Bottom-Up Approach (When Roof Access Isn’t Safe)
If accessing your roof feels risky—whether due to height, steep pitch, or challenging weather—cleaning from below through your stove opening is a perfectly viable option. This bottom-up method works especially well for multi-story homes where scrambling onto the roof simply isn’t worth the danger.
Here’s the reality: cleaning from below gets messier, but it’s manageable with proper preparation. Before you begin, completely seal off the stove opening with heavy plastic sheeting and duct tape, creating a work chamber. Cut a small slit for your brush handle to pass through. Remove the baffle plates inside your stove if possible—they’ll give your brush easier passage upward.
The technique involves threading your flexible rods upward through the flue, which requires patience as you’re working against gravity. You’ll feel when the brush reaches the top and breaks through. Work the brush up and down thoroughly, letting debris fall into your sealed stove chamber rather than your living room.
The trade-off? More containment work upfront, but zero roof climbing. For many homeowners, especially those embracing the cozy lifestyle of wood heat, this safer approach means you’ll actually maintain your system regularly rather than avoiding it out of fear—keeping your eco-friendly heating solution running cleanly all season long.
Cleaning the Stovepipe and Connections
While your chimney’s vertical sections get plenty of attention, the stovepipe and connections demand special care—they’re where creosote loves to settle in. Horizontal runs and elbows catch more creosote because smoke slows down and cools as it changes direction, leaving behind stubborn, tarry deposits.
Start by disconnecting the stovepipe sections carefully. You’ll likely find a thick layer of creosote buildup, especially on the bottom of horizontal pipes. Use a stiff wire brush to scrub these sections thoroughly, working outdoors if possible to contain the mess. Pay extra attention to elbows and joints where creosote accumulates fastest.
Don’t overlook your damper and baffle plate—these hardworking components regulate airflow and heat efficiency, making them essential to your stove’s eco-friendly performance. The damper, usually located in the stovepipe just above the stove, can become caked with deposits that prevent it from moving freely. Clean it completely and ensure smooth operation.
Inside your firebox, the baffle plate (that metal deflector above the flames) catches significant amounts of ash and creosote. Remove it according to your manufacturer’s instructions and brush away all buildup. A clean baffle maximizes heat transfer and reduces emissions—better for your home’s warmth and the environment.
Final Inspection and Reassembly
Before reassembling, thoroughly inspect your flue system. Look for cracks in the liner, damaged mortar joints, or rust spots that could compromise safety. Check for any remaining creosote buildup—it should be minimal after cleaning. Examine the damper mechanism to ensure smooth operation.
When reassembling, work methodically from top to bottom. Secure all pipe connections tightly, ensuring gaskets are properly seated. Replace any worn seals or fasteners. Double-check that your chimney cap is firmly attached to prevent wildlife entry and weather damage.
Finally, complete your maintenance with proper ash removal from your stove before lighting your first post-cleaning fire. A clean, well-maintained system isn’t just about efficiency—it’s about creating a safe, eco-friendly heating solution that keeps your home cozy all season long.
When to Call a Professional Instead
While there’s real satisfaction in maintaining your own wood stove, some situations absolutely call for professional expertise—and that’s nothing to feel awkward about. Your safety and your home’s integrity matter far more than DIY bragging rights.
Stage 3 creosote is the biggest red flag. This hard, glazed buildup looks shiny or tar-like and can’t be removed with standard brushes. It requires specialized removal techniques and often indicates deeper combustion issues that need diagnosing. If you spot this glossy coating, step back and call the pros.
Structural concerns also warrant professional eyes. Cracked flue tiles, deteriorating mortar, or rust-through in metal chimneys compromise safety and may require wood burning insert repair or complete flue replacement. These aren’t cosmetic issues—they’re potential fire hazards or carbon monoxide risks.
Complex flue configurations with multiple bends, offsets, or exceptionally long runs make thorough DIY cleaning nearly impossible. Professionals have camera equipment to verify complete cleaning and specialized tools to navigate tricky passages.
Height and access challenges matter too. If your roof pitch feels intimidating or your chimney extends more than one story, professional equipment and experience make the job exponentially safer. Insurance and proper safety harnesses aren’t luxuries—they’re necessities.
Finally, staying current with wood burning regulations in your area sometimes requires professional certification of your system’s condition. Think of professionals as partners in your wood-burning lifestyle, not admissions of defeat. They’re there to keep your cozy fires burning safely for years to come.
Preventing Creosote Buildup Between Cleanings
Burn Hotter, Burn Cleaner
The secret to a cleaner flue starts with how you burn. When your fire burns hot enough—typically between 300-400°F at the flue collar—wood combusts completely, producing minimal smoke and far less creosone buildup. Think of it as the difference between a candle flickering versus burning bright and steady.
Avoid the temptation to dampen down your stove too much, especially during startup. Those smoldering, smoke-heavy fires might seem economical, but they’re creosote factories. Instead, burn smaller, hotter fires using properly seasoned wood with moisture content below 20%. Load your stove with appropriately-sized splits rather than stuffing it full, allowing adequate airflow for complete combustion.
Here’s your game plan: Start with kindling and small pieces to establish a robust coal bed. Once you’ve got strong flames, add larger logs but resist overloading. Keep the air intake open enough to maintain lively flames—you should see active fire, not just glowing wood surrounded by smoke.
This approach isn’t just about cleaner chimneys; it’s an eco-friendly heating solution that extracts maximum heat from every log while minimizing environmental impact. Your wood stove becomes more efficient, your flue stays cleaner longer, and you’ll enjoy the authentic ambiance of a properly burning fire—exactly what makes wood heating such a satisfying lifestyle choice.
The Right Wood Makes All the Difference
The type of wood you burn has a surprisingly direct impact on how often you’ll need to clean your flue—and how much creosote builds up between cleanings. Think of it as choosing the right fuel for your lifestyle, one that keeps your stove burning beautifully while minimizing maintenance headaches.
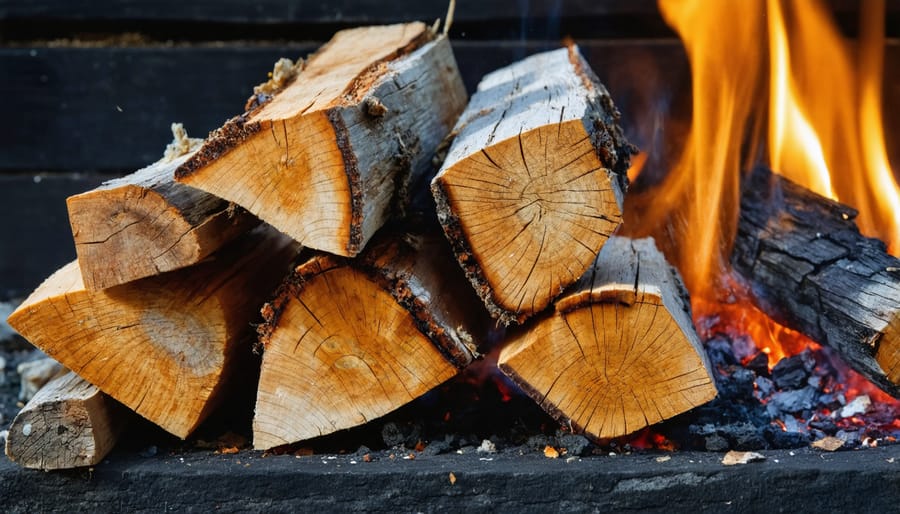
Seasoned hardwoods are your best friends when it comes to clean burning. Woods like oak, maple, ash, and birch have been dried for at least six months to a year, reducing their moisture content to below 20%. This matters because wet or “green” wood produces more smoke and significantly more creosote deposits. You’re essentially sending unburned particles straight up your flue, where they cool and stick to the chimney walls.
Testing your wood is simple and worthwhile. Invest in an inexpensive moisture meter—just split a piece of wood and press the meter’s prongs into the freshly exposed surface. Anything above 20% moisture means the wood needs more seasoning time. You can also look for visual clues: seasoned wood has darkened ends with visible cracks, feels lighter, and makes a sharp “crack” sound when two pieces are struck together.
Beyond the practical benefits, choosing properly seasoned local hardwoods supports sustainable heating. You’ll burn less wood overall since dry wood produces more heat per log, reducing your environmental footprint while creating that cozy ambiance you love. It’s a win for your chimney, your wallet, and the planet.
Common Mistakes That Make Things Worse
Let’s talk about what *not* to do—because when it comes to flue cleaning, good intentions can sometimes lead to problematic outcomes.
**The Chemical Cleaner Myth**
Those miracle powders and logs promising to clean your flue as you burn? They’re not the complete solution many homeowners hope for. While some products can help reduce creosote between cleanings, they absolutely cannot replace proper mechanical brushing. Think of them like mouthwash—helpful for maintenance, but you still need to brush your teeth. The creosote buildup in your flue requires physical removal, and no chemical shortcut changes that reality.
**Fuel Choices Matter More Than You Think**
Here’s where we need to be firm: burning trash, cardboard, treated lumber, or painted wood is dangerous and accelerates creosote buildup. These materials create toxic fumes and leave behind stubborn, tar-like deposits that are incredibly difficult to remove. Treated wood contains chemicals that become hazardous when burned, and glossy materials produce excessive creosote. Stick with seasoned hardwood and understand what you should burn in your stove for both safety and efficiency.
**Brushing Blunders**
Using the wrong-sized brush is like trying to paint a room with a toothbrush—ineffective and frustrating. Your brush needs to match your flue dimensions exactly to properly scrape away buildup. Also, avoid aggressive scrubbing on metal flue liners, as excessive force can damage the liner itself. Gentle, consistent strokes work better than forceful jabbing.
**The “I’ll Just Burn It Hot” Fantasy**
Some believe running their stove extremely hot will “burn off” creosote. Wrong. This dangerous practice can actually ignite existing creosote, causing a chimney fire. Regular cleaning, proper fuel, and maintaining appropriate burning temperatures prevent problems—extreme heat doesn’t solve them.
Keeping your wood stove flue clean isn’t just another item on your home maintenance checklist—it’s an essential part of enjoying those cozy evenings by the fire with complete peace of mind. A well-maintained flue means safer burns, more efficient heat, and that wonderful ambiance you fell in love with when you first chose wood heating as part of your lifestyle.
Think of regular flue cleaning as an investment in both your family’s safety and your home’s warmth. By staying on top of this task, whether you tackle it yourself or call in a professional, you’re preventing chimney fires, reducing harmful emissions, and ensuring your stove performs at its best throughout the season. That’s responsible homeownership that also happens to be kinder to the environment.
So go ahead—schedule that next cleaning with confidence. You’ve got the knowledge, you understand the why behind the what, and you’re ready to keep your wood burning experience everything it should be: warm, efficient, and wonderfully worry-free. Here’s to many more seasons of crackling fires and sustainable comfort!

")