

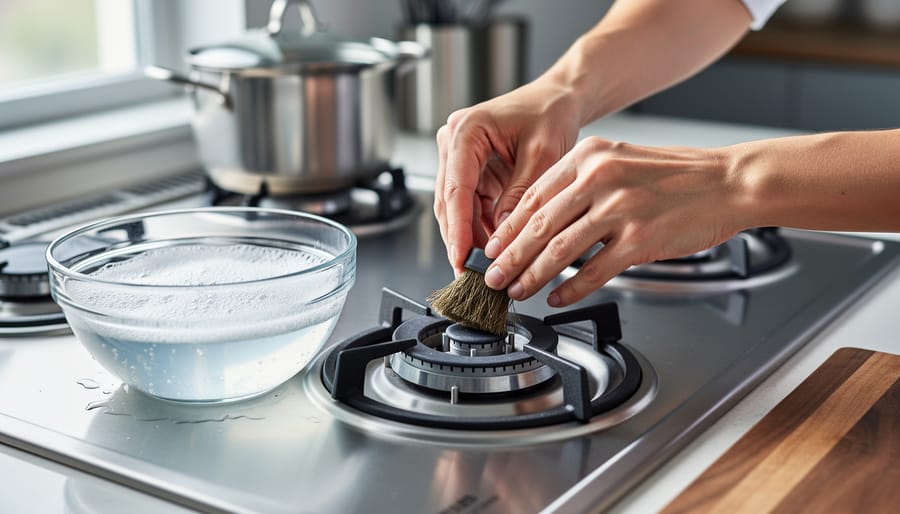

Inspect your burner ports monthly by removing the grates and cleaning any visible debris with a soft brush—clogged ports create uneven flames and waste gas, costing you money while reducing cooking efficiency. Turn off your gas supply completely, then wipe down burner caps and heads with warm, soapy water to prevent grease buildup that leads to yellow flames instead of the crisp blue you need for optimal heat.
Check your igniter electrodes every few weeks by gently wiping away food particles that prevent proper sparking—a clean igniter means no more frustrating clicking or reaching for matches. Clean the stovetop surface after each use with non-abrasive cleaners to prevent hardened spills from blocking gas flow, which creates dangerous incomplete combustion and releases harmful carbon monoxide into your kitchen.
Schedule a deep clean quarterly where you remove all removable parts, soak them in degreasing solution, and use a straightened paperclip to clear individual port holes—this 30-minute investment prevents the majority of gas stove problems before they start. Listen for any hissing sounds when burners are off, watch for persistent yellow or orange flames, and immediately call a professional if you smell gas beyond the brief whiff when igniting.
These simple maintenance habits extend your stove’s lifespan by years while keeping your family safe and your heating costs down. Regular care transforms your gas stove from a potential hazard into a reliable, eco-friendly cooking companion that performs beautifully for decades.
Why Gas Stove Maintenance Actually Matters
Let’s be honest: nobody wakes up excited about cleaning their gas stove. But here’s the thing – maintaining your gas stove isn’t just about keeping up appearances or following some arbitrary household rule. It’s about protecting your home, your family, and yes, your wallet.
The most critical reason is safety. Gas stoves that aren’t properly maintained can develop leaks you might not even smell, especially if the leak is small. Carbon monoxide buildup is another real concern when burners aren’t burning cleanly – and unlike natural gas, you can’t smell carbon monoxide at all. Those yellow or orange flames flickering on your burners? That’s not charming ambiance; it’s a sign of incomplete combustion that could be releasing harmful gases into your kitchen.
Then there’s the money factor. A well-maintained gas stove runs more efficiently, which means lower energy bills month after month. When burners are clogged or igniters are dirty, your stove works harder and uses more gas to achieve the same heat. Over a year, that inefficiency adds up. Plus, catching small issues early – like a worn gasket or a burner that needs adjustment – can save you from facing an $800 or more repair bill down the road.
And let’s talk about cooking performance. If you’ve ever wondered why your pots aren’t heating evenly or why that back burner takes forever to boil water, maintenance is usually the answer. Clean, well-adjusted burners deliver consistent heat that makes cooking predictable and enjoyable. Regular care keeps your stove performing the way it did when it was new, extending its lifespan by years.
Daily Habits That Keep Your Gas Stove Running Smoothly
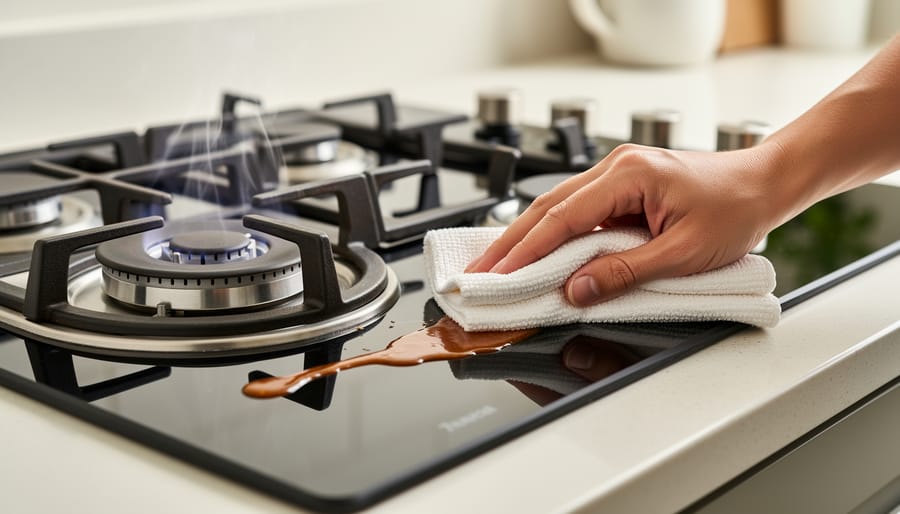
Wipe Up Spills While They’re Still Warm
Here’s the secret to keeping your gas stove looking pristine and performing beautifully: tackle spills the moment they happen. When you catch those drips and splatters while they’re still warm, they wipe away effortlessly with just a damp cloth. Wait until they cool and harden, though, and you’re setting yourself up for serious scrubbing sessions and potential burner performance issues.
Hardened food residue doesn’t just look unsightly. It creates real problems for your stove’s efficiency. Built-up spills can block gas ports, leading to uneven flames that waste energy and cook food unevenly. Think of it like maintaining any heating appliance in your home—regular attention prevents bigger headaches down the road.
For sugary spills like sauces or sodas, speed is everything. These caramelize quickly as they cool, forming rock-hard deposits. Grab a warm, damp cloth and gently wipe them away immediately. Greasy splatters respond well to a drop of dish soap on your cloth for that extra cutting power.
Starchy spills from pasta water or milk need a slightly different approach. Let them cool for just thirty seconds so you don’t burn yourself, then wipe with a cloth dampened in warm water. The residue will lift right off before it has a chance to cement itself to your cooktop.
This simple habit takes seconds but saves you hours of deep cleaning while keeping your stove running efficiently.
Check Your Burner Flames
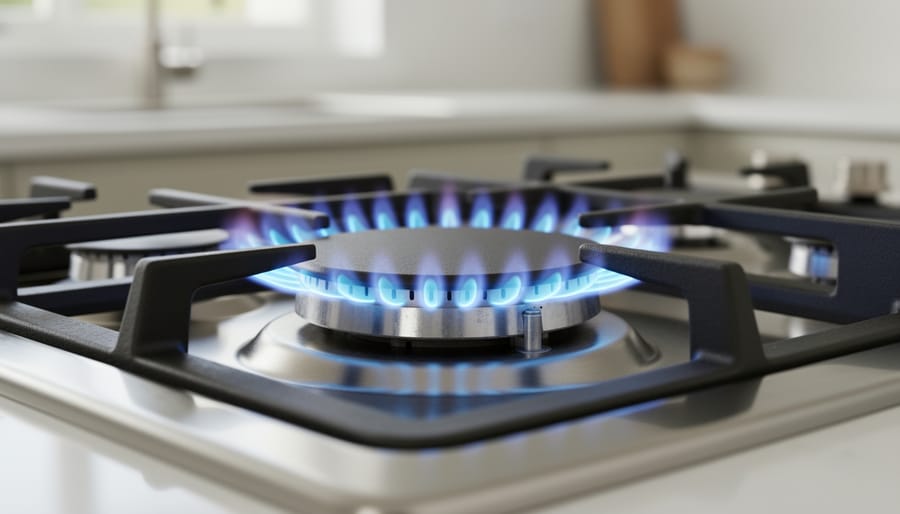
A healthy gas stove flame tells you everything is working efficiently and safely. When you turn on your burner, take a moment to observe the flames. You’re looking for a steady, cone-shaped flame that burns a crisp blue color with perhaps just a hint of blue-green at the base. This blue flame indicates complete combustion, meaning your stove is burning gas efficiently and producing minimal carbon monoxide.
If you notice yellow, orange, or red flames, that’s your stove’s way of signaling trouble. These colors indicate incomplete combustion, which wastes energy, increases your utility bills, and can release harmful carbon monoxide into your home. Common causes include clogged burner ports from food spills or dust buildup. You might also notice the flames flickering excessively, appearing lazy or wavering, or producing a sooty residue on your cookware.
Here’s a simple inspection technique: Light each burner individually in a dimly lit kitchen where you can clearly see the flame colors. Check all sides of the burner, rotating your view around the stove. If you spot any yellow flame issues, turn off the burner and let it cool before cleaning the ports with a soft brush or needle to remove debris.
Weekly Cleaning That Takes Less Than 15 Minutes
The Right Way to Remove and Clean Burner Components
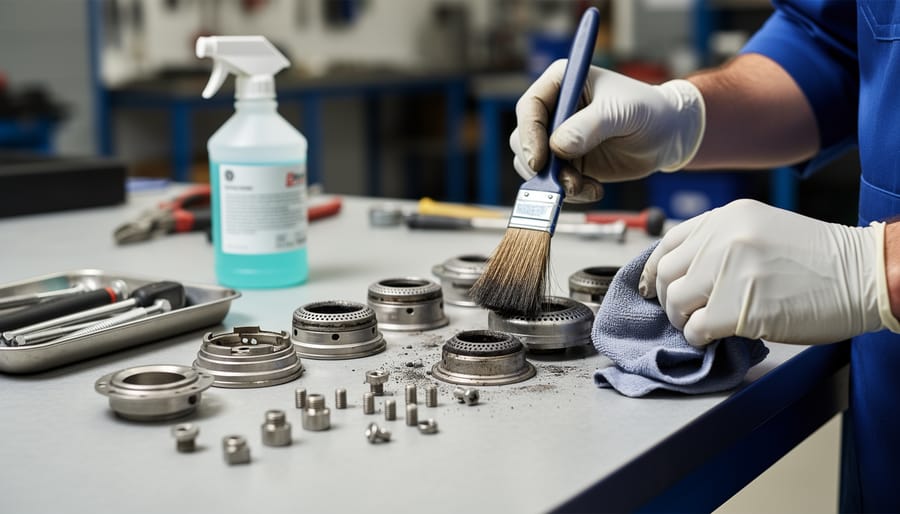
Before you begin cleaning your gas stove’s burner components, safety comes first. Make sure the stove is completely cool and the gas supply is turned off. Gently lift each burner cap and head straight up from the stovetop. Most models allow for easy removal without any tools, though you may need to wiggle them slightly if they’ve been in place for a while.
Once removed, fill your sink or a large basin with warm water and add a few drops of mild dish soap. Let the burner caps and heads soak for 15 to 20 minutes. This gentle approach loosens built-up grease and food residue without harsh scrubbing that could damage the finish. Think of it as giving your burners a relaxing spa treatment rather than an aggressive cleaning session.
After soaking, use a soft-bristled toothbrush or non-abrasive sponge to clean the surfaces. The real challenge often lies in those tiny burner ports where gas flows through. If you notice clogged holes, a straightened paperclip or wooden toothpick works wonderfully to clear them. Never use metal tools like pins or needles that could scratch and enlarge the ports, which affects flame efficiency and your stove’s overall energy performance.
Here’s a common mistake to avoid: resist the urge to put burner components in the dishwasher. The intense heat and harsh detergents can warp metal and damage protective coatings. Similarly, avoid abrasive cleaners or steel wool pads that scratch surfaces, creating rough spots where grime accumulates faster.
After cleaning, rinse everything thoroughly with clean water and let the parts air dry completely on a towel. Any remaining moisture can cause sputtering when you relight your stove. Once fully dry, carefully reassemble the components, ensuring each burner cap sits flat and centered over its base for optimal, eco-friendly performance.
Cleaning Your Stove Top Surface Without Scratching
Your stovetop surface works hard alongside your cooking, and keeping it pristine doesn’t have to mean endless scrubbing. The key is matching your cleaning approach to your specific surface material.
For porcelain enamel stovetops, gentle is the golden rule. A simple paste of baking soda and water works wonders on everyday spills without the harsh chemicals. Apply it with a soft cloth using circular motions, then wipe clean with warm water. This eco-friendly solution is kind to both your surface and the environment.
Stainless steel surfaces benefit from cleaners designed specifically for this material, or you can create your own with equal parts water and white vinegar. Always wipe in the direction of the grain to avoid streaking. For glass stovetops, let the surface cool completely before cleaning, then use a specialized glass cooktop cleaner or that trusty baking soda paste.
Stubborn, burnt-on stains require patience rather than force. Soak the area with warm, soapy water for 10-15 minutes to loosen the residue. For particularly challenging spots, a plastic scraper held at a shallow angle can lift debris without scratching.
Remember, abrasive scrubbers and harsh chemicals are your stovetop’s enemies. Stick with soft cloths, microfiber towels, and gentle cleaners to maintain that showroom shine while protecting your investment.
Monthly and Seasonal Deep Maintenance Tasks

Inspecting and Cleaning Ignition Systems
A healthy ignition system is the heartbeat of your gas stove, ensuring reliable starts every time you need warmth and ambiance. Let’s explore how to keep this vital component in top condition.
For electronic ignition systems, start by unplugging your stove or switching off the circuit breaker for safety. Gently remove the burner grates and caps to access the igniter. These small ceramic or metal components should spark when you turn the knob. Check for food debris, grease buildup, or moisture that might prevent sparking. A soft, dry toothbrush works wonderfully for gentle cleaning. For stubborn residue, use a cotton swab dipped in rubbing alcohol, being careful not to damage the delicate igniter tip. Allow everything to dry completely before reassembling, as moisture is a common cause of igniter problems after cleaning.
If your stove uses pilot light systems, inspect the small flame regularly. It should burn steady and blue. A yellow or orange flame suggests incomplete combustion and needs adjustment. Keep the pilot orifice clean using a thin wire or needle to remove any blockages.
Watch for warning signs that require professional attention: persistent clicking without ignition, weak or inconsistent sparking, cracks in the igniter ceramic, or pilot lights that won’t stay lit. These issues affect both performance and safety, making your heating solution less efficient and potentially releasing harmful gases. Regular inspection keeps your home safe while supporting eco-friendly operation.
Checking Gas Connections and Hoses
Gas connections deserve your careful attention as part of your regular maintenance routine. Start by turning off your gas stove and allowing it to cool completely. Visually inspect all visible gas lines and connections for any obvious damage, corrosion, or loose fittings. Look for discoloration around connection points, which can indicate a potential leak.
The soap-bubble test is your most reliable DIY method for detecting gas leaks. Mix a few drops of dish soap with water in a spray bottle, then lightly spray the solution onto connections, valves, and flexible hoses while the gas is on but burners are off. Watch carefully for bubbles forming, which indicate escaping gas. If you spot any bubbles, turn off the gas immediately and contact a qualified technician.
Flexible gas hoses typically need replacement every 5-10 years, depending on their material and condition. Check your hose for cracks, brittleness, kinks, or fraying in the protective coating. Any stiffness or loss of flexibility signals it’s time for a replacement. Also watch for rust or corrosion on metal connectors.
Red flags requiring immediate professional attention include the smell of gas (that distinctive sulfur odor), hissing sounds near connections, or a yellow or orange flame instead of the efficient blue flame your gas appliance should produce. When it comes to gas safety, it’s always better to err on the side of caution and call in an expert.
Troubleshooting Common Issues Before Calling a Technician
Weak, Uneven, or Yellow Flames
If your gas stove’s flames appear weak, yellow, or uneven, don’t worry—this is one of the most common issues and usually straightforward to fix. These flame problems typically signal that your burner isn’t getting the right fuel-to-air mixture, which not only affects cooking performance but can also reduce efficiency and increase emissions.
Start by checking for clogged burner ports. Turn off the gas and let everything cool completely. Remove the burner grates and caps, then look closely at the small holes around each burner. Use a straightened paperclip or thin wire to gently clear any debris—never use toothpicks, as they can break off inside. A soft brush works well for surface cleaning.
If cleaning doesn’t solve the problem, you may need to adjust the air shutter. This small sliding plate near the burner’s base controls how much air mixes with the gas. Loosen the set screw slightly, then make small adjustments while the burner is lit. You’re aiming for steady blue flames with just a hint of yellow at the tips. Too much air creates lifting flames that may blow out; too little produces those telltale yellow flames.
Persistent yellow flames after these fixes could indicate the wrong orifice size for your gas type. This requires professional attention to ensure safe, eco-friendly operation.
Burners Won’t Ignite or Click Constantly
If your burners won’t ignite or keep clicking even after the flame appears, don’t worry—most of these issues have simple solutions you can handle yourself. The most common culprit is moisture around the igniter, often from spills or cleaning. After wiping down your stove, simply let it air dry for 30 minutes, or gently pat the igniter area with a dry cloth.
Dirty igniters are another frequent cause. These small ceramic components need to be clean to create the spark that lights your gas. Turn off the power to your stove, then use a soft toothbrush or cotton swab to gently remove any grease or food buildup from the igniter. You’ll be surprised how often this quick fix solves the problem.
Check that your burner caps are properly aligned—they need to sit flat and centered for the igniter to work correctly. Even a slight tilt can prevent ignition or cause continuous clicking. Just lift, realign, and set them down evenly.
However, if cleaning and realignment don’t help, you might have wiring issues or a faulty igniter switch. These electrical problems require professional attention for safety. While maintaining your gas stove yourself saves energy and keeps your home heating efficiently, knowing when to call an expert protects both your family and your appliance.
Strange Smells or Sounds
Your gas stove should operate quietly and without noticeable odors during normal use. Understanding what’s typical and what signals trouble helps keep your home safe and comfortable.
During normal operation, you might hear a gentle whooshing sound when burners ignite, followed by a steady, soft hum. These sounds are perfectly normal. However, if you notice hissing, popping, or whistling sounds, something needs attention. These unusual noises often indicate a burner cap isn’t seated properly, debris is blocking gas flow, or there’s an issue with gas pressure.
Gas odors are never normal. Natural gas includes a distinctive sulfur or rotten-egg smell for safety purposes. If you detect this odor, immediately turn off all burners, open windows, avoid using electrical switches or flames, and leave your home. Call your gas company or emergency services from outside. Don’t return until professionals declare it safe.
Burned food smells are different and usually dissipate quickly with ventilation. If lingering odors persist despite thorough cleaning, check for food debris in hard-to-reach areas around burners.
Trust your senses. Any persistent unusual smell or sound deserves investigation. When in doubt, contact a qualified technician. Your family’s safety always comes first, and professional assessment provides peace of mind while maintaining your stove’s efficient, eco-friendly performance for years to come.
Safety Guidelines You Can’t Skip
Maintaining your gas stove safely doesn’t have to feel overwhelming. Think of these guidelines as your foundation for peace of mind, ensuring your cooking space remains both comfortable and secure for everyone in your home.
Let’s start with the basics of gas leak detection. Natural gas has that distinctive rotten egg smell added specifically so you’ll notice leaks immediately. If you detect this odor, don’t investigate with a flame or turn any lights on or off. Simply open windows, leave the house, and call your gas company or emergency services from outside. It’s a simple protocol that could make all the difference.
Proper ventilation is equally essential for safe operation. Your gas stove needs adequate airflow to burn cleanly and efficiently. Always use your range hood when cooking, and if you don’t have one, crack a window to keep fresh air circulating. This isn’t just about comfort—it’s about preventing the buildup of combustion byproducts in your living space.
Carbon monoxide awareness deserves your attention too. This invisible, odorless gas can accumulate when your stove isn’t burning efficiently or ventilation is poor. Install carbon monoxide detectors near your kitchen and sleeping areas, and test them monthly. Yellow or orange flames instead of blue ones signal incomplete combustion, which means it’s time for professional servicing.
Know where your gas shutoff valve is located and how to use it. In an emergency, you’ll want to act quickly without fumbling around. Most shutoff valves are near the stove itself or where the gas line enters your home.
Here’s the eco-friendly bonus: properly maintained gas stoves burn cleaner and more efficiently, reducing harmful emissions and your carbon footprint. Regular maintenance isn’t just about safety—it’s about responsible home heating that benefits both your family and the environment. When your appliance operates at peak efficiency, everyone wins.
When to Call a Professional (And What It’ll Cost)
While gas stove maintenance is something you can mostly handle yourself, certain situations absolutely require a professional. The good news? Knowing when to pick up the phone can save you money and keep your home safe.
You’ll want to call a licensed gas appliance technician if you smell gas (even faintly), notice yellow or orange flames instead of blue, hear unusual popping or roaring sounds, or if your burners won’t ignite at all. Similarly, issues with the main gas line, pressure regulator, or any component requiring disassembly of internal gas connections should always be handled by professionals. This isn’t just about capability—it’s about safety and often local building codes that require licensed technicians for gas line work.
Typical service costs vary by region and issue complexity. A basic service call usually runs between $75 and $150, which typically covers diagnosis. Cleaning or replacing a thermocouple costs around $150 to $250, while igniter replacement ranges from $150 to $300. More involved repairs like valve replacement can reach $200 to $400. Annual professional inspections, which many homeowners schedule alongside their heating system maintenance, typically cost $100 to $200 and can prevent costlier repairs down the road.
Finding a qualified technician doesn’t need to be stressful. Look for professionals certified by the National Fuel Gas Code or your state’s licensing board. Check online reviews, and don’t hesitate to ask friends for recommendations. Before hiring, ask about their gas appliance experience specifically, whether they’re licensed and insured, if they charge flat rates or hourly, and what their warranty policy covers.
Remember, a good technician will explain the problem clearly, provide options, and never pressure you into unnecessary repairs. Trust your instincts—quality service feels collaborative, not pushy.
Taking care of your gas stove doesn’t have to feel like another overwhelming chore on your endless to-do list. As we’ve explored together, most maintenance tasks take just minutes and require nothing more than the simple supplies you already have at home. A quick daily wipe-down, a weekly burner check, and a monthly deep clean are truly all it takes to keep your stove performing beautifully for years to come.
Think of it this way: those few minutes you invest in regular maintenance are protecting a significant investment in your home while ensuring your family’s safety. You’re also preserving that reliable cooking performance you depend on for everything from weeknight dinners to holiday feasts. When your stove operates efficiently, you’re even reducing energy waste, which aligns perfectly with mindful, sustainable living.
Consider jotting down a simple maintenance schedule that works for your lifestyle. Maybe Sunday evenings work for a thorough weekly check, or perhaps the first day of each month becomes your deep-clean reminder. Find what feels natural and sustainable for you.
At MyFire.Place, we believe that well-maintained heating and cooking appliances are at the heart of a comfortable, welcoming home. Whether you’re tending to your gas stove, fireplace, or any heat source that brings warmth to your space, these small acts of care create ripples of comfort and safety that touch every corner of your daily life. You’ve got this, and your future self will thank you for the effort.

")