

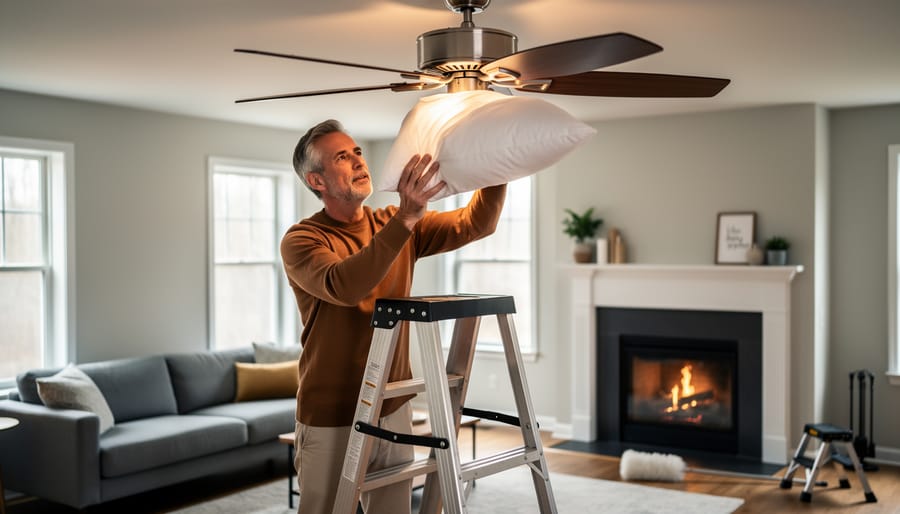

Clean your ceiling fan blades every two to three months using a pillowcase slipped over each blade to trap dust instead of sending it airborne throughout your room. Check and tighten all visible screws and mounting hardware twice yearly, as vibration from normal operation can gradually loosen connections that affect both performance and safety. Reverse your fan’s direction seasonally—counterclockwise in summer to create a cooling downdraft, and clockwise in winter at low speed to gently push warm air down from the ceiling, which works beautifully alongside your fireplace since air circulation is crucial for distributing heat evenly throughout your space. Balance wobbly fans using an inexpensive balancing kit from any hardware store, which prevents motor strain and extends your fan’s lifespan significantly. These simple maintenance habits take less than thirty minutes per season but dramatically improve your home’s comfort while reducing energy costs year-round.
The Real Cost of Ignoring Your Ceiling Fan
Neglecting your ceiling fan might seem harmless, but it can actually impact your home comfort and wallet in surprising ways. When you skip regular maintenance, you’re setting yourself up for a cascade of problems that go far beyond a dusty blade or two.
First, let’s talk about efficiency and energy costs. A dirty ceiling fan works harder to move the same amount of air, drawing more electricity in the process. Those dust-covered blades create drag and imbalance, reducing airflow by up to 30 percent. For homeowners who rely on their ceiling fans to complement heating systems and fireplaces, this means your fan isn’t properly circulating that cozy warm air throughout your rooms. The result? Your heating system runs longer and your energy bills creep upward month after month.
The wobbling and grinding noises that develop from neglect aren’t just annoying during quiet evenings by the fireplace. They signal loose hardware, bent blades, or motor strain that will eventually lead to complete fan failure. What could have been prevented with a simple tightening or cleaning becomes an expensive replacement project.
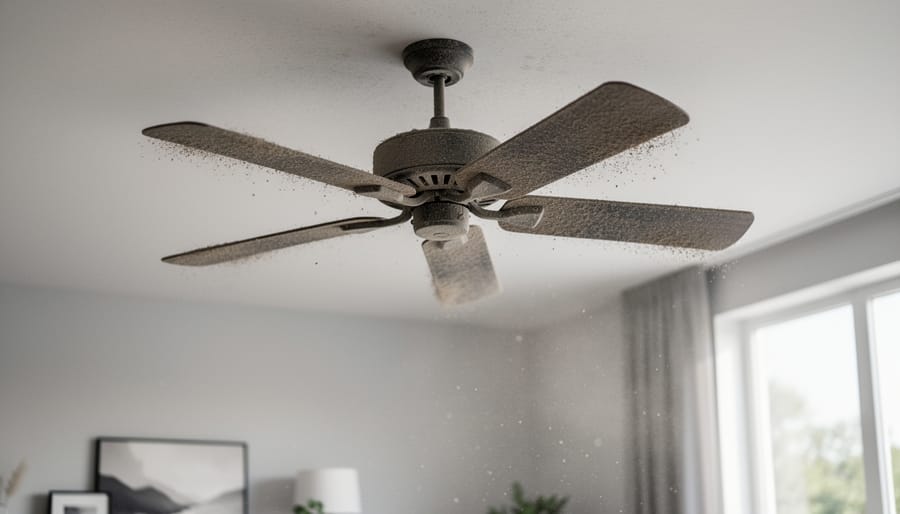
Here’s something that might surprise you: ceiling fans are silent dust collectors that directly affect your indoor air quality. Every time you turn on a neglected fan, it launches accumulated dust, pet dander, and allergens into the air you breathe. For homes with fireplaces, this problem intensifies because fine ash particles can mix with regular household dust on fan blades, creating an especially problematic combination for respiratory health.
The lifespan issue is straightforward. A well-maintained ceiling fan can last 15 to 20 years, while a neglected one might fail in half that time. Regular maintenance isn’t just about cleanliness; it’s about protecting your investment and maintaining the comfortable, eco-friendly home environment you’ve worked to create.
Safety First: Preparing for Ceiling Fan Maintenance
Before you climb up to give your ceiling fan some much-needed attention, let’s talk about keeping yourself safe. Think of maintenance preparation the same way you’d approach cleaning your fireplace—it’s all about taking the right precautions before diving in.
First things first: power down completely. Head to your electrical panel and flip the breaker switch that controls your ceiling fan. Don’t just rely on the wall switch or pull chain, as someone could accidentally turn it on while you’re working. Test the fan by trying to turn it on after switching the breaker to make sure you’ve got the right one.
Next, let’s talk about your ladder situation. A sturdy step ladder or extension ladder is essential—avoid standing on chairs, tables, or makeshift platforms. Position your ladder on level ground and make sure it’s tall enough that you’re not overreaching or standing on the top rungs. If possible, have someone nearby to spot you while you work.
Gather your supplies before you climb up. You’ll need microfiber cloths, a mild cleaning solution, a vacuum with a brush attachment, and a screwdriver set. Having everything within arm’s reach means fewer trips up and down the ladder.
Clear the area beneath your fan, moving furniture and valuables away from potential falling dust and debris. Open windows for ventilation and natural light, and consider spreading a drop cloth to catch any grime. This preparation creates a comfortable, safe workspace that lets you focus on the task at hand.
The Complete Ceiling Fan Cleaning Process
Blade Cleaning That Actually Works
Let’s face it—cleaning ceiling fan blades can feel like orchestrating a dust storm in your favorite living space. But here’s a game-changing approach that keeps the mess contained while delivering spotless results.
The pillowcase method is genuinely brilliant in its simplicity. Grab an old pillowcase and slide it over each blade, one at a time. As you pull the pillowcase back toward yourself, the fabric traps dust on both the top and bottom surfaces inside the case. No more watching dust particles drift down onto your freshly cleaned furniture or settling into the hearth of your beautiful fireplace below.
For your cleaning solution, skip harsh chemicals that leave residue and attract more dust. Mix equal parts water and white vinegar in a spray bottle, or use a few drops of mild dish soap in warm water. Lightly dampen your pillowcase with this solution—never soak it, as excess moisture can damage the blade finish or motor housing.
Start at the highest point and work your way around systematically. Apply gentle pressure as you wipe, paying extra attention to the leading edge where dust accumulates most heavily. These fan cleaning techniques work beautifully for any style of fan in your home.
After cleaning, give blades a quick buff with a dry microfiber cloth to prevent water spots. This final step ensures your fan operates smoothly and efficiently, complementing your home’s climate control whether you’re circulating warm air from your fireplace in winter or creating cooling breezes in summer.

Motor Housing and Fixture Care
Your ceiling fan’s motor housing and light fixtures deserve gentle, thoughtful care to keep them looking beautiful while protecting their electrical components. Think of this process like maintaining other cherished elements in your home—it requires attention to detail but pays dividends in both appearance and longevity.
Before touching any part of the motor housing or fixtures, always turn off the power at the circuit breaker. This extra step beyond the wall switch ensures complete electrical safety. Once powered down, let the fan cool completely if it’s been running, as motor housings can retain heat.
For the motor housing itself, use a slightly damp microfiber cloth to wipe away dust and grime. Avoid spraying cleaners directly onto the housing, as liquid can seep into electrical components. Instead, lightly dampen your cloth with a mild soap solution—just enough moisture to capture dust without dripping. Work methodically around the housing, paying attention to any decorative details or ventilation slots where dust accumulates.
Light fixtures require similar gentle handling. Remove glass shades or globes according to manufacturer instructions, wash them separately in warm soapy water, and dry thoroughly before reattaching. For the fixture base and electrical connections, use only a dry or barely damp cloth, keeping moisture away from sockets and wiring.
When cleaning decorative elements like finials or carved details, a soft-bristled brush works wonders for reaching into crevices without scratching finishes. This approach preserves the aesthetic appeal that complements your home’s overall ambiance, much like maintaining the visual charm of your fireplace mantel. Regular attention prevents buildup that becomes harder to remove and helps your ceiling fan remain an attractive, functional part of your comfortable living space.
Don’t Forget These Hidden Spots
While most of us remember to wipe down the visible parts of our ceiling fans, there are several sneaky spots that quietly collect dust and grime, affecting both your fan’s performance and your home’s air quality. Let’s uncover these hidden culprits that deserve your attention.
The blade brackets, those metal arms connecting each blade to the motor housing, are notorious dust collectors. Because they sit at an angle and blend into the shadows, they’re easy to miss during routine cleaning. Run your cleaning cloth along both sides of each bracket, paying special attention to the screws and joints where dust loves to accumulate.
Don’t overlook the downrod, that vertical shaft connecting your fan to the ceiling. This area often develops a grimy film, especially in kitchens where cooking oils become airborne. A damp microfiber cloth works wonders here, and while you’re at it, check that the set screw remains tight.
The ceiling canopy, that decorative cover where your fan meets the ceiling, creates a perfect ledge for dust buildup. Gently wipe around its edges and top surface. This is particularly important if you’re running other air-moving appliances in your home, as increased circulation means more particles in the air.
Finally, light globes deserve more than a quick glance. Remove them carefully and wash with warm, soapy water. You’ll be amazed at how much brighter your room feels with clean globes, creating that cozy ambiance you love throughout your home.
Essential Maintenance Tasks Beyond Cleaning
Tightening Loose Connections
A wobbly, rattling ceiling fan isn’t just annoying—it can actually reduce your home’s comfort and air circulation efficiency, which matters whether you’re distributing warm air from your fireplace in winter or keeping cool during summer months. The good news is that most wobbling and noise issues stem from simple loose connections that you can fix yourself in about 15 minutes.
Start by turning off your fan at the wall switch and letting it come to a complete stop. Using a stepladder for safe access, gently wiggle each fan blade to check for movement at the blade brackets. If you feel any play, tighten the screws connecting the blade irons to the motor housing using a screwdriver. Don’t overtighten—just make them snug.
Next, inspect the canopy where your fan meets the ceiling. Look for any visible gaps or looseness in the mounting bracket. Carefully tighten these screws, working in a cross pattern if there are multiple fasteners to ensure even pressure. Check the downrod connection if your fan has one, as this junction point often loosens over time from normal vibration.
Finally, examine the light kit screws if your fan includes lighting. These frequently work loose and create rattling sounds. Make it a habit to check all connections during your seasonal maintenance routine, especially after heavy use periods. This simple practice keeps your fan running smoothly and your home environment comfortable.
Balancing Your Ceiling Fan
A wobbly ceiling fan isn’t just annoying—it can strain the motor and reduce efficiency, working against your home’s overall comfort system. The good news is that balancing your fan is simpler than you might think.
Start by running your fan on high speed to identify which blade is causing the wobble. Turn off the fan and measure from the ceiling to each blade tip using a yardstick. If measurements vary by more than one-eighth inch, gently bend the blade holders until they’re level.
Next, address weight distribution issues. Most balancing kits include a clip and adhesive weights, but you can use a simple clothespin as a temporary solution. Place the clip at the center of one blade’s trailing edge and run the fan. Move the clip to different blades until you find the position where wobbling decreases most noticeably.
Once you’ve identified the problematic blade, attach a small adhesive weight to that spot. If you don’t have a balancing kit, try using coins secured with tape, adding them incrementally until the wobble disappears.
This simple maintenance task ensures your fan operates efficiently, helping circulate warm air from your heating sources throughout the room while keeping energy costs down—a practical approach to maintaining comfort in every season.
When to Call a Professional
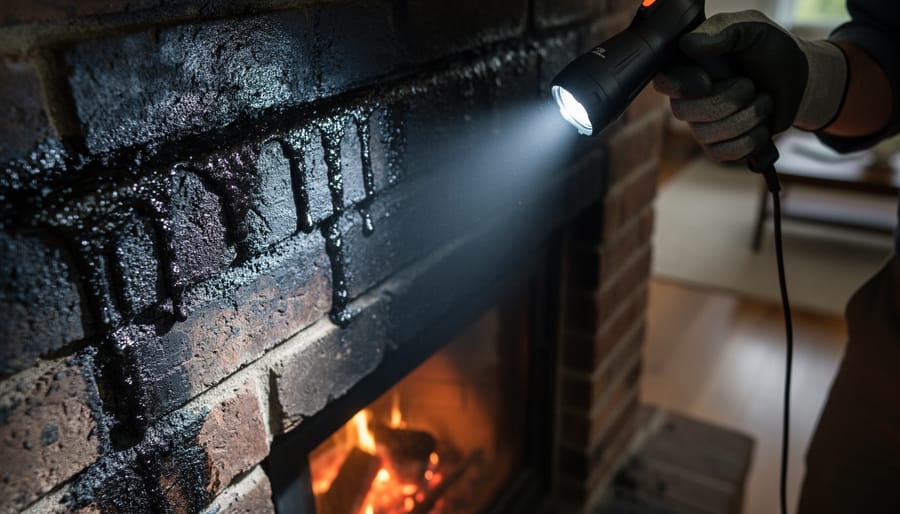
While many ceiling fan maintenance tasks are perfect DIY projects, certain warning signs indicate it’s time to call in a professional. If you notice sparking, burning smells, or unusual buzzing sounds coming from your fan, shut it off immediately and contact a licensed electrician. These symptoms often point to wiring issues that pose serious fire hazards to your home and family.
Strange grinding or clicking noises that persist after cleaning and balancing may signal motor bearing problems requiring expert repair. Similarly, if your fan wobbles excessively even after you’ve checked the mounting bracket and balanced the blades, the ceiling box itself might be compromised, creating a structural safety concern.
Pay attention if your fan suddenly stops working entirely or if the remote control functions erratically despite fresh batteries. These electrical gremlins often need professional diagnosis. Additionally, if you’re uncomfortable working on a ladder, dealing with electrical components, or if your fan requires accessing wiring in the ceiling, there’s no shame in hiring help.
Remember, just as you’d call a professional for complex fireplace repairs to ensure your family’s safety and comfort, ceiling fan issues deserve the same careful attention. The modest investment in professional service protects your home’s comfort systems and provides peace of mind.
Seasonal Maintenance: Getting the Most From Your Fan Year-Round
Your ceiling fan works hard throughout the year, but its job changes with the seasons—especially when you’re creating that perfect cozy atmosphere with your fireplace. Understanding how to adjust your fan seasonally transforms it from a simple cooling device into a year-round comfort partner.
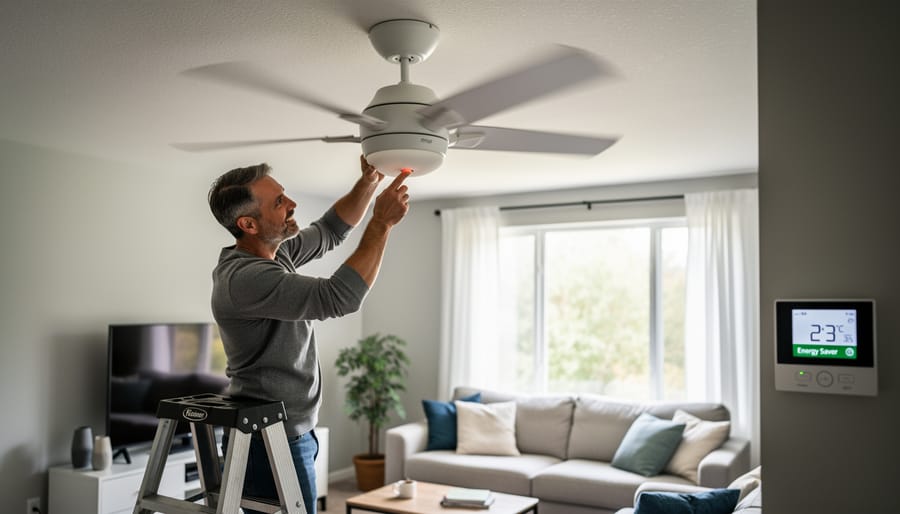
During summer months, your fan should rotate counterclockwise when viewed from below. This creates a direct downdraft that produces that wonderful cooling breeze we all love on warm evenings. But here’s where things get interesting for fireplace enthusiasts: when winter arrives, flip that switch on your fan’s housing to reverse the blade direction. Running clockwise at low speed, your fan gently pushes warm air—whether from your heating system or that beautiful fire you’ve built—down from the ceiling where it naturally collects. This simple change can significantly improve fireplace heat distribution throughout your living space.
The key to winter fan use is keeping the speed low. You want gentle circulation that redistributes warmth without creating an uncomfortable draft that fights against the cozy ambiance your fireplace provides. Think of it as helping your fireplace work smarter, not harder—an eco-friendly approach that reduces the fuel you need while maximizing comfort.
Schedule your deep cleaning maintenance during those transitional seasons—late spring and early fall—when you’re switching rotation directions anyway. This timing ensures your fan operates efficiently when you need it most. When you’re ready to optimize air circulation around your fireplace this winter, you’ll have a clean, properly functioning fan ready to distribute that wonderful warmth throughout your home, creating the welcoming environment you’ve envisioned.
Creating Your Maintenance Schedule
Establishing a regular maintenance schedule keeps your ceiling fan running efficiently year-round, contributing to your home’s comfort alongside your fireplace. The frequency of cleaning depends on your specific environment and usage patterns.
For homes with active fireplaces, plan on dusting your ceiling fan blades monthly during heating season. Soot and ash particles circulate through the air and settle on fan surfaces more quickly than in homes without fireplaces. A quick wipe-down takes just minutes but prevents heavy buildup that affects performance.
Every three months, conduct a more thorough deep cleaning. This involves removing the blades for washing, cleaning the motor housing, and inspecting all visible components. Spring and fall are ideal times for these deeper sessions, as they coincide with seasonal transitions when you’re adjusting your home’s heating and cooling strategies.
Schedule an annual comprehensive inspection before peak summer or winter seasons. Check for loose screws, test the motor’s sound for unusual noises, examine electrical connections, and verify that all speeds function properly. This yearly check-up catches potential problems before they become costly repairs.
Certain signs demand immediate attention regardless of your schedule. If you notice wobbling, grinding sounds, reduced speed, or burning smells, stop using the fan and investigate immediately. Similarly, visible dust buildup that starts falling when the fan operates means it’s time for cleaning, even if it hasn’t been a full month.
By maintaining this rhythm of care, your ceiling fan works harmoniously with your home’s heating system, circulating warmth from your fireplace efficiently while keeping your living spaces comfortable throughout every season.
A well-maintained ceiling fan is more than just a cleaning task checked off your list—it’s an investment in your home’s comfort and efficiency that pays dividends year-round. When you combine proper fan care with thoughtful fireplace use, you create a harmonious heating and cooling system that works smarter, not harder. Your fan helps distribute that cozy fireplace warmth throughout your space during winter, while providing refreshing comfort when temperatures rise.
The beauty of ceiling fan maintenance is that it doesn’t require specialized skills or hours of your time. Starting with that simple 15-minute routine every month sets the foundation for years of reliable performance. You’ll notice the difference immediately—quieter operation, better airflow, and the satisfaction of knowing you’re maximizing your home’s energy efficiency. Over time, this consistent care prevents costly repairs and extends your fan’s lifespan significantly.
Think of your ceiling fan as a partner in creating the comfortable, welcoming home environment you deserve. Whether you’re curled up by the fire on a chilly evening or enjoying a cool breeze on a summer afternoon, your ceiling fan enhances those moments. Begin your maintenance routine today, and you’ll enjoy the benefits of improved air circulation, lower energy bills, and a healthier home atmosphere for years to come.


")