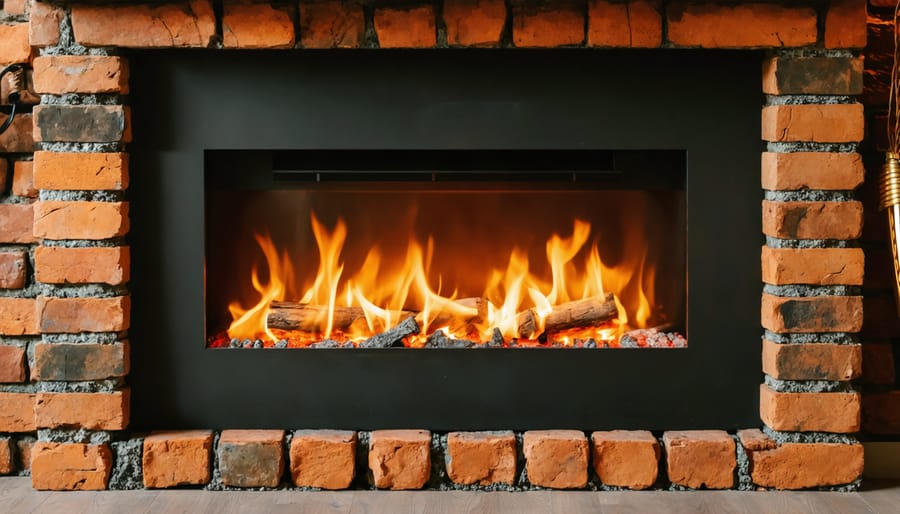
Transform your living space with a modern electric fireplace insert – a stylish, efficient upgrade that combines classic charm with contemporary convenience. Before diving into the preparation steps, understand that proper installation ensures optimal performance, safety, and longevity of your investment.
Electric fireplace inserts offer a perfect solution for homeowners seeking the ambiance of a traditional fireplace without the maintenance demands of wood or gas. With precise temperature control, realistic flame effects, and zero emissions, these units represent the future of home heating comfort. Installation typically takes just a few hours, requires minimal tools, and can significantly enhance your home’s value while providing zone heating capabilities that reduce overall energy costs.
Whether you’re retrofitting an existing fireplace or creating a new focal point, proper installation ensures years of reliable operation. This guide will walk you through essential considerations, from electrical requirements to ventilation clearances, helping you achieve professional-quality results while maintaining safety standards and building codes.

Preparing for Installation
Required Tools and Materials
Before starting your electric fireplace insert installation, gather these essential tools and materials:
Tools:
– Electric drill with various drill bits
– Screwdriver set (both Phillips and flathead)
– Level
– Measuring tape
– Wire strippers and electrical pliers
– Voltage tester
– Work gloves
– Safety glasses
– Dust mask
Materials:
– Electric fireplace insert (sized for your existing fireplace)
– Mounting brackets (usually included with insert)
– Electrical cable (if hardwiring is required)
– Junction box (for hardwired installations)
– Screws and anchors
– Silicone caulk for sealing
– Trim kit (if needed for a custom fit)
– Surge protector (for plug-in models)
– Cleaning supplies for preparation
– Drop cloth to protect flooring
Optional materials might include:
– Insulation material
– Additional trim pieces for a finished look
– Cable management solutions
– Remote control batteries (if not included)
Remember to check your insert’s manual for any model-specific requirements, as some units may need special mounting hardware or electrical components not listed here.
Safety Considerations
Before starting your electric fireplace insert installation, it’s crucial to understand and follow proper safety protocols. First, ensure your electrical circuit can handle the unit’s power requirements – most inserts need a dedicated 120V or 240V circuit. If you’re replacing a gas fireplace, safely disconnecting gas lines should be done by a certified professional.
Always work with clean, dry hands and ensure the power is completely off at the circuit breaker before beginning installation. Check that your outlet is properly grounded and meets local building codes. If modifications to your home’s electrical system are needed, consult a licensed electrician.
Keep the area around your insert clear of flammable materials, including curtains, furniture, and decorative items. While electric inserts don’t produce real flames, they still generate heat and require proper ventilation. Install smoke detectors nearby and ensure they’re working correctly.
Remember to carefully read the manufacturer’s installation manual, as safety requirements can vary between models. Never attempt to modify the insert or its electrical components, as this could void the warranty and create safety hazards.
Step-by-Step Installation Process
Removing Existing Fireplace Components
Before installing your new electric fireplace insert, you’ll need to carefully prepare your existing fireplace space. If you currently have a gas fireplace, you’ll first need to remove existing gas insert and ensure all gas lines are properly capped by a certified professional.
Start by removing any existing grates, screens, or decorative elements from your fireplace. These items won’t be needed with your new electric insert and should be stored safely or recycled if you don’t plan to use them again. Using a shop vacuum, thoroughly clean the fireplace interior, removing all ash, debris, and dust that has accumulated over time.
Next, inspect the damper mechanism. While you won’t need it for the electric insert, you’ll want to ensure it’s in good working condition and properly sealed to prevent drafts. Most installations require the damper to be permanently fixed in an open position to accommodate the insert’s power cord and prevent any potential heat buildup.
Check the condition of your fireplace’s interior walls and floor. Remove any loose brick or mortar, and make necessary repairs before proceeding with the installation. This ensures a stable and secure foundation for your new electric insert. Finally, measure the opening carefully one more time to confirm your new insert will fit properly.

Electrical Connection Setup
Proper electrical connection is crucial for your electric fireplace insert’s safe and efficient operation. Before beginning any electrical work, ensure your home’s circuit can handle the insert’s power requirements – most units need a dedicated 120V circuit rated for at least 15 amps.
First, locate a suitable electrical outlet near your fireplace opening. Ideally, this should be within easy reach of the insert’s power cord, which typically extends 6 feet. If you need a new outlet installed, always hire a licensed electrician to ensure compliance with local electrical codes.
For hardwired installations, turn off the power at your home’s circuit breaker before proceeding. Remove the junction box cover on your insert and connect the wires following the manufacturer’s color-coding: black to black (hot), white to white (neutral), and green or bare copper to green (ground). Secure all connections with appropriate wire nuts and electrical tape.
Many modern inserts come with plug-in power cords for easier installation. Simply route the cord through the designated opening in your fireplace, ensuring it doesn’t touch any hot surfaces or create tripping hazards. Some installations may require a recessed outlet to maintain a flush appearance – again, this is a job for a qualified electrician.
Test all connections before finalizing the installation. Check that your insert powers up correctly and all features function as intended. Pay special attention to any unusual sounds, smells, or operation that might indicate wiring issues.
Remember to keep the power cord accessible for maintenance and never modify the original plug or cord. If you’re unsure about any aspect of the electrical setup, don’t hesitate to consult a professional. The small cost of professional installation far outweighs the risks of improper electrical work.
For optimal safety, consider installing a surge protector to safeguard your insert’s electronic components from power fluctuations. Also, make note of where your circuit breaker is located in case you need to quickly cut power in an emergency.
Securing the Insert
Once your electric fireplace insert is positioned in the opening, it’s time to secure it properly to ensure safe and stable operation. Start by checking that the insert is level using a bubble level on both horizontal and vertical planes. If needed, use shims to achieve perfect leveling – this is crucial for proper operation and prevents unnecessary strain on the unit.
Next, locate the mounting brackets or holes provided by the manufacturer. Most modern inserts come with pre-drilled holes or mounting points on the sides or top of the unit. Using the hardware supplied with your insert, secure these mounting points to the surrounding fireplace structure. If your insert didn’t come with mounting hardware, use appropriate masonry screws or anchors rated for fireplace use.
Pay special attention to the trim kit installation, as this not only enhances the appearance but also helps secure the unit. Most trim kits snap or screw into place around the insert’s frame, creating a finished look while providing additional stability. Ensure all trim pieces are properly aligned and securely fastened.
For added security, especially in larger openings, consider installing a support platform beneath the insert. This platform should be constructed from non-combustible materials and be capable of supporting the full weight of your unit. If there’s any gap between the insert and the fireplace opening, use appropriate fireproof insulation materials to fill these spaces, improving both efficiency and stability.
Before finalizing the installation, gently tug on the insert from different angles to ensure it’s firmly anchored. Any movement could indicate the need for additional securing points. Remember, a properly secured insert not only operates more efficiently but also provides peace of mind knowing your investment is safely installed for years of enjoyment.
Post-Installation Steps

Testing and Adjustment
Once your electric fireplace insert is installed, proper testing and adjustment are crucial for optimal performance and safety. Begin by ensuring all connections are secure before plugging in the unit. When you first power up the insert, check that the control panel or remote control responds correctly to all commands.
Test each heating level, making sure warm air flows evenly and the temperature control functions as expected. Pay attention to any unusual sounds or odors – while a slight “new appliance” smell is normal during first use, it should dissipate quickly. Verify that the flame effects work smoothly through all settings and that any ambient lighting features operate correctly.
If your insert seems to be heating unevenly or the flame effects appear misaligned, small adjustments may be needed. Most units have leveling feet or brackets that can be tweaked to ensure the insert sits perfectly straight. Check that the blower isn’t obstructed and adjust the airflow direction if your model allows for it.
Take time to familiarize yourself with all features and programming options. Many modern inserts include programmable thermostats, timer functions, and different flame pattern selections. Make notes of your preferred settings for future reference. If you encounter any issues during testing, consult your owner’s manual before making adjustments, as improper modifications could void your warranty.
Remember to test the unit through a complete heating cycle to ensure consistent performance and comfort in your space.
Maintenance Tips
To keep your electric fireplace insert performing at its best, regular maintenance is essential. Start by unplugging the unit and allowing it to cool completely before any cleaning. Every two weeks, use a soft, dry cloth to dust the insert’s exterior and glass panel, avoiding harsh chemicals that could damage the surfaces.
Monthly, inspect the air vents and use a vacuum with a brush attachment to remove any dust buildup that could affect performance. Check the power cord for signs of wear or damage, and ensure all connections remain secure. If your model has a filter, clean or replace it according to the manufacturer’s recommendations.
For LED displays and flame effects, wipe the mirrors and rotating light cylinders gently with a microfiber cloth to maintain optimal visual performance. Every six months, check that all screws and mounting hardware remain tight, as normal house settling can loosen connections over time.
Annually, schedule a thorough inspection of all electrical components. Look for any signs of wear on the heating elements and fan motors. If you notice unusual sounds, decreased heat output, or flickering effects, consult your owner’s manual or contact a qualified technician.
Remember to keep the area around your electric fireplace insert clear of furniture, curtains, and decorative items to ensure proper airflow and prevent potential hazards. With these simple maintenance steps, your electric fireplace insert will continue providing warmth and ambiance for years to come.
Installing an electric fireplace insert can transform your existing fireplace into a modern, efficient heating solution while maintaining the cozy ambiance you love. Throughout this guide, we’ve covered the essential steps to ensure a successful installation, from initial measurements to final testing. Remember that proper preparation, including checking electrical requirements and ensuring adequate ventilation, is crucial for both safety and optimal performance.
Whether you’re a DIY enthusiast or planning to work with a professional, understanding the installation process helps you make informed decisions and maintain your electric insert properly. The benefits of choosing an electric fireplace insert are clear: energy efficiency, easy maintenance, and the flexibility to enjoy the visual appeal of flames with or without heat.
Safety should always be your top priority. Double-check all electrical connections, maintain proper clearances, and follow manufacturer guidelines precisely. If you’re unsure about any aspect of the installation, don’t hesitate to consult a qualified electrician or professional installer. The investment in proper installation will pay off in years of reliable, safe operation.
Consider the environmental impact of your choice as well. Electric fireplace inserts offer a clean-burning alternative to traditional wood or gas fireplaces, reducing your carbon footprint while providing efficient zone heating for your living space. Regular maintenance, including cleaning and inspection of components, will ensure your insert continues to operate at peak efficiency.
As you enjoy your newly installed electric fireplace insert, take pride in knowing you’ve made a smart choice for your home’s comfort, safety, and energy efficiency. The modern convenience and realistic flame effects of today’s electric inserts provide all the charm of a traditional fireplace without the mess and maintenance of conventional fuel sources. Here’s to many cozy evenings enjoying your upgraded fireplace!


