


Master heat levels by learning the visual cues your stovetop provides. Watch for the shimmer in oil that signals medium-high heat is ready, or the gentle bubble around food edges that confirms you’re at the perfect simmer. Your burner’s response time matters more than its settings—gas flames adjust instantly while electric coils need 30-60 seconds to stabilize, so anticipate temperature changes before your food overcooks.
Control moisture to prevent soggy vegetables and achieve restaurant-quality results at home. Pat proteins completely dry before they touch the pan, allow adequate space between food pieces so steam can escape rather than trap, and resist the urge to flip or stir constantly. That golden crust you’re after develops only when food maintains uninterrupted contact with hot metal.
Match your cookware to your cooking method for even heat distribution and better energy efficiency. Heavy-bottomed pans prevent hot spots that burn delicate sauces, while lightweight skillets respond quickly for dishes requiring temperature adjustments. A properly sized pan that matches your burner diameter reduces wasted heat and lowers energy consumption—an approach that benefits both your cooking results and household efficiency.
Position your ingredients strategically across different heat zones on your stovetop. Keep finished components warm on low burners while you sear the next batch on high, or move partially cooked items to cooler spots to finish gently without burning. This orchestrated approach transforms your stovetop into multiple cooking stations, letting you prepare complex meals with the timing and precision of a professional kitchen.
Understanding Your Heat Source: The Foundation of Great Stovetop Cooking

Gas vs. Electric: Why It Actually Matters
Understanding the differences between gas and electric stovetops isn’t just technical knowledge—it’s the foundation for becoming a more confident, intuitive cook. These two heat sources behave quite differently, and recognizing those distinctions will transform how you approach everyday meals.
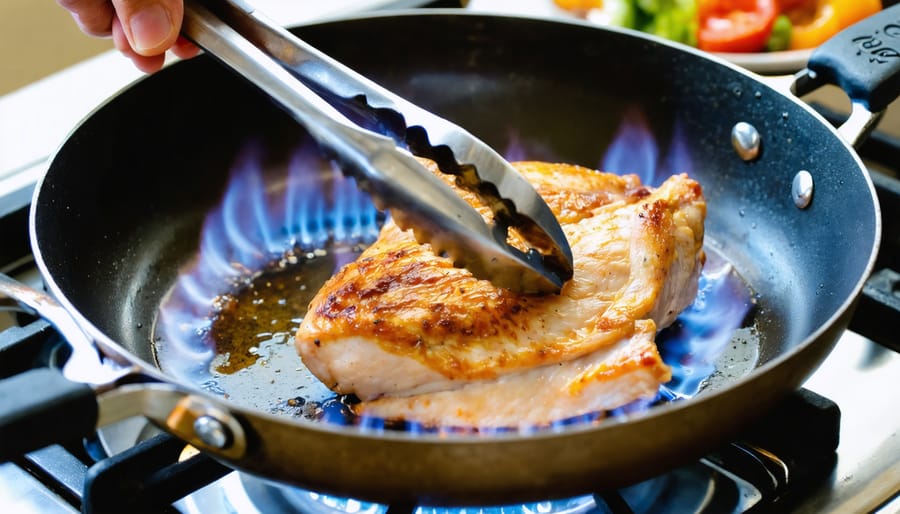
Gas burners offer immediate heat response. Turn the knob, and you have instant flame; turn it down, and the temperature drops immediately. This responsiveness gives you precise control, making gas ideal for techniques requiring quick adjustments, like searing or boiling water on gas stoves. The visible flame also provides a helpful visual cue about heat intensity. However, gas can create hot spots where flames concentrate, so moving your pan occasionally ensures even cooking.
Electric stovetops, whether traditional coil or smooth-top, heat more slowly and retain heat longer. When you adjust the temperature, expect a delay before the burner responds. This means planning ahead—reducing heat before food reaches your target temperature, since residual heat will continue cooking. Electric burners often distribute heat more evenly across the cooking surface, which benefits dishes requiring steady, consistent warmth.
For both types, the key is working with their natural characteristics rather than against them. Gas cooks appreciate the immediate feedback and can make split-second adjustments. Electric users learn to anticipate temperature changes and use that retained heat as an advantage, even turning off burners early to finish cooking with residual warmth—an eco-friendly approach that reduces energy consumption while achieving perfect results.
Reading Your Burner’s Sweet Spots
Your stovetop isn’t uniform in temperature, and understanding these variations can transform your cooking. Think of your burner like a well-designed fireplace, where different zones serve different purposes to create the perfect environment.
Start by heating a burner on medium and holding your hand about six inches above it, moving from center to edge. You’ll notice the center radiates intense heat, while the outer edges offer gentler warmth. This natural variation is your secret weapon, not a flaw to fight against.
Use the hot center zone for initial searing and bringing water to a rapid boil. Once you’ve achieved that perfect crust on your steak or your pasta water is bubbling, slide the pan toward the cooler outer edge to maintain temperature without burning. This technique mirrors how you’d adjust wood placement in a fireplace for consistent, controlled heat.
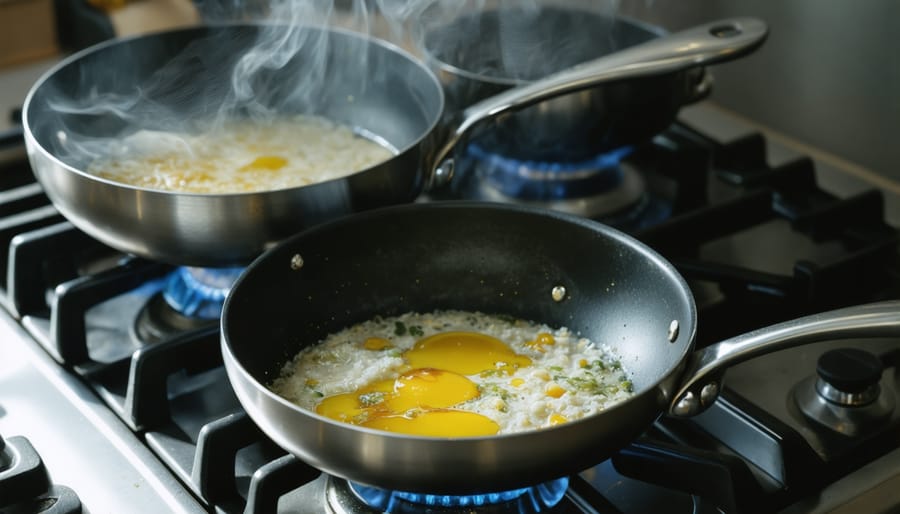
For delicate foods like eggs or sauces, start them in the cooler zone, then move them to the center only when needed. This strategic approach saves energy while giving you precise control, much like how efficient heating solutions work best when you understand your space’s natural temperature patterns. Practice this zone awareness, and you’ll reduce burnt dinners while using less energy overall.
The Temperature Trick That Prevents Most Cooking Disasters
Low, Medium, High: What These Actually Mean for Your Food
If you’ve ever stood at your stove wondering whether “medium” means that dial should point straight up or slightly left, you’re not alone. These settings can feel surprisingly mysterious, but once you understand what’s actually happening, you’ll cook with much more confidence.
Low heat is your patient friend, perfect for gentle simmering and keeping dishes warm without burning. You should be able to hold your hand about 6 inches above the pan for 8-10 seconds comfortably. Think of it like the steady warmth from a well-maintained fireplace—consistent and controlled. Water will barely bubble, butter melts slowly without browning, and sauces thicken gradually. This setting typically ranges from 200-300°F.
Medium heat is where most home cooking happens, and understanding medium heat transforms your results. Your hand test drops to 5-6 seconds above the pan. You’ll see steady bubbling in liquids, hear a satisfying sizzle when food hits the pan, and notice gentle steam rising. Butter foams but doesn’t brown immediately. This sweet spot sits around 300-375°F and handles everything from sautéing vegetables to pan-frying chicken.
High heat brings intensity—your hand can only hover for 2-3 seconds. Oil shimmers and moves quickly across the pan, water droplets dance and evaporate instantly, and you’ll hear that restaurant-worthy sear. This 400°F-plus zone is ideal for stir-fries and achieving golden crusts, but demands your full attention to prevent burning.
The Preheat Patience Principle
Think of preheating your cookware like warming up your home’s hearth before settling in for the evening. Just as a properly heated fireplace radiates consistent warmth throughout your space, a well-preheated pan distributes heat evenly across your food, preventing those frustrating hot spots that leave some areas burnt while others remain undercooked.
The waiting game pays off significantly. For lightweight stainless steel or nonstick pans, allow 2-3 minutes over medium heat. Cast iron, much like a masonry fireplace that retains heat beautifully, needs 5-7 minutes to reach optimal temperature. This patience ensures your ingredients sear properly rather than stick or steam.
Here’s a simple test: hover your hand a few inches above the pan’s surface. You should feel steady, radiating warmth, similar to standing near a well-established fire. For a more precise check, sprinkle a few water droplets onto the surface. If they dance and evaporate within a second or two, you’re ready to cook.
Different techniques demand different preheat times. Searing meats requires maximum heat and thorough preheating, while gentle sautéing needs moderate warmth. Starting with a properly heated surface also improves energy efficiency, much like eco-friendly heating solutions that work smarter, not harder. Your food cooks faster and more evenly, reducing overall cooking time and energy consumption while delivering consistently delicious results.
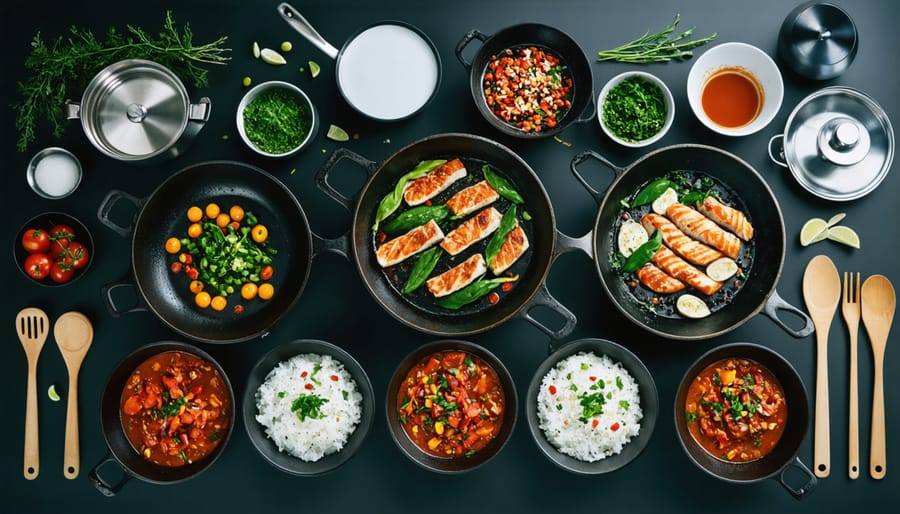
Essential Stovetop Techniques Every Home Cook Should Know
Sautéing: The Quick-Cook Method That Locks in Flavor
Sautéing transforms everyday ingredients into restaurant-quality dishes, much like how the right flame creates perfect ambiance in your living space. This quick-cook method uses high heat and constant movement to seal in flavors while creating those delicious caramelized edges we all love.
Start by heating your pan over medium-high heat for about two minutes. You’ll know it’s ready when a drop of water sizzles and evaporates immediately. Add a thin layer of oil with a high smoke point, like grapefruit seed or avocado oil, swirling to coat the pan evenly.
The key to successful sautéing is preparation. Cut ingredients into uniform, bite-sized pieces so everything cooks evenly. Pat proteins and vegetables dry to ensure proper browning rather than steaming.
Once your ingredients hit the pan, resist the urge to constantly stir. Let them sit for 30 to 60 seconds to develop that golden crust, then toss or flip. Keep the food moving every minute or so, using a flick of the wrist or a wooden spoon.
Don’t overcrowd the pan. Too much food lowers the temperature and creates steam instead of that satisfying sear. Work in batches if needed. This efficient cooking method uses less energy than your oven, making it both quick and eco-conscious for everyday meals.

Searing: Creating That Restaurant-Quality Crust
Creating a beautiful, golden-brown crust on your protein or vegetables transforms good food into something genuinely special. The secret lies in understanding the Maillard reaction, a wonderful bit of kitchen chemistry that occurs when food surfaces reach temperatures above 300°F. This browning process develops complex flavors and textures that make restaurant dishes so memorable.
The key to successful searing starts before the food even touches the pan. First, ensure your cooking surface is properly preheated. A good test is the water droplet method: when a drop of water sizzles and evaporates immediately, you’re ready. Second, pat your food completely dry with paper towels. Moisture is the enemy of a good crust, creating steam instead of that satisfying sear.
Here’s where patience becomes your greatest asset. Once you place food in the hot pan, resist the urge to move it. This is the most common mistake home cooks make. Let it sit undisturbed for at least 3-4 minutes. The food will naturally release from the pan when it’s ready to flip. If you’re wrestling with stuck food, it simply needs more time.
Think of it like gathering around a crackling fire, you need sustained, consistent heat to achieve the best results, not constant poking and prodding.
Simmering Without Boiling Over
Mastering the gentle simmer is like tending a cozy fire—it requires patience and attention to maintain that perfect, steady warmth. A proper simmer shows small bubbles occasionally breaking the surface, creating a soft, rhythmic motion in your pot. If you’re unsure, check out what simmering looks like to recognize the ideal bubble pattern.
Start by bringing your liquid to a boil, then reduce the heat gradually until you achieve that gentle bubble. Most stovetops require setting the dial between low and medium-low, though understanding simmer versus low heat helps you find your stove’s sweet spot. Think of it as maintaining the perfect ember glow rather than roaring flames.
Keep your pot partially covered to prevent excessive evaporation while allowing steam to escape. This prevents the dreaded boil-over while concentrating flavors naturally. Stir occasionally to ensure even heating and prevent sticking. With practice, you’ll develop an intuitive feel for maintaining this gentle warmth, creating rich, flavorful dishes that taste like they’ve been lovingly tended for hours.
Boiling: More Than Just Turning Up the Heat
Understanding the difference between boiling intensities is like knowing when to stoke your fire higher versus letting it simmer with steady warmth. A rolling boil, with its vigorous bubbles breaking the surface, is your go-to for pasta. The constant motion prevents sticking and ensures even cooking. For delicate vegetables like broccoli or green beans, dial it back to a gentle boil. Those smaller, steadier bubbles preserve color, texture, and nutrients without battering your food into mushiness.
Grains like rice and quinoa benefit from starting at a rolling boil, then reducing to a barely-there simmer once covered. This energy-efficient approach saves you money while delivering perfectly fluffy results. Think of it as banking your fire for overnight warmth rather than keeping it roaring unnecessarily.
The key is observing your pot. If vegetables are bouncing violently, reduce the heat. If pasta water stops moving when you stir, bump it up. This mindful approach to stovetop cooking not only improves your meals but also reduces energy waste, keeping both your kitchen and budget comfortable.
Deglazing: Rescuing Those Flavorful Brown Bits
After searing meat or sautéing vegetables, you’ve likely noticed those golden-brown bits stuck to your pan. Don’t let them go to waste! This flavorful residue, called fond, is pure culinary gold waiting to transform into a delicious pan sauce.
Deglazing is beautifully simple. Once you’ve removed your cooked food, return the pan to medium heat. Pour in about half a cup of liquid—wine, broth, or even water works wonderfully. As the liquid hits the hot surface, it’ll immediately start bubbling and loosening those caramelized bits. Use a wooden spoon to gently scrape the pan bottom, stirring as the fond dissolves into the liquid.
Within minutes, you’ll have a rich, flavorful sauce that would make any restaurant jealous. The process is efficient too, using residual heat from cooking rather than starting from scratch. Think of it like capturing the warmth from your stovetop—nothing goes to waste.
For wine-based sauces, let the alcohol cook off for a minute before finishing with a pat of butter. With broth, reduce it slightly until it reaches your desired consistency. This technique turns everyday meals into something special, adding depth and character that brings comfort to your dinner table.
Choosing the Right Cookware for Your Stovetop
Material Matters: Cast Iron, Stainless, and Nonstick
Your choice of cookware profoundly impacts how heat transfers from your stovetop to your food, much like how different fireplace materials radiate warmth throughout your home.
Cast iron excels at retaining heat once it’s warmed up, making it perfect for searing steaks or maintaining steady temperatures for stews. It works beautifully on gas flames and electric coils, though it takes longer to heat initially. Think of it as the thermal mass equivalent of a stone hearth, holding and distributing warmth evenly. Season it properly, and you’ll have a naturally nonstick surface that lasts generations.
Stainless steel responds quickly to temperature changes, giving you precise control when you need it. It’s ideal for sauces, pan-frying, and dishes requiring temperature adjustments. Look for heavy-bottomed stainless pans that prevent hot spots, especially on electric stovetops where heat distribution can be uneven.
Nonstick cookware suits delicate foods like eggs and fish, requiring less oil and cleanup effort. However, it demands lower heat settings to preserve the coating and avoid releasing fumes. Use wooden or silicone utensils to protect the surface.
For the eco-conscious cook, quality pieces in any material reduce waste and energy consumption. Cast iron and stainless steel last decades with proper care, while well-maintained nonstick pans serve reliably for several years before needing replacement.
Size and Shape Considerations
Choosing the right pan size for your burner makes a surprising difference in both cooking results and energy efficiency. When your pan matches your burner size, heat distributes evenly across the bottom, preventing those frustrating hot spots that burn food in one area while leaving it undercooked in another. Think of it like matching firewood to your fireplace—the right fit creates optimal performance.
Using an oversized pan on a small burner wastes energy as heat escapes around the sides, never reaching the cooking surface. Conversely, a small pan on a large burner sends heat up the sides unnecessarily, potentially damaging pan handles and wasting energy that could be heating your home through more efficient means. For best results, your pan’s base should cover about 80-90% of the burner surface.
This mindful approach to pan selection not only improves your cooking but also reduces energy consumption—a simple way to make your kitchen routine more eco-friendly while keeping your utility bills lower. When you’re cooking efficiently, you’re contributing less waste heat to your home, which matters whether you’re relying on your fireplace for warmth or managing your overall energy footprint.
Safety Tips That Keep Your Kitchen (And Family) Protected
The Handle Rule and Other Burn Prevention Basics
One of the simplest yet most overlooked safety habits in stovetop cooking is the handle rule: always turn pot and pan handles inward, away from the stove’s edge. This small adjustment prevents accidental bumps that could send hot contents spilling across your kitchen or, worse, onto someone nearby. It’s especially important in busy households where children and pets move around the cooking area.
Beyond handle positioning, maintain a clean cooking zone by wiping up spills immediately and keeping dish towels, paper products, and wooden utensils away from active burners. These items can ignite faster than you might expect. Use dry oven mitts or pot holders when handling hot cookware, as damp fabric conducts heat dangerously well. Keep a working fire extinguisher within reach, and know how to use it before you need it.
Stay present while cooking. Most kitchen accidents happen during those quick moments when we step away to check our phones or tend to other tasks. Your focused attention is the best prevention tool available.
What to Do When Things Get Too Hot
Even experienced cooks face kitchen emergencies, so knowing how to respond quickly keeps everyone safe. If you spot smoke or flames from oil, stay calm and never reach for water. Instead, slide a lid over the pan to smother the fire, then turn off the heat and leave the lid in place until everything cools completely. For grease fires, you can also use baking soda, though you’ll need a generous amount.
When pots boil over, immediately reduce the heat and move the pot slightly off the burner if possible. Clean up spills quickly once the stovetop cools to prevent stubborn, burnt-on messes. If you’re dealing with overheating that creates excessive smoke, turn off the burner, open windows, and use your exhaust fan to clear the air.
Keep a fire extinguisher within easy reach of your cooking area, and make sure everyone in your household knows where it’s located. These simple preparations transform potential disasters into manageable moments, letting you return to creating the cozy, nourishing meals that make a house feel like home.
Energy-Efficient Stovetop Cooking: Better for Your Bills and the Planet
Match Your Burner to Your Pan Size
Think of your stovetop burners like zones of heat, similar to how you’d choose the right fireplace size for a room. When you match your pan size to your burner, you’re creating an efficient heat environment that saves energy and cooks food more evenly.
Using a small pan on a large burner wastes precious energy as heat escapes around the sides, heating your kitchen instead of your food. It’s like leaving a window open while trying to warm your home. Conversely, crowding a large pan onto a tiny burner creates hot spots in the center while leaving the edges frustratingly cool, resulting in unevenly cooked meals.
The sweet spot? Your pan should cover the burner completely, with flames or heating elements just kissing the pan’s bottom edges. This simple adjustment can reduce your cooking time by up to 40 percent and lower your energy bills, making it an eco-friendly choice that benefits both your wallet and the environment.
For best results, use small burners for saucepans and butter warming, medium burners for everyday skillets, and reserve large burners for stockpots and wide sauté pans. This mindful approach to heat management transforms your cooking from guesswork into a reliable, efficient process.
The Lid-On Advantage
Here’s a simple truth that can transform your cooking while saving money: keeping the lid on your pot traps heat exactly where you need it. When you cover your cookware, you’re creating a more efficient cooking environment that works smarter, not harder.
Think of it like closing your fireplace damper when you’re not using it. Just as you wouldn’t heat your home with all the windows open, cooking with lids prevents valuable heat from escaping into your kitchen. This means water boils faster, food cooks more evenly, and your stovetop doesn’t have to work as hard to maintain temperature.
The benefits extend beyond speed. With the lid on, you’ll use less energy, which translates directly to lower utility bills. Your kitchen stays cooler too, especially welcome during warmer months. For pasta, potatoes, and soups, covered cooking can reduce cooking time by up to 25 percent.
This efficient approach aligns perfectly with eco-conscious home management. By conserving energy at the stovetop, you’re making a small but meaningful contribution to reducing your household’s carbon footprint while keeping more money in your pocket.
Just as a well-tended fireplace becomes the heart of a home, your stovetop has the power to create that same sense of warmth and gathering. Mastering these cooking techniques isn’t just about preventing burnt dinners or achieving the perfect sear. It’s about transforming your kitchen into a place where comfort is created, one meal at a time.
Think about it: when you understand how to control your burners with confidence, adjusting heat like tending carefully placed logs, cooking becomes less stressful and more enjoyable. You’re no longer guessing or second-guessing yourself. Instead, you’re creating nourishing meals that bring people together around your table, much like gathering around a crackling fire on a cold evening.
The beauty of stovetop cooking lies in its daily presence in our lives. Unlike special occasions or complicated recipes, these are techniques you’ll use every single day. Each time you practice proper preheating, adjust your flame thoughtfully, or choose the right pan for the job, you’re building skills that will serve you for years to come.
Start small. Pick one technique from what you’ve learned and focus on it this week. Maybe it’s mastering medium heat for more even cooking, or finally getting your sauté pan properly heated before adding ingredients. As these methods become second nature, you’ll discover that cooking transforms from a chore into something genuinely satisfying. Your kitchen will become what it was always meant to be: a source of warmth, nourishment, and connection for everyone you welcome home.
")