

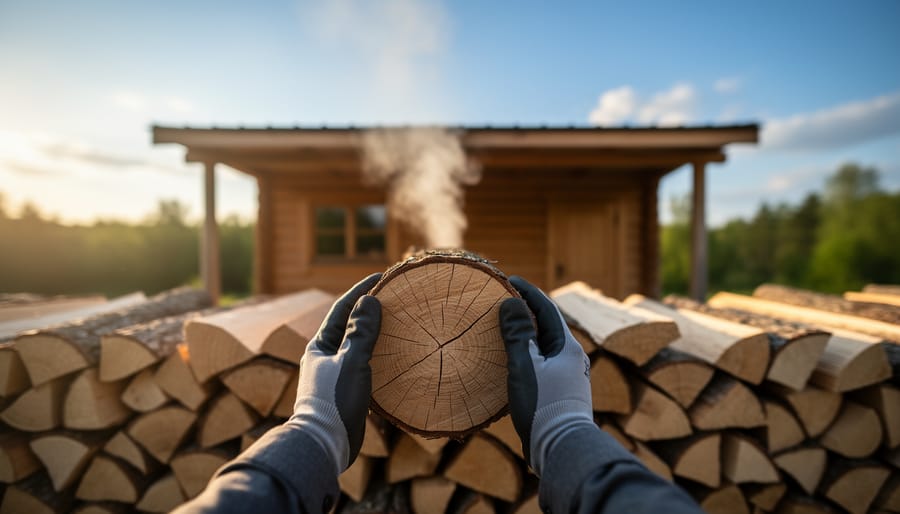

Choose hardwoods like oak, maple, or ash over softwoods for longer burn times and higher heat output. Split your wood into pieces 3-6 inches in diameter to ensure proper seasoning and efficient burning. Stack firewood in a sunny, well-ventilated area with top cover only, allowing air circulation from the sides for at least six months before use. Check moisture content with an inexpensive meter, aiming for readings below 20 percent to maximize heat production and minimize creosote buildup.
The difference between a disappointing, smoky fire and a powerful, efficient heat source comes down to one fundamental factor: the quality and preparation of your fuel. While modern homeowners explore dual fuel options for maximum flexibility, traditional wood burning remains an economical and sustainable choice when done correctly. Unfortunately, many people struggle with poor burn efficiency, excessive smoke, and wasted money on inappropriate wood simply because they lack guidance on proper fuel selection and preparation.
Your wood stove investment deserves better than green, wet, or low-quality fuel that smolders instead of burns. Understanding which wood species deliver the best performance, how long seasoning actually takes, and why moisture content matters more than wood type transforms your heating experience from frustrating to satisfying. This comprehensive guide walks you through selecting premium firewood, preparing it correctly, storing it for optimal results, and handling it safely while minimizing your environmental impact. Whether you’re new to wood heating or looking to improve your current practices, mastering these fundamentals ensures cozy warmth all winter long.
What Makes Good Wood Stove Fuel
Hardwood vs. Softwood: The Real Difference
Understanding the difference between hardwood and softwood can transform your wood stove experience from frustrating to fantastic. Contrary to what the names suggest, this classification isn’t about the wood’s physical hardness—it’s actually based on the tree type. Hardwoods come from deciduous trees that lose their leaves, while softwoods come from evergreen conifers.
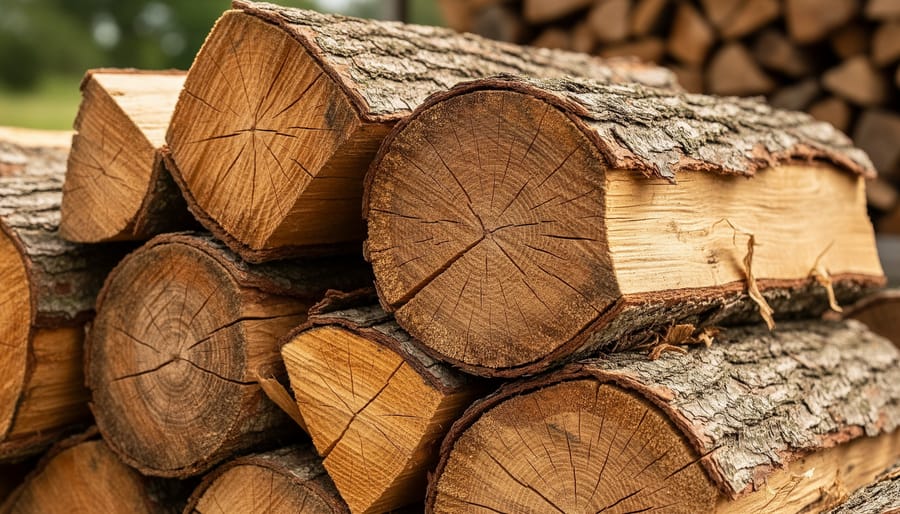
When it comes to heating your home, hardwoods are the champions. Oak, maple, ash, and birch burn hotter and longer because they’re denser, packing more energy into each log. A single load of hardwood can keep your home cozy for hours, making it ideal for overnight burns and consistent heating throughout the day. The slower burn rate also means you’ll use less wood overall, making hardwood more economical in the long run despite typically costing more upfront.
Softwoods like pine, spruce, and cedar have their place too. They ignite quickly and burn fast, making them perfect for getting your fire started on chilly mornings or taking the edge off during milder weather. However, they produce more creosote—that sticky, flammable residue that builds up in your chimney—so they require more frequent cleaning if used exclusively.
The winning strategy? Use softwood to get your fire roaring, then add hardwood for sustained, efficient heat. This approach gives you the best of both worlds: quick warmth when you need it and long-lasting comfort that keeps your home feeling like a warm embrace all season long.
The Moisture Content Sweet Spot
Getting your wood’s moisture content just right makes all the difference between a cozy, efficient fire and a smoky, frustrating experience. The sweet spot you’re aiming for is 15-20% moisture content. At this level, your wood burns cleanly, produces maximum heat, and keeps your stove operating safely.
Why does this matter so much? When you burn wet wood with moisture above 20%, you’re essentially trying to boil water while heating your home. The fire wastes energy evaporating that excess moisture instead of warming your space. Worse yet, wet wood creates creosote, a sticky, flammable tar that accumulates inside your chimney and can lead to dangerous chimney fires. You’ll also notice more smoke, unpleasant odors, and significantly less heat output.
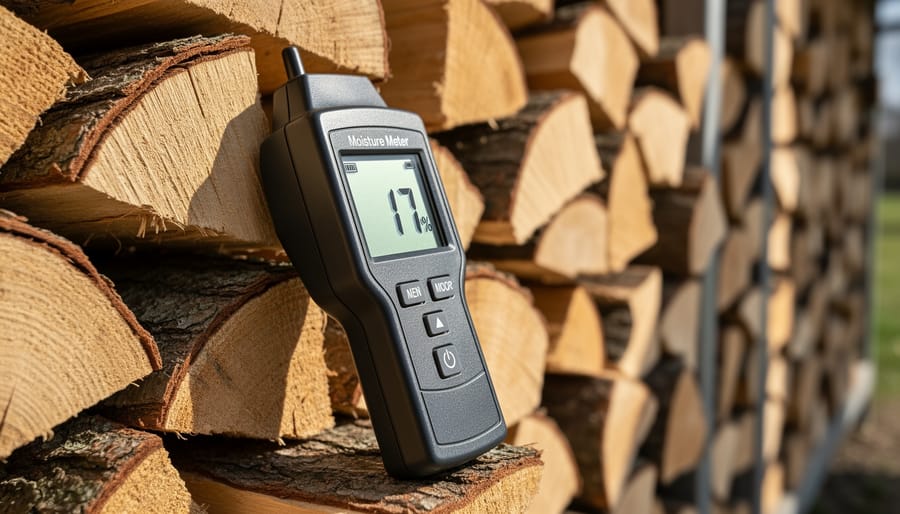
Testing your wood’s moisture is surprisingly simple. A moisture meter, available at most hardware stores for around twenty dollars, gives you instant readings. Just split a piece of wood and test the freshly exposed interior rather than the outer surface, which dries faster. If you don’t have a meter, look for visual clues: properly seasoned wood has darkened ends with visible cracks, feels lighter than fresh-cut wood, and makes a satisfying hollow sound when two pieces knock together. Taking a few moments to check moisture content ensures every fire delivers the warmth and ambiance you’re looking for.
How to Season Wood Stove Fuel Properly
Seasoning Timelines by Wood Type
Understanding the seasoning timeline for your firewood helps you plan ahead and ensures you’re always stocked with properly dried fuel for cozy, efficient fires. The drying process varies significantly depending on wood density and species.
Softwoods like pine, spruce, and fir are your quickest options, typically reaching optimal moisture levels within 6 to 9 months when split and stacked correctly. These lighter woods dry faster due to their less dense cellular structure, making them great for shoulder season burning.
Medium-density hardwoods such as ash, maple, and birch require approximately 12 months of seasoning. Ash is particularly forgiving and can sometimes be burned after just 6 to 8 months, making it a favorite among homeowners who need reliable fuel without excessive waiting.
Dense hardwoods like oak, hickory, and beech demand patience, requiring 18 to 24 months for complete seasoning. While this extended timeline might seem daunting, these woods reward you with longer burn times and superior heat output, making them worthwhile investments for your home’s warmth.
To stay prepared, consider rotating your wood supply by cutting and stacking 2 to 3 years in advance. This practical approach ensures you always have perfectly seasoned fuel ready, transforming your wood stove from a heating source into a dependable lifestyle element that keeps your home comfortable throughout the colder months.
The Best Seasoning Techniques
Proper seasoning transforms freshly cut wood into efficient, clean-burning fuel that makes your wood stove experience truly enjoyable. The process begins with splitting your wood to the right size—aim for pieces about 6 inches in diameter or smaller. Splitting increases the surface area exposed to air, dramatically speeding up the drying process. Think of it as giving moisture more escape routes from the wood’s core.
Once split, how you stack your wood makes all the difference. Create your woodpile with plenty of breathing room between pieces. A popular method is the crisscross or log cabin pattern, where you alternate the direction of wood layers. This creates natural air channels throughout the stack, allowing wind to flow through and carry moisture away. Avoid stacking wood directly against walls or in enclosed spaces where air circulation is limited.
Location is equally crucial for effective seasoning. Position your woodpile where it receives maximum sun exposure and catches prevailing winds—both are nature’s best drying agents. A south-facing spot often works beautifully in most climates. While you want the top protected from rain with a cover or roof, keep the sides open to maintain that essential airflow. Raising your stack off the ground with pallets or rails prevents ground moisture from seeping back into your carefully dried wood.
Remember, well-seasoned wood is not just about convenience—it’s an eco-friendly choice that reduces smoke emissions and maximizes the heat output from every log you burn. With patience and proper technique, you’ll create the perfect fuel supply for cozy, efficient fires all season long.
How to Tell When Your Wood Is Ready
Knowing when your firewood has properly seasoned makes all the difference between a cozy, efficient fire and a smoky, frustrating experience. The most reliable method is using a moisture meter, an inexpensive tool available at most hardware stores. Simply split a piece of wood and test the freshly exposed interior—you’re looking for a reading below 20% moisture content, with 15-20% being ideal for optimal burning.
If you don’t have a moisture meter handy, your senses can guide you. Well-seasoned wood typically has darkened ends with visible cracks radiating from the center. The bark often loosens or falls off easily. Pick up two pieces and knock them together—dry wood produces a sharp, hollow crack, while wet wood creates a dull thud. Seasoned wood also feels noticeably lighter than green wood of the same size.
These simple tests help ensure you’re burning fuel that creates warmth efficiently while minimizing creosote buildup in your chimney. Taking a moment to check your wood’s readiness protects both your home and the environment, giving you the clean-burning, sustainable heat that makes wood stove living so rewarding.
Storing Your Wood Stove Fuel the Right Way
Outdoor Storage Solutions
Protecting your seasoned firewood from the elements is essential for maintaining its quality and ensuring efficient burns all season long. Let’s explore some practical outdoor storage solutions that keep your fuel dry and ready to use.
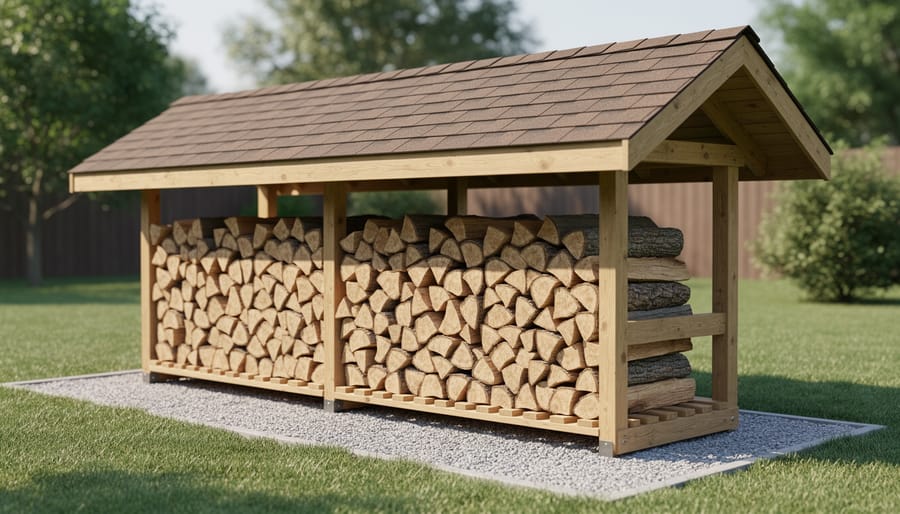
Wood sheds remain the gold standard for firewood storage, offering complete protection from rain and snow while maintaining crucial airflow. A well-designed shed features an open or slatted front to promote air circulation, preventing moisture buildup that could undo months of seasoning. The key is choosing a location with good sun exposure and natural breeze patterns. Position your shed at least six inches off the ground using gravel, pavers, or pressure-treated runners to prevent ground moisture from wicking up into your wood pile.
Covered racks offer a more budget-friendly alternative while still providing excellent protection. Look for models with waterproof covers that extend beyond the woodpile on all sides, creating natural rain runoff. The best racks include raised platforms or legs that maintain that critical ground clearance. Remember, ventilation is just as important as coverage – avoid wrapping your stack in tarps completely, as trapped moisture creates the perfect environment for mold and rot.
For the DIY enthusiast, building a simple firewood shelter using pallets, posts, and corrugated roofing can be both economical and effective. Create a sloped roof to shed water, leave the sides open for airflow, and use pallets as a base to elevate your wood. This approach gives you flexibility in sizing while keeping costs manageable.
Whatever storage method you choose, proper placement matters. Keep your woodpile away from your home’s exterior walls to discourage pests, and ensure easy access during winter storms when you’ll appreciate the convenience most.
Indoor Storage for Ready-to-Burn Wood
While your main wood supply belongs outdoors, keeping a small indoor stash makes your wood stove experience more convenient and enjoyable. Think of it as having just enough ready-to-burn fuel for a day or two, saving you those chilly trips outside during cold evenings or harsh weather.
The key to successful indoor wood storage is choosing the right container. Look for sturdy options like metal log holders, woven baskets, or decorative wood caddies that complement your home’s style. Whatever you select, ensure it has proper ventilation and a solid base to catch any bark or debris. Avoid plastic bins or containers that trap moisture, as they can undo all your seasoning efforts and create dampness issues indoors.
Safety should always guide your indoor storage decisions. Keep your wood supply at least three feet away from your stove or fireplace to prevent accidental ignition. Place containers on heat-resistant mats or tiles to protect your flooring from scratches and potential moisture damage. Never stack wood directly against walls, as this can trap moisture and encourage mold growth in your home.
Pest prevention is surprisingly straightforward. Only bring in wood that’s been properly seasoned and stored outdoors first, as green wood attracts more insects. Inspect each piece before carrying it inside, looking for signs of active insect activity like holes or sawdust trails. Keeping your indoor supply small and rotating it regularly, ideally within 24-48 hours, ensures bugs don’t have time to establish themselves in your cozy living space.
Safe Handling and Preparation
Sizing Wood for Your Specific Stove
Getting the right wood size for your stove isn’t just about convenience—it directly impacts how efficiently your fire burns and how much warmth you’ll enjoy. Start by checking your owner’s manual for manufacturer specifications, as they typically provide ideal length and diameter recommendations for your specific firebox.
As a general rule, cut wood pieces 3 to 6 inches shorter than your firebox depth to allow proper air circulation and easy loading. For most residential wood stoves, this means pieces between 14 and 18 inches long. Diameter matters too: aim for a mix of sizes from 3 to 6 inches across. Smaller pieces ignite quickly and help establish your fire, while larger splits burn longer and maintain consistent heat.
Think of your firebox as a three-dimensional puzzle. Pieces that are too long won’t fit properly and can prevent the door from sealing, reducing efficiency and creating safety hazards. Oversized diameter logs restrict airflow and produce incomplete combustion, leading to excessive creosote buildup.
When splitting your seasoned firewood, create a variety of sizes. Keep some kindling-sized pieces (1 to 2 inches), medium splits for building the fire, and larger chunks for overnight burns. This approach gives you flexibility for different heating needs while maximizing your stove’s performance throughout the burning season.

Handling Safety Tips
Working with firewood is a rewarding part of maintaining your wood stove, but it comes with real risks that deserve your attention. Let’s talk about keeping yourself safe while handling the fuel that brings such wonderful warmth to your home.
First, proper lifting technique matters more than you might think. Firewood is deceptively heavy, and awkward pieces can strain your back in an instant. Always bend at your knees, not your waist, and keep the wood close to your body as you lift. Consider using a wheelbarrow or log carrier for moving multiple pieces rather than making numerous trips with armloads.
When it comes to cutting and splitting, protective equipment isn’t optional. Safety glasses or goggles protect your eyes from flying wood chips and sawdust. Steel-toed boots guard against dropped logs, while leather gloves provide grip and prevent splinters and blisters. If you’re using a chainsaw, add chaps, hearing protection, and a hard hat to your safety gear.
Chainsaw operation requires focused attention and respect for the tool’s power. Maintain a stable stance, never cut above shoulder height, and be mindful of kickback zones. Keep your saw properly maintained with a sharp chain and adequate bar oil. For splitting, whether using a manual maul or hydraulic splitter, always position yourself so that a missed strike or malfunction won’t send the tool toward your body.
Store your splitting equipment properly and keep work areas clear of tripping hazards. Taking these precautions ensures your wood heating experience remains a pleasure rather than a painful lesson.
Eco-Friendly Wood Fuel Practices
Sourcing Sustainable Wood Fuel
Making responsible choices about where your firewood comes from benefits both your wallet and the environment. Start by exploring local sources—purchasing from nearby suppliers or cutting your own wood reduces transportation costs and carbon emissions while supporting your community. Many landowners are happy to have fallen trees or dead wood cleared from their property, often at little to no cost to you.
When gathering wood yourself, focus on dead or fallen trees rather than cutting live ones. These trees have already begun the drying process and won’t impact the local ecosystem’s health. Just be sure you have proper permission before removing wood from any property.
For purchased firewood, look for suppliers certified by organizations that verify responsible forest management practices. These certifications ensure the wood comes from well-managed forests that will continue thriving for generations. Learning more about sustainable wood sourcing can help you make informed decisions.
One critical rule: never burn treated, painted, or stained wood. These materials release toxic chemicals when burned, creating serious health hazards and potentially damaging your stove. Stick to natural, untreated wood for a clean, safe burn that keeps your home healthy and your heating eco-friendly.
Maximizing Efficiency, Minimizing Emissions
Getting the most from your wood stove isn’t just about tossing in logs and hoping for the best. The secret lies in how you burn, not just what you burn. Start with the top-down method: place larger logs at the bottom, medium pieces in the middle, and kindling on top. This technique creates a cleaner, more efficient burn that produces less smoke and more heat.
Once your fire is established, resist the urge to overload. Adding too much wood at once smothers the flames and creates creosote buildup. Instead, add logs gradually, allowing adequate airflow. Keep your air vents properly adjusted—too little oxygen produces smoke and waste, while the right amount creates that satisfying, clean-burning fire that warms your home beautifully.
Temperature matters too. A hot fire burns cleaner than a smoldering one. Aim to maintain stove temperatures between 300-500°F for optimal efficiency. By embracing sustainable heating practices and proper burning techniques, you’ll use roughly 30% less wood while producing significantly fewer emissions—a win for both your wallet and the environment.
Common Wood Stove Fuel Mistakes to Avoid
Even experienced wood stove users sometimes fall into habits that compromise efficiency, safety, and the longevity of their heating investment. Understanding these common pitfalls helps you maintain a cleaner burn and a warmer, safer home.
Burning green or unseasoned wood ranks as the most frequent mistake. When wood hasn’t dried properly, you’re essentially trying to boil water while creating heat. This produces excessive creosote buildup in your chimney, reduces heat output dramatically, and creates that frustrating smoldering fire that never quite gets going. Your stove deserves better, and so does your heating budget.
Using treated lumber, painted wood, or construction scraps might seem economical, but it’s genuinely dangerous. These materials release toxic chemicals when burned, posing serious health risks to your family and potentially damaging your stove’s internal components. Plywood and particle board fall into this category too, despite appearing like harmless wood products.
Overpacking your firebox is tempting when you want maximum heat, but it actually restricts airflow and prevents complete combustion. This creates more smoke, less heat, and accelerates creosote accumulation. Your stove was designed with specific capacity limits for good reason. Loading it properly with space between pieces allows flames to circulate and wood to burn efficiently.
Storage mistakes often happen before wood ever reaches your firebox. Stacking wood directly on the ground invites moisture absorption and pest infestation. Without proper cover, rain and snow undo months of seasoning. Creating a well-ventilated storage area with wood elevated off the ground and protected from precipitation ensures your fuel investment stays dry and ready to provide cozy, efficient warmth throughout the heating season.
Choosing the right wood stove fuel and caring for it properly isn’t just about keeping your home warm—it’s about creating a truly rewarding heating experience that benefits your wallet, your family’s safety, and the environment. When you select well-seasoned hardwoods, store them correctly, and handle them with care, you’re setting yourself up for cleaner burns, fewer chimney problems, and significantly lower heating costs throughout the season.
The beauty of mastering these fundamentals is that the improvements compound over time. Each cord of properly seasoned wood burns more efficiently than green alternatives, producing more heat while creating less creosote buildup. Your chimney stays cleaner, your stove performs better, and you’ll find yourself reaching for the thermostat less often. Plus, you’re choosing an eco-friendly heating solution that’s renewable and carbon-neutral when managed responsibly.
This heating season, commit to implementing these wood fuel best practices. Start by checking your current wood supply’s moisture content, improve your storage setup if needed, and plan ahead for next year’s fuel needs. These small investments of time and attention will transform your wood stove from a simple heat source into an efficient, sustainable centerpiece of your home’s comfort and ambiance.


")