

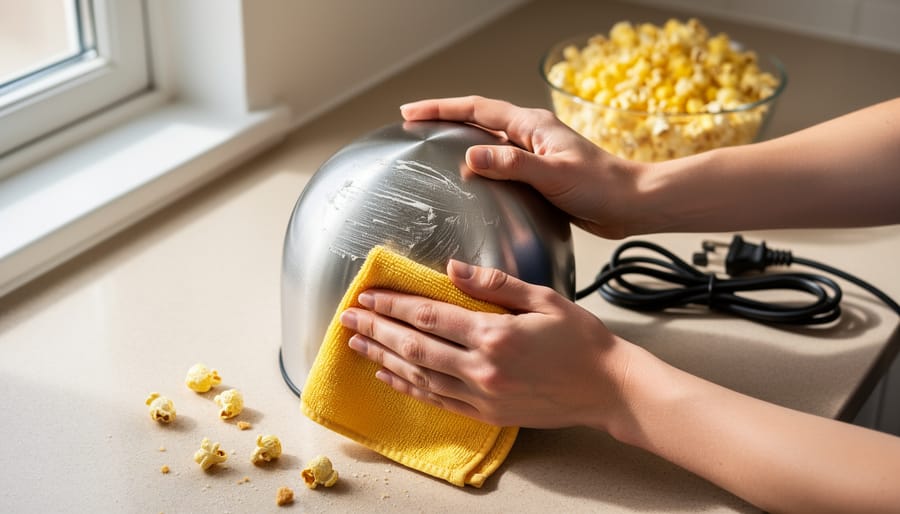

Unplug your popcorn maker and let it cool completely before attempting any cleaning to prevent electrical hazards and burns. Remove all loose kernels and popcorn debris by turning the unit upside down over a trash bin and gently shaking it, then use a dry microfiber cloth or soft brush to sweep out remaining particles from the heating chamber. For oil-based popcorn makers, wipe down the interior kettle and heating plate with a damp cloth and mild dish soap, avoiding any electrical components or heating elements that could be damaged by moisture. Air-pop machines require less intensive cleaning, but the chute and butter melting tray should be washed separately in warm soapy water and dried thoroughly before reassembling.
Regular cleaning after every three to five uses prevents stubborn buildup that affects popcorn taste and can create fire hazards from accumulated oils and burnt residue. The heating elements should never be submerged in water, but surface cleaning with a barely damp cloth removes most grease without risking damage. For commercial-style kettle makers, the removable kettle typically detaches for easier deep cleaning in your sink. Much like maintaining a cozy fireplace for family movie nights, keeping your popcorn maker clean ensures it performs reliably whenever you want that fresh, theater-style snack experience at home. A well-maintained popcorn maker not only produces better-tasting popcorn but also operates more efficiently, reducing energy waste and extending the appliance’s lifespan.
Why Cleaning Your Popcorn Maker Actually Matters
Just as you’d never let ash and soot build up in your fireplace, your popcorn maker deserves the same attention to detail. Neglecting regular cleaning creates problems that go far beyond just an unsightly appliance sitting on your counter.
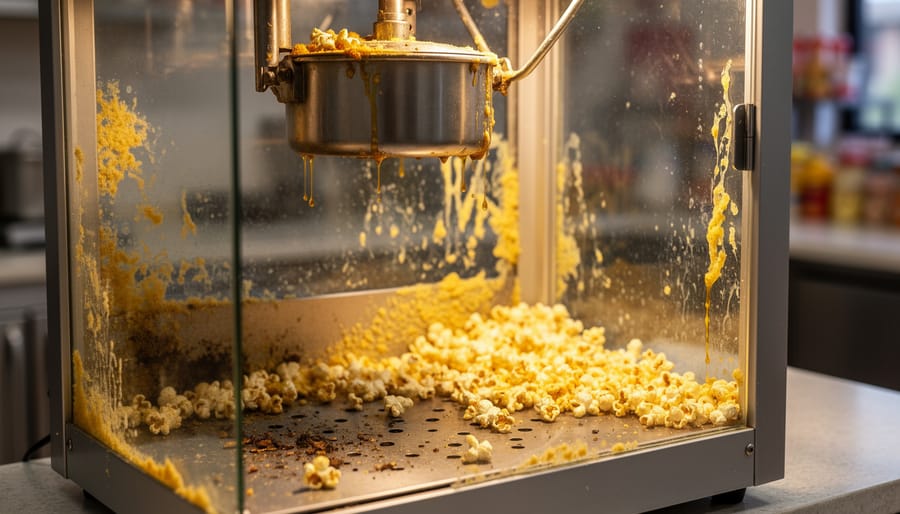
Old oil and butter residue don’t simply disappear between movie nights. Instead, they turn rancid, creating unpleasant odors that permeate your kitchen and transfer directly into your next batch of popcorn. That burnt, stale taste you’ve been noticing? It’s yesterday’s kernels and oils making an unwelcome return appearance. Each time you pop without cleaning, layers of residue accumulate, and those charred bits from previous batches stick to heating elements and surfaces, affecting the flavor of every subsequent snack.
Beyond taste concerns, there’s a genuine safety issue at play. Built-up grease and kernel fragments near heating elements create fire hazards, much like creosote buildup in chimneys. The residue can ignite, producing smoke or even flames in extreme cases. At our website, we’ve always emphasized that safety comes first, whether you’re maintaining a cozy fireplace or preparing a simple snack.
Finally, proper popcorn popper cleaning extends your appliance’s lifespan significantly. Motors strain harder when gummed up with residue, and heating elements corrode faster when coated in burnt-on gunk. Regular maintenance protects your investment while keeping your home environment pleasant and safe for everyone who gathers around your hearth or snack table.
What You’ll Need Before You Start
Good news: you probably already have most of what you need to get your popcorn maker sparkling clean. Just like maintaining a cozy fireplace, keeping your popcorn maker in top shape doesn’t require fancy supplies or harsh chemicals.
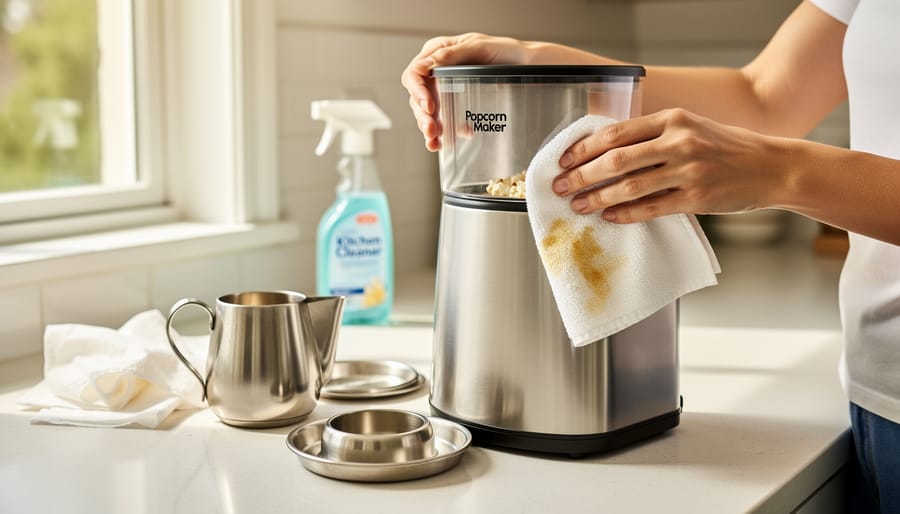
Start by gathering warm water and mild dish soap, which work wonders on most popcorn residue and oil buildup. For those who prefer eco-friendly options, white vinegar makes an excellent natural degreaser that’s gentle on your appliance and the environment. You’ll also want a few soft microfiber cloths or non-abrasive sponges to prevent scratching delicate surfaces.
A soft-bristled brush, like an old toothbrush, is perfect for reaching into crevices and around heating elements. Keep paper towels handy for drying and initial wipe-downs. If you’re tackling stubborn, baked-on residue, baking soda creates a gentle paste that lifts grime without damage.
Safety matters too. Have oven mitts or heat-resistant gloves nearby if you’re cleaning right after use, and always ensure your popcorn maker is unplugged before you begin. A small bowl for mixing cleaning solutions and a dry towel for the final polish round out your cleaning kit. With these simple items, you’re ready to restore your popcorn maker to like-new condition.
How to Clean Different Types of Popcorn Makers
Hot Air Poppers
Hot air poppers are wonderfully simple machines, which makes cleaning them refreshingly straightforward. Just like maintaining any appliance in your home, a little regular care keeps them performing at their best for years to come.
Start by unplugging your hot air popper and letting it cool completely. This safety step is non-negotiable, similar to how you’d never attempt to clean a warm fireplace without proper precautions. Once cool, turn the unit upside down over your trash can and give it a gentle shake to remove any loose kernels or popcorn bits that might be hiding inside.
For the interior chamber, use a soft, dry cloth or paper towel to wipe down the surfaces. The key here is keeping everything dry, as hot air poppers contain heating elements that absolutely cannot get wet. Think of it like caring for electrical components near your home’s heating system where moisture and electricity simply don’t mix. If you encounter stubborn residue, a slightly damp cloth works, but make certain no water drips into the heating element area at the bottom.
The butter melting tray on top requires separate attention. Remove it according to your manufacturer’s instructions and wash it with warm, soapy water. This piece usually handles traditional dishwashing just fine, making your life easier.
For the heating element chamber itself, stick to dry cleaning methods only. A soft-bristled brush can gently dislodge any stuck-on bits without risking damage. Never submerge the base or spray water directly into the popping chamber. This mindful approach protects your appliance while ensuring every batch tastes fresh and delicious.
Stovetop Popcorn Makers
Stovetop popcorn makers bring back the nostalgic charm of traditional cooking, much like gathering around a crackling fireplace on a cozy evening. These timeless kitchen companions require a bit more hands-on care than their electric counterparts, but the process is straightforward when you know the right approach.
Start by addressing oil residue while the pot is still warm, not hot. Pour out any excess oil and wipe the interior with a paper towel to remove the bulk of the grease. For a deeper clean, wash with warm water and mild dish soap using a soft sponge. Avoid abrasive scrubbers that might damage the finish and compromise your pot’s longevity.
Burnt-on kernels present a common challenge. If you encounter stubborn spots, create a paste using baking soap and a small amount of water. Gently rub this eco-friendly solution onto the affected areas, let it sit for a few minutes, then wipe clean. This method respects both your cookware and the environment.
The stirring mechanism deserves special attention during cleaning stovetop popcorn makers. Remove it entirely and wash separately, ensuring no kernel fragments remain trapped in the gears or handle. If you need detailed guidance on specific models, learn how to clean a Whirley Pop for additional tips.
Proper drying prevents rust and maintains that beautiful finish. Towel-dry immediately after washing, then leave the lid off to air-dry completely. This simple step ensures your stovetop popper remains ready for your next fireside movie night.
Electric Oil Poppers
Electric oil poppers bring that authentic movie theater experience right into your home, creating a cozy atmosphere perfect for family movie nights. However, that delicious buttery flavor comes with a cleaning challenge that requires special attention to keep your popper performing safely and efficiently.
Before you begin, safety comes first. Always unplug your popper and allow it to cool completely for at least an hour. Once cooled, carefully remove the kettle unit by lifting it from its mounting bracket or unscrewing the fasteners, depending on your model. Check your manufacturer’s manual if you’re unsure about the removal process.
The kettle itself needs thorough attention. Wipe out excess oil with paper towels first, then wash the kettle with warm, soapy water. For stubborn, baked-on oil residue, create a paste using baking soda and a small amount of water. This eco-friendly solution works wonders without harsh chemicals that could affect your next batch of popcorn. Apply the paste, let it sit for ten minutes, then scrub gently with a non-abrasive sponge.
The heating element area beneath the kettle deserves equal care. Use a damp cloth to wipe down this space, being careful not to submerge any electrical components in water. A soft brush can help dislodge popcorn kernels and oil splatters from hard-to-reach spots.
For the base unit and surrounding surfaces, a warm, damp cloth with mild dish soap handles most messes beautifully. Dry everything thoroughly before reassembly to prevent moisture-related issues.
When reattaching the kettle, ensure all connections are secure and the unit sits properly in its brackets. This attention to detail ensures your popper operates safely while delivering that warm, inviting aroma that makes any evening special.
Microwave Popcorn Poppers
Microwave popcorn poppers are wonderfully convenient, and the good news is they’re just as easy to clean. Most silicone and glass poppers are dishwasher-safe, making cleanup a breeze after your movie night. Simply place them on the top rack and run a normal cycle. The heat and detergent will melt away butter and oil residue without any fuss.
If you prefer hand-washing or notice stubborn spots, warm soapy water does the trick beautifully. Use a soft sponge or cloth to gently scrub the interior, paying special attention to any crevices where kernels might hide. For silicone poppers, turn them inside out if possible to reach every nook. Glass poppers benefit from a good soak if there’s baked-on residue—let them sit in warm water for 15 minutes before washing.
Lingering butter or salt smells can be surprisingly persistent. Here’s a natural solution that works wonders: mix equal parts water and white vinegar, swish it around your popper, and let it sit for 10 minutes before rinsing thoroughly. For particularly stubborn odors, sprinkle baking soda inside, add a splash of water to create a paste, let it work its magic for an hour, then rinse clean. Your popper will smell fresh and be ready for your next batch.
Deep Cleaning for Stubborn Problems
Sometimes your popcorn maker needs more than a quick wipe-down. If you’re facing burnt-on residue, lingering odors, or stubborn stains, don’t worry. These challenges are completely manageable with a few natural, eco-friendly solutions that work wonders without harsh chemicals.
For burnt-on residue that refuses to budge, create a paste using three parts baking soda to one part water. Apply this mixture directly to the affected areas and let it sit for 15-20 minutes. The gentle abrasive nature of baking soda will loosen even the most stubborn buildup without scratching surfaces. Use a soft cloth or non-abrasive sponge to work the paste in circular motions, then rinse thoroughly with warm water.
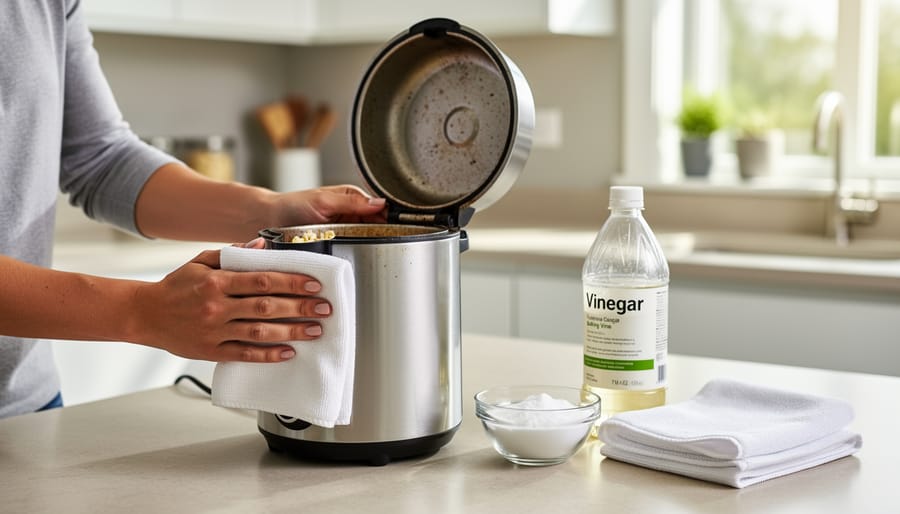
If your popcorn maker has developed that telltale rancid oil smell, white vinegar is your best friend. Mix equal parts white vinegar and water in a spray bottle, then thoroughly spray the interior surfaces. Let it sit for 10 minutes before wiping clean. The vinegar naturally neutralizes odors and cuts through greasy residue. For particularly persistent smells, place a small bowl of baking soda inside your unplugged popcorn maker overnight to absorb lingering odors.
Discoloration happens over time, especially with high-heat cooking. A solution of lemon juice and water not only brightens surfaces but also leaves a fresh, clean scent. Mix the juice of one lemon with a cup of warm water, apply with a soft cloth, and watch those stains fade.
For kernels stuck in hard-to-reach crevices, use a soft-bristled toothbrush dipped in your vinegar solution. This gives you the precision needed without damaging delicate components. These natural cleaning methods align with sustainable home care practices, keeping both your popcorn maker and the environment healthy.
Creating a Maintenance Schedule That Actually Works
Just like you wouldn’t let soot build up in your fireplace, maintaining your popcorn machine works best with a consistent routine. Think of it as part of your overall home care schedule.
After each use, wipe down surfaces while they’re still slightly warm (but safe to touch). Remove loose kernels and give the kettle a quick wipe. This two-minute habit prevents stubborn buildup and keeps your next batch tasting fresh.
Weekly, dedicate fifteen minutes to a deeper clean. Remove and wash detachable parts, wipe down the warming deck thoroughly, and check for any oil residue in corners. This is your maintenance sweet spot, similar to sweeping your hearth weekly to keep ash manageable.
Monthly tasks include inspecting heating elements, checking electrical cords for wear, and giving glass panels extra attention with proper cleaner. These checks catch problems early, just as you’d monitor your fireplace for creosote buildup.
Consider a seasonal deep clean every few months, especially if you’re a frequent popper. Disassemble what you safely can, clean every nook, and inspect moving parts. This preventive approach extends your machine’s life while ensuring every batch tastes like opening night at the movies.
Common Mistakes That Damage Your Popcorn Maker
Even well-intentioned cleaning can harm your popcorn maker if you’re not careful. One of the most dangerous mistakes is submerging electrical components in water. The heating element and power cord should never get soaked, as this creates serious safety hazards and can permanently damage your appliance. Just as you’d never spray water directly into your fireplace’s gas valve, keep water away from electrical parts.
Abrasive cleaners and scouring pads might seem like quick fixes for stubborn residue, but they’ll scratch non-stick surfaces and create rough spots where kernels and oil will stick even more. These scratches compromise your popcorn maker’s performance and shorten its lifespan considerably.
Another common error is reassembling your popcorn maker before it’s completely dry. Trapped moisture leads to mold growth, unpleasant odors, and potential electrical issues. Always allow every component to air dry thoroughly, ideally overnight.
Finally, harsh chemical cleaners aren’t just unnecessary for popcorn makers, they’re harmful. These chemicals can leave residues that contaminate your next batch of popcorn and may damage plastic components. Stick with gentle dish soap and warm water for safe, effective cleaning that protects both your appliance and your family’s health.
There’s something wonderfully comforting about settling into your favorite spot at home, perhaps near the warm glow of your fireplace, with a bowl of freshly popped popcorn in hand. That perfect snack experience starts long before you press the “on” button—it begins with a clean, well-maintained popcorn maker. By making popcorn maker cleaning a regular part of your home care routine, you’re not just removing oil and kernel debris; you’re ensuring every batch tastes as fresh and delicious as it should. A clean machine also runs more safely and efficiently, reducing energy waste and extending the life of your appliance—a small but meaningful step toward more sustainable living at home. Think of it as caring for any cherished part of your household, whether it’s maintaining your heating systems or keeping your kitchen appliances in top shape. When you invest just a few minutes in proper cleaning after each use, you’re protecting your investment and guaranteeing that cozy movie nights and family gatherings will always feature the best-tasting popcorn possible. Make it part of your routine, and you’ll enjoy the rewards for years to come.

")