


Turn off the power to your bathroom fan at the circuit breaker before attempting any maintenance work—this single safety step prevents electrical shock and protects you throughout the cleaning process. Remove the fan cover by gently squeezing the mounting clips or unscrewing fasteners, then vacuum away dust buildup from the fan blades, motor housing, and vent opening using a brush attachment to restore proper airflow. Clean stubborn grime from the cover and blades with warm soapy water, ensuring all components are completely dry before reassembly to prevent motor damage. Schedule this deep cleaning every six months to maintain optimal performance, reduce energy consumption, and prevent moisture buildup that can compromise your home’s air quality.
A well-maintained bathroom fan protects your home just as proper ventilation safeguards your fireplace investment—both create healthier living environments by managing moisture and air circulation effectively. When your fan struggles to remove humidity, bathroom surfaces stay damp longer, encouraging mold growth and damaging finishes. Regular maintenance extends your fan’s lifespan from the typical 10 years to 15 or more, making this simple task a smart investment in your home’s comfort and value. Listen for unusual noises, vibrations, or reduced airflow between cleanings, as these signs indicate it’s time for immediate attention or professional assessment.
Why Your Bathroom Fan Needs Regular Attention
Your bathroom fan works quietly in the background, much like a well-maintained home heating system, but ignoring its upkeep can lead to surprisingly costly consequences. When bathroom fans go unmaintained, they become less effective at their primary job—removing moisture and odors from your home.
A neglected fan struggles to move air efficiently, meaning the humidity from your showers and baths lingers longer than it should. This excess moisture doesn’t just disappear; it seeps into walls, ceilings, and grout, gradually causing damage that can require expensive repairs. Paint begins to peel, wood surfaces may warp, and that warm, welcoming bathroom atmosphere you’ve carefully created can quickly turn musty and uninviting.
Perhaps more concerning is the health impact. When moisture accumulates in poorly ventilated spaces, it creates the perfect breeding ground for mold growth. These unwelcome guests can spread throughout your home, affecting indoor air quality and potentially causing respiratory issues for your family. Just as you wouldn’t ignore creosote buildup in a chimney, bathroom fan maintenance deserves the same preventive attention.
Your wallet will also feel the impact of a struggling fan. When dust and debris clog the motor, it works harder to achieve less, driving up your energy bills while delivering diminishing results. What started as an efficient appliance becomes an energy drain.
The good news? Regular maintenance is simple and takes minimal time. A fan that receives proper care can last 10-15 years or more, while a neglected one might fail in half that time. Think of it as an investment in your home’s comfort, much like maintaining your heating systems—a little preventive care today saves considerable expense tomorrow.
Signs Your Bathroom Fan Needs Cleaning
Your bathroom fan works quietly in the background to protect your home from excess moisture and maintain healthy air quality—much like how a well-functioning fireplace system manages airflow. But how do you know when it’s crying out for attention? Let’s look at the telltale signs that your fan needs some care.
The most obvious indicator is reduced airflow. Hold a tissue up to the vent—if it barely clings or falls away, your fan isn’t pulling air effectively. This diminished performance can lead to lingering humidity and potential moisture issues, including identifying mold warning signs in your bathroom.
Listen closely during operation. Does your fan rattle, grind, or squeal? These unusual noises suggest dust buildup on the blades or motor, or potentially worn bearings that need attention. A healthy fan should run relatively quietly, creating a gentle hum rather than disruptive sounds.
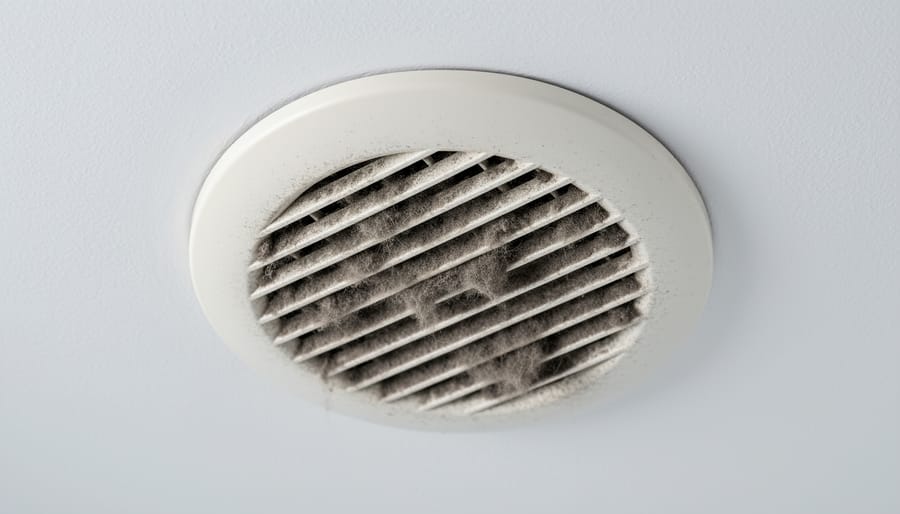
Take a peek at the vent cover. Visible dust accumulation, especially thick gray or brown clumps, signals it’s definitely time for cleaning. If you notice the grille looks fuzzy or caked with debris, dust has likely built up inside too.
Watch for lingering moisture after showers. If your mirror stays fogged longer than usual or you spot condensation on walls and ceilings, your fan isn’t doing its job properly. You might also notice it needs to run considerably longer to clear steam—a clear sign of reduced efficiency that cleaning can often restore.
Safety First: What You Need Before You Start
Before you begin maintaining your bathroom fan, let’s make sure you’re set up for success and, most importantly, safety. Just as you’d never clean your fireplace with the fire still burning, working on electrical fixtures requires some common-sense precautions that’ll keep you safe throughout the process.
Your first and most crucial step is to turn off the power to your bathroom fan at the circuit breaker. Don’t just flip the wall switch—head to your electrical panel and switch off the dedicated circuit. This simple step prevents any risk of electrical shock while you’re working. If you’re unsure which breaker controls your fan, test it by turning the fan on, then flipping breakers until it stops running. Consider placing a piece of tape over the breaker as a reminder that you’re working on that circuit.
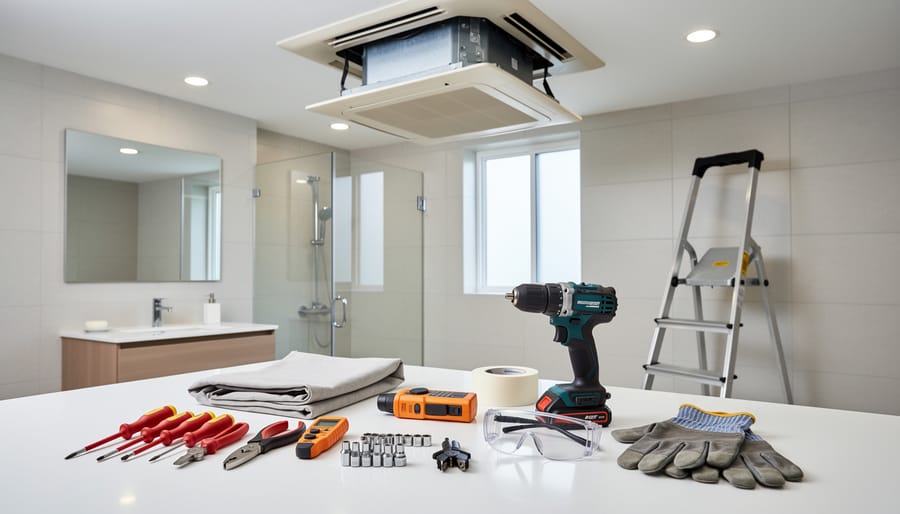
Next, gather your supplies. You’ll need a screwdriver (typically Phillips head), a vacuum with a brush attachment, microfiber cloths, mild dish soap, warm water, and a sturdy step ladder or stool. Having everything within reach before you start makes the job flow smoothly.
Make sure your work area has adequate lighting. If your bathroom doesn’t get much natural light, bring in a portable work light or lamp. You want to see what you’re doing clearly, especially when working with small screws and delicate fan components.
Finally, wear safety glasses to protect your eyes from falling dust and debris. Bathroom fans accumulate surprising amounts of lint and dust, and you don’t want any of that landing in your eyes while you’re looking upward.
Step-by-Step Bathroom Fan Cleaning Process
Removing the Fan Cover and Components
Before you begin, make sure you’ve turned off the power at the circuit breaker. Safety always comes first when working with any electrical fixture in your home.
Start by gently pulling down on the fan grille. Most bathroom fan covers are designed with spring-loaded clips that hold them in place. You’ll typically find two or three metal clips on either side. Simply squeeze these clips together while carefully lowering the grille. If your cover feels stuck, don’t force it. Some models have screws securing the grille, so take a moment to check for these first.
Once the grille is removed, you’ll have a clear view of the fan assembly. Take a photo with your phone before disconnecting anything. This simple step will help you remember how everything fits back together.
Next, locate the fan motor housing. Depending on your model, you may need to unplug the electrical connector or remove a few screws to access the fan blade. Work slowly and deliberately, keeping track of all screws and small parts in a container nearby.
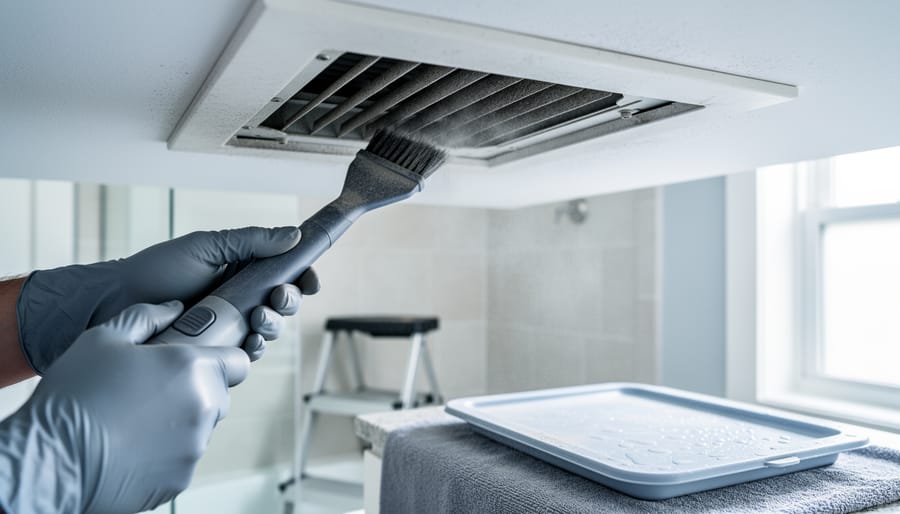
If you notice excessive dust buildup, resist the urge to blow on it. This just spreads debris around your bathroom. Instead, use a vacuum with a brush attachment to gently remove loose dust before proceeding with deeper cleaning.
Cleaning the Fan Blades and Motor Housing
Once you’ve safely accessed your bathroom fan, it’s time to tackle the buildup that’s been hampering its performance. Start by using a soft brush or vacuum with a brush attachment to gently remove loose dust and lint from the fan blades. Work methodically, turning each blade to ensure you capture all the debris. Think of this as similar to maintaining other home comfort systems—regular attention prevents bigger problems down the road.
For stubborn grime on the blades and motor housing, create a simple cleaning solution using warm water and a few drops of dish soap. Dampen a microfiber cloth with this mixture, wring it out well (excess moisture near electrical components is never a good idea), and carefully wipe down each blade and the surrounding housing. The technique for cleaning fan components is gentle but thorough—avoid harsh chemicals that could damage the finish or leave residue.
Pay special attention to the motor housing, where dust tends to accumulate in crevices. A cotton swab lightly dampened with your cleaning solution works beautifully for tight spots. Allow everything to air dry completely before reassembly—patience here ensures safe operation and extends your fan’s lifespan, keeping your bathroom’s air quality fresh and healthy.
Cleaning the Ductwork and Vent
Once you’ve tackled the fan housing and blades, it’s time to address the ductwork and exterior vent where dust and debris can quietly accumulate, restricting airflow much like a clogged chimney dampens your fireplace’s draw. With the power still off, carefully disconnect the duct from the fan housing if possible. Use a vacuum with a long hose attachment to reach into the duct, removing lint, dust, and any mystery items that may have found their way inside. For longer ducts, you might need a flexible duct brush to dislodge stubborn buildup.
Next, head outside to inspect the exterior vent cover. Remove any leaves, bird nests, or debris blocking the opening. Wipe down the vent flaps with a damp cloth and ensure they move freely. These flaps should open easily when the fan operates and close when it’s off, preventing drafts and keeping your home’s comfort intact. If the flaps stick or don’t seal properly, this creates an energy efficiency issue similar to leaving your damper open when the fireplace isn’t in use. A clean, unobstructed path from fan to exterior ensures your bathroom stays fresh and moisture-free, protecting your home’s air quality year-round.
Reassembly and Testing
Once you’ve completed your cleaning, it’s time to put everything back together and enjoy improved air circulation in your home. Start by carefully reinstalling the fan cover or grille, making sure all clips or screws are securely fastened. Double-check that the motor and blower wheel are properly seated and any wiring connections remain intact.
Before restoring power at your circuit breaker, give everything one final visual inspection to ensure nothing was left loose or disconnected. Once you’ve flipped the breaker back on, turn on the fan and listen. You should notice a significant difference—a quieter operation with better airflow. Place your hand near the vent to feel the improved suction, which means your bathroom will clear moisture and odors more efficiently.
Test the fan at different speeds if yours has variable settings. This simple maintenance task not only extends your fan’s lifespan but also protects your bathroom from moisture damage, creating a healthier, more comfortable environment throughout your home. Consider marking your calendar to repeat this cleaning every six months for optimal performance.
Creating Your Bathroom Fan Maintenance Schedule
Establishing a regular fan maintenance schedule keeps your bathroom fresh and your air quality healthy, much like maintaining your home’s heating systems ensures optimal comfort year-round.
For most households, a quick monthly inspection works well. Simply turn on your fan and listen for unusual noises or vibrations. Check that air is flowing properly by holding a tissue near the vent—it should pull toward the fan. This five-minute check helps you catch issues early.
Deep cleaning frequency depends on your specific situation. If you have a busy household with four or more people taking daily showers, plan to clean your fan every three months. Smaller households or those with less frequent bathroom use can extend this to every six months.
Environmental factors matter too. Homes in humid climates or areas with significant dust should lean toward quarterly cleanings. If you notice visible dust buildup on the cover between scheduled cleanings, don’t wait—address it promptly.
Consider marking your calendar with seasonal reminders. Spring and fall cleanings align nicely with other home maintenance tasks, creating a natural rhythm that’s easy to remember and maintain throughout the year.
When to Call a Professional
While maintaining your bathroom fan is typically a straightforward DIY task, there are times when calling in a professional is the smart choice. If your fan continues to operate noisily despite thorough cleaning, or if you notice the motor struggling to maintain speed, these could indicate worn bearings or motor failure that require expert attention.
Electrical issues should always be handled by a licensed electrician. If you experience flickering lights when the fan runs, burning smells, or the fan doesn’t turn on at all even after checking the circuit breaker, don’t attempt repairs yourself. Safety comes first in any home maintenance situation.
Persistent moisture problems or mold growth around the fan, even with regular cleaning and operation, may signal inadequate ventilation capacity or ductwork issues. A professional can assess whether your current fan size matches your bathroom’s needs or if installation problems are preventing proper airflow.
If your fan is more than 15 years old and showing multiple problems, a professional can help you evaluate whether investing in a modern, energy-efficient replacement makes more sense than repeated repairs. Today’s models offer better performance while using less energy, contributing to a healthier, more comfortable home environment.
Taking care of your bathroom fan is one of those simple tasks that delivers remarkable benefits for your entire home. Just like maintaining your heating systems ensures cozy winters and fresh air, a well-maintained bathroom fan protects your family’s health by preventing mold growth and eliminating moisture that can damage your home’s structure. The good news? This maintenance takes just minutes a few times a year, yet the payoff in improved air quality and comfort is immediate and lasting.
Make bathroom fan maintenance part of your seasonal home care routine, right alongside checking smoke detectors and changing HVAC filters. Your lungs will thank you, your utility bills may decrease with better ventilation efficiency, and you’ll extend the life of your fan significantly. It’s a small investment of time that creates a healthier, more comfortable living environment for everyone under your roof.

")