

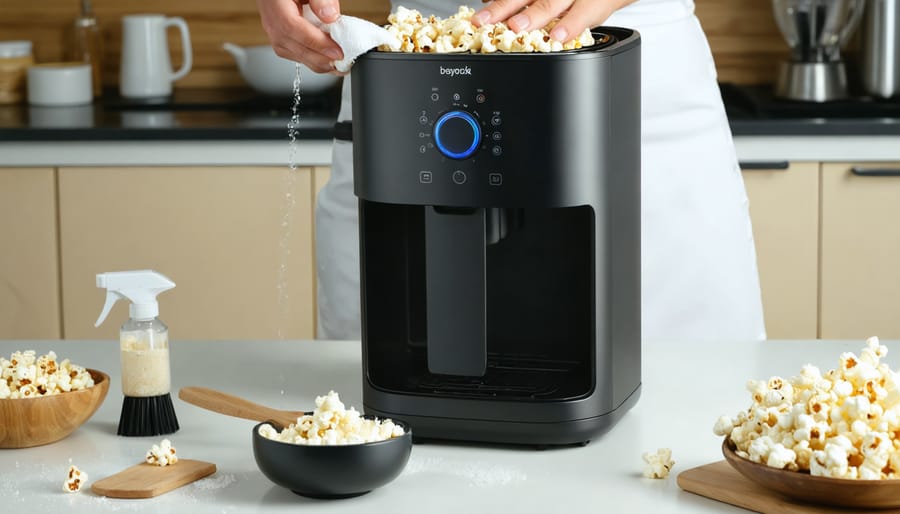

Unplug your popcorn popper and let it cool completely before cleaning to prevent burns and electrical hazards. Remove loose kernels and hulls by turning the unit upside down over a trash bin, then wipe interior surfaces with a damp cloth dipped in warm, soapy water, avoiding any electrical components or heating elements. For stubborn oil buildup that affects popcorn flavor and performance, create a paste using baking soda and water, gently scrub affected areas with a soft brush, then wipe clean with a fresh damp cloth. Air-dry all components thoroughly before reassembling, and make this cleaning routine part of your monthly kitchen maintenance, just as you would regularly maintain other home comfort elements to keep your living spaces inviting and functional. Different popper types require specific approaches: air poppers need frequent vent cleaning to maintain airflow, stovetop models benefit from seasoning like cast iron cookware, and electric models with non-stick coatings demand gentle care to preserve their surfaces. Regular cleaning every 5-10 uses prevents rancid oil smells, extends your appliance’s lifespan, and ensures consistently delicious popcorn for cozy movie nights at home.
Why Your Popcorn Popper Needs Regular Cleaning
Just as you’d never let ash and soot build up in your fireplace, your popcorn popper deserves the same attention to maintain a safe, efficient home. Regular cleaning isn’t just about appearance—it’s essential for your family’s health and safety.
Every time you pop a batch, tiny oil droplets and kernel particles coat the interior surfaces. Over time, these create a stubborn, sticky film that becomes increasingly difficult to remove. This buildup doesn’t just sit there harmlessly. It carbonizes with each use, creating a burnt, acrid smell that seeps into your fresh popcorn. That unpleasant taste? It’s not your kernels—it’s yesterday’s neglected residue.
The real concern goes beyond flavor. Accumulated oil and burnt particles create a genuine fire hazard, much like creosote buildup in a chimney. When old oil residue gets hot enough, it can smoke excessively or even ignite. This is particularly concerning with hot air poppers, where heating elements reach extreme temperatures. The risk increases each time you use a dirty machine.
Beyond safety, there’s the matter of appliance longevity. Oil buildup can clog vents, forcing motors to work harder and overheat. This shortened lifespan means more waste in landfills and unnecessary expense replacing what should be a durable kitchen companion. In homes focused on sustainable living and mindful consumption, proper maintenance aligns with eco-friendly values.
Think of your popcorn popper maintenance as part of your overall home care routine—just like maintaining your heating appliances ensures a cozy, safe environment. A clean popper delivers better-tasting snacks, operates more efficiently, and keeps your family safe during movie nights and gatherings. The few minutes spent cleaning after each use protect your investment and everyone who enjoys those perfectly popped kernels.
What You’ll Need Before You Start
Before diving into cleaning your popcorn popper, gathering the right supplies makes the job easier and helps protect both your appliance and the environment. The good news is you likely have most of what you need already in your kitchen.
For all popper types, start with warm water and mild dish soap as your foundation. White vinegar serves as an excellent natural degreaser and deodorizer, particularly effective for stubborn oil residue. Baking soda works wonders for tackling burnt-on kernels without scratching surfaces. These simple ingredients align perfectly with sustainable home maintenance practices while keeping your space fresh and inviting.
You’ll also want several soft cloths or microfiber towels for wiping and drying. A soft-bristled brush or old toothbrush reaches into tight corners and around heating elements. For stovetop poppers, consider having a non-abrasive sponge handy. Air popper owners should grab a small vacuum attachment or compressed air canister to remove kernel debris from vents.
If you prefer ready-made solutions, look for plant-based, biodegradable cleaners that are safe for food-contact surfaces. Avoid harsh chemicals like bleach or ammonia, which can leave residues and create unpleasant fumes in your home.
Keep paper towels nearby for initial wipe-downs of excess oil. For electric poppers, have your owner’s manual accessible to reference any manufacturer-specific cleaning recommendations. With these eco-friendly supplies assembled, you’re ready to restore your popcorn popper to like-new condition, ensuring many more cozy movie nights ahead.

Cleaning Different Types of Popcorn Poppers
Air Popper Cleaning Method
Hot-air poppers are wonderfully straightforward machines, much like the simple elegance of a well-maintained home heating system. They create that perfect snack without oil, but keeping them clean ensures they’ll keep performing beautifully for years to come.
Before anything else, always unplug your air popper and let it cool completely. This is as essential as ensuring your fireplace has cooled before cleaning, safety first. Once cooled, turn the unit upside down over your trash bin and give it a gentle shake to dislodge loose kernels and debris from the popping chamber.
For the interior chamber, use a soft, dry cloth or paper towel to wipe away any residual butter spots or kernel fragments. Never submerge an air popper in water or use wet cleaning methods inside the chamber, as the heating element and electrical components must stay dry. Think of it like protecting your home’s vital systems from moisture damage.
The butter-melting cup and chute, if removable, can typically be washed with warm, soapy water. Check your manufacturer’s instructions to confirm these parts are dishwasher-safe, though hand-washing is often gentler and more eco-friendly.
For the exterior, simply wipe down with a damp cloth and mild dish soap, then dry thoroughly. If you notice stubborn spots, a paste of baking soda and water works wonders without harsh chemicals, keeping your cleaning routine as natural as possible.
Regular maintenance after each use takes just minutes but preserves that cozy movie-night tradition we all treasure.
Stovetop Popper Cleaning Method
Traditional stovetop poppers bring a nostalgic charm to movie nights, much like gathering around a crackling fireplace. However, cleaning stovetop poppers requires special attention to oil residue and moving parts.
Start by letting your popper cool completely after use. Once safe to handle, remove any unpopped kernels and loose debris. For the main pot, wash with warm soapy water using a soft sponge to avoid scratching the surface. The key challenge with stovetop poppers is addressing stubborn oil buildup that can affect performance over time.
For models with hand-crank mechanisms like a Whirley Pop popcorn popper, pay special attention to the stirring assembly. Remove it according to manufacturer instructions and wipe down with a cloth dampened in warm soapy water. Avoid submerging mechanical components unless specifically approved by the manufacturer.
Tackle baked-on oil residue with a paste of baking soda and water, an eco-friendly solution that cuts through grease without harsh chemicals. Apply gently, let sit for five minutes, then scrub with a non-abrasive sponge.
Dry all components thoroughly before reassembling to prevent rust and ensure smooth operation. This simple maintenance routine keeps your stovetop popper performing beautifully for countless cozy evenings ahead.
Electric Oil Popper Cleaning Method
Electric oil poppers bring that warm, nostalgic touch to your home entertainment, much like gathering around a cozy hearth. But keeping them clean requires a mindful approach since you’re working around heating elements. Let’s walk through the safest, most effective cleaning method.
First and foremost, unplug your popper and let it cool completely. This typically takes 30-45 minutes, and patience here prevents burns and protects the electrical components. Once cool, remove any detachable parts like the kettle, lid, and butter warming tray. These pieces can be washed separately with warm, soapy water.
For the main unit with the heating element, never immerse it in water. Instead, wipe down the interior with a damp cloth and a drop of mild dish soap. Pay special attention to the area around the heating element where oil tends to accumulate. For stubborn, baked-on oil buildup, create a paste using baking soda and water. This eco-friendly solution cuts through grease without harsh chemicals that might linger in your next batch of popcorn.
Apply the paste gently with a soft cloth, avoiding direct contact with electrical connections. Let it sit for five minutes, then wipe away with a clean, damp cloth. For those hard-to-reach corners, a soft-bristled toothbrush works wonders.
Dry everything thoroughly before reassembling. This simple routine after every few uses keeps your popper performing beautifully, ensuring many more cozy movie nights ahead.
Microwave Popper Cleaning Method
Microwave poppers made from silicone or glass are wonderfully low-maintenance, making them perfect for busy households that value both convenience and sustainability. After enjoying your cozy movie night snack, simply allow the popper to cool completely before cleaning. Most microwave poppers are dishwasher-safe, so you can place them on the top rack for effortless cleaning. If you prefer handwashing, use warm soapy water and a soft sponge to gently clean all surfaces, paying attention to the lid and any venting mechanisms where butter or oil might accumulate.
For stubborn kernel residue or butter buildup, let the popper soak in warm water for 10-15 minutes to loosen debris. Silicone poppers are naturally non-stick and resist odors, while glass versions offer the eco-friendly benefit of being completely chemical-free. Avoid abrasive scrubbers that could damage these materials. Rinse thoroughly and air-dry completely before storing to prevent any moisture-related issues. This simple routine keeps your popper fresh and ready for your next gathering around the warmth of home.
Tackling Stubborn Buildup and Burnt-On Residue
Even with regular cleaning, you might encounter stubborn buildup that refuses to budge with simple soap and water. The good news is that tackling these challenging spots doesn’t require harsh chemicals that could damage your popper or harm the environment.
Start with a gentle yet effective solution: white vinegar and baking soda. This dynamic duo creates a natural cleaning powerhouse that’s perfect for breaking down burnt-on residue. Make a paste using three parts baking soda to one part water, then apply it directly to problem areas. Let it sit for 15-20 minutes to work its magic. For especially stubborn spots, sprinkle a bit of baking soda first, then spray with white vinegar. The fizzing action helps lift away baked-on oils and popcorn residue.
If you’re dealing with particularly tough buildup inside the kettle, try the steam method. Fill a heat-safe bowl with equal parts water and white vinegar, place it inside your popper, and let the machine run for a few minutes. The steam will loosen crusty residue, making it much easier to wipe away. Just like maintaining other home appliances for optimal comfort and performance, this preventive approach saves you from more intensive scrubbing later.
For burnt-on spots that still won’t surrender, lemon juice offers another eco-friendly option. The citric acid cuts through grease while leaving a fresh scent. Apply directly to affected areas and let it sit before scrubbing with a soft cloth or non-abrasive sponge.
Remember, patience is key. Allow these natural solutions adequate time to work rather than immediately reaching for abrasive tools that could scratch surfaces. This gentle approach protects your investment while keeping your home free from harsh chemical residues, creating a healthier environment for making those cozy movie-night treats.
How Often Should You Clean Your Popcorn Popper?
Your cleaning schedule should adapt to how often you gather around the kitchen for movie nights and cozy snacking sessions. If you’re popping corn weekly or more, plan for a quick wipe-down after each use—this takes just a minute or two and prevents oil buildup from becoming stubborn. Simply let the popper cool completely, then wipe interior surfaces with a dry cloth to remove any residual kernels and light oil film.
For moderate users (a few times per month), add a thorough cleaning every third or fourth use. This involves washing removable parts with warm, soapy water and ensuring all components are completely dry before reassembly. Heavy users should deep-clean weekly to maintain optimal performance.
Regardless of frequency, commit to a monthly deep clean that addresses every nook and cranny. This comprehensive stovetop popper maintenance routine extends your appliance’s lifespan and keeps it performing like new. Think of it like maintaining your fireplace—regular attention prevents bigger problems down the road and ensures your home stays ready for those spontaneous cozy gatherings where fresh popcorn makes everything better.
Common Cleaning Mistakes That Damage Your Popper
Even the coziest kitchen routines can go wrong when we’re not careful with appliance maintenance. Your popcorn popper is a simple machine, but certain cleaning mistakes can permanently damage it or create safety hazards.
The most dangerous error is submerging the electrical base in water. This applies to air-pop models and any popper with a heating element or motor. Water and electricity never mix safely, and immersing electrical components can cause shorts, corrosion, or fire risks. Always unplug your machine and clean only the removable parts with water.
Abrasive cleaners might seem effective for stubborn buildup, but they scratch non-stick coatings and damage the interior surfaces that make your popper work efficiently. Steel wool, harsh scouring pads, and powdered cleansers create tiny scratches where oils and residue accumulate more easily. Instead, stick with soft cloths and gentle, eco-friendly dish soap.
Ignoring your manufacturer’s instructions is another common pitfall. Each popper model has specific care requirements, whether it’s a stovetop version like our detailed Whirley Pop guide explains, or an electric countertop unit. Some materials can’t handle certain temperatures or cleaning solutions.
Finally, skipping the cooling period before cleaning can warp metal components and burn your hands. Let your popper rest for at least 15-20 minutes after use. This patience protects both you and your appliance, ensuring many more cozy movie nights ahead.
A clean popcorn popper is your ticket to perfect movie nights and cozy evenings gathered around the warmth of your home. Just as you maintain your fireplace to keep it running safely and efficiently, giving your popcorn maker a little regular attention ensures every batch pops to fluffy perfection. The few minutes you spend cleaning after each use prevents buildup, preserves your appliance’s lifespan, and keeps your snacks tasting fresh rather than stale or burnt. Think of it as part of creating that inviting atmosphere you love in your home, where comfort and care go hand in hand. Make popper maintenance a simple habit, and you’ll always be ready when friends drop by or family settles in for an evening together. After all, the best memories happen when everything in your home works seamlessly, from the flicker of your fireplace to that satisfying pop of fresh kernels.
")