


Installing a wood stove in your RV transforms your mobile living space into a cozy, off-grid sanctuary while dramatically reducing your heating costs. Before you begin, verify your RV’s structural integrity can support the stove’s weight and heat output—most installations require reinforced flooring rated for at least 300 pounds per square foot and clearances of 18 inches from combustible walls. Select a compact marine-grade or certified RV wood stove weighing under 100 pounds, as these units are specifically engineered for mobile environments and include vibration-resistant components that prevent joint failures during travel.
Plan your flue system to exit through the roof rather than sidewalls, which prevents smoke backdrafts and water intrusion while meeting NFPA 211 safety standards. You’ll need double-wall stainless steel stovepipe with a minimum 3-inch clearance from all combustibles, plus a spark arrestor cap to prevent ember escape. Install a non-combustible hearth pad extending 18 inches beyond the stove’s loading door and secure all pipe sections with high-temperature sealant and locking bands rated for mobile applications.
This installation typically takes two to three days for someone with moderate DIY skills, but the reward is exceptional: sustainable heat that works anywhere, complete independence from propane costs, and the unmatched ambiance of a crackling fire in your home on wheels. The investment pays for itself within two heating seasons while adding genuine off-grid capability to your adventures.
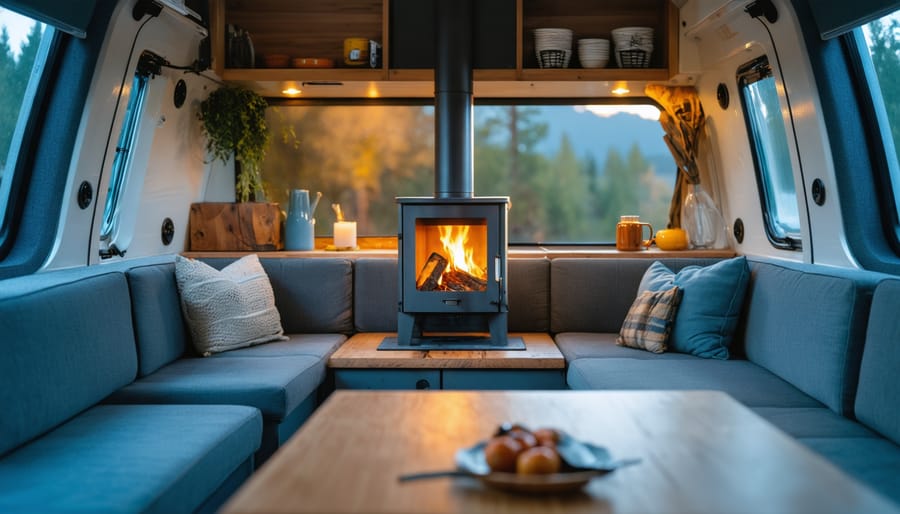
Why RV Owners Are Switching to Wood Stoves
More RV owners are discovering what cabin dwellers have known for generations: there’s something special about wood heat. Beyond nostalgia, the shift toward wood stoves in recreational vehicles reflects practical benefits that align perfectly with the freedom-seeking RV lifestyle.
The most compelling reason? Breaking free from propane dependency. While propane has long been the standard RV heating fuel, it requires constant refills, often at inconvenient times and locations. Wood, on the other hand, can be gathered from nature (where permitted) or purchased affordably almost anywhere you travel. This independence becomes particularly valuable when boondocking in remote locations where propane services aren’t readily available.
Cost-effectiveness makes wood heat increasingly attractive as energy prices fluctuate. A cord of firewood typically costs far less than filling multiple propane tanks throughout winter, and if you’re camping on land where deadfall collection is allowed, your fuel cost drops to zero. These savings add up quickly for full-time RVers or those spending extended periods off-grid.
The quality of heat from a wood stove stands out immediately. Unlike forced-air propane systems that create dry, circulated heat, wood stoves provide radiant warmth that feels more natural and comfortable. This gentle, consistent heat penetrates deeply, warming people and objects rather than just moving hot air around. Many RVers report sleeping better and experiencing fewer respiratory issues with wood heat.
The ambiance factor shouldn’t be underestimated either. There’s an undeniable appeal to gathering around a crackling fire after a day exploring the outdoors. It transforms your RV from a vehicle into a genuine home, creating that cozy atmosphere that makes winter camping enjoyable rather than merely tolerable.
From an environmental perspective, wood burning can be remarkably eco-friendly when done responsibly. Modern wood stoves burn efficiently with minimal emissions, and wood is a renewable resource that releases only the carbon it absorbed during growth. For RVers committed to reducing their environmental footprint, this sustainable heating solution aligns beautifully with outdoor-loving values.
Choosing the Right Wood Stove for Your RV
Size and BTU Requirements
Choosing the right size wood stove for your RV is crucial for both comfort and safety. Unlike traditional homes, your mobile living space requires careful calculation to avoid overheating this confined area.
Start by measuring your RV’s interior square footage. Most RVs range from 60 to 400 square feet, and you’ll need approximately 20-30 BTUs per square foot for adequate heating. For a 200-square-foot RV, that means a stove producing 4,000-6,000 BTUs would be ideal. Understanding how wood stoves work helps you appreciate why matching BTU output to your space matters so much.
Here’s the golden rule: smaller is genuinely better in RV living. An oversized stove can quickly turn your cozy home-on-wheels into an uncomfortably hot box, forcing you to keep windows open and wasting fuel. Look for compact models specifically designed for marine or tiny home applications, typically producing 8,000 BTUs or less.
Many experienced RV dwellers find that a properly sized small stove maintains comfortable temperatures while burning less wood, creating an eco-friendly heating solution that respects both your comfort and the environment. Remember, you can always add more fuel to increase heat, but you can’t easily cool down an overpowered stove.
Weight Considerations and Placement
Before you fall in love with a particular wood stove, understanding your RV’s weight capacity is essential for both safety and longevity. Think of your RV as a delicate balancing act – adding a wood stove, chimney system, and hearth protection typically adds 100-300 pounds to your rig, depending on the materials you choose.
Start by checking your RV’s weight rating and current cargo capacity in the owner’s manual. You’ll want at least 400 pounds of available capacity to accommodate the stove system plus fuel storage. Position your stove over or near structural support points like floor joists or cross members – never place it solely on thin flooring or over empty space beneath.
The ideal location combines structural strength with practical living. Many RV owners find success installing their stove along an exterior wall near the center of the vehicle, which helps distribute weight evenly and shortens the chimney run. This placement also creates a natural gathering spot that transforms your RV into a cozy retreat during chilly evenings.
Consider consulting with an RV technician or structural specialist if you’re uncertain about load-bearing capacity. This small investment in professional advice can prevent costly repairs and ensure your mobile hearth remains a source of comfort rather than concern.
Popular RV Wood Stove Models
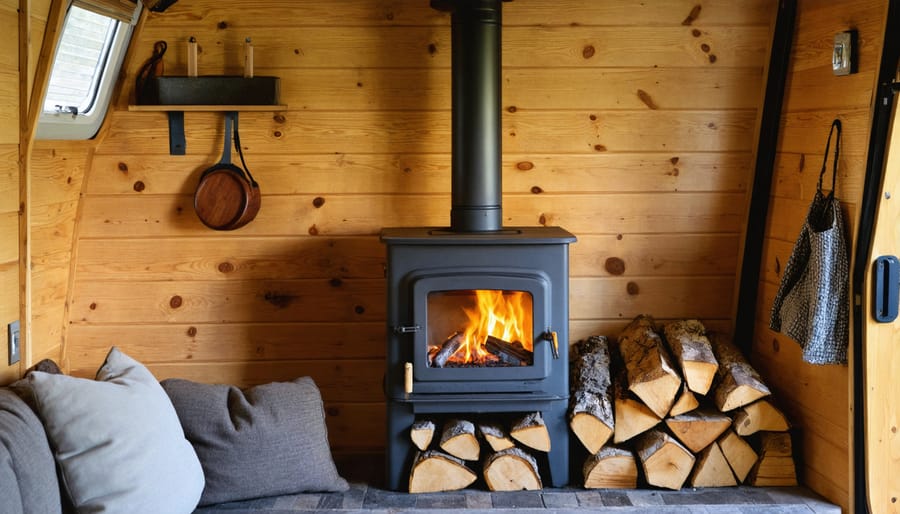
When choosing a wood stove for your RV, you’ll want models specifically engineered for compact living spaces. The Cubic Mini has earned its reputation as a favorite among RV enthusiasts, offering remarkable heat output despite its petite 10x11x14 inch footprint. This Canadian-made gem efficiently heats spaces up to 200 square feet while maintaining proper clearances in tight quarters.
Dwarf stoves represent another excellent choice for mobile living. Their clever engineering maximizes heating efficiency while minimizing installation complexity. The Dwarf 3kw and 4kw models provide adjustable heat output, making them perfect for various RV sizes and seasonal camping needs.
The Dickinson Newport is worth considering if you prefer marine-grade construction. Originally designed for boats, these stoves handle the vibration and movement of travel exceptionally well. For those seeking eco-friendly heating solutions with modern conveniences, the Kimberly wood stove includes a built-in water heating coil, adding functionality without sacrificing precious space.
Each of these proven models comes with manufacturer-specific installation guidelines, proper venting components, and safety certifications essential for insurance compliance. Remember, investing in a quality compact stove transforms your RV into a cozy sanctuary while supporting sustainable, off-grid adventures.
Essential Safety Requirements You Cannot Skip
When it comes to installing a wood stove in your RV, safety isn’t just important—it’s absolutely non-negotiable. The cozy warmth and ambiance you’re dreaming of can only be enjoyed when you’ve taken every precaution to protect yourself, your loved ones, and your mobile home.
Let’s start with clearances, which are arguably the most critical consideration. Understanding how hot wood stoves get will help you appreciate why proper spacing matters so much. Most RV wood stoves require at least 18 inches of clearance from combustible materials on all sides, though some models may need more. Your RV’s walls, ceiling, and furniture are all potentially at risk without adequate spacing. Check your stove’s manual religiously—these aren’t suggestions, they’re life-saving requirements.
Heat shields are your next line of defense and absolutely essential in the confined space of an RV. Install a proper heat shield on any nearby walls using non-combustible materials like steel or cement board with an air gap behind them. This creates a thermal barrier that dramatically reduces surface temperatures. Floor protection is equally vital—your stove needs to sit on a non-combustible pad that extends well beyond the stove’s footprint to catch any stray embers or ash.
Carbon monoxide detection deserves special attention because this silent killer is particularly dangerous in small, enclosed spaces. Install multiple CO detectors throughout your RV, positioning them at different heights since carbon monoxide can rise or sink depending on temperature. Test them monthly and replace batteries regularly—your life literally depends on these small devices working properly.
Don’t forget ventilation and proper flue installation. Your chimney system must be designed specifically for mobile applications, with appropriate roof seals and spark arrestors. Any gaps or improper connections can lead to dangerous exhaust leaks inside your living space.
Finally, before you light that first fire, contact your insurance provider. Many policies have specific requirements for alternative heating sources, and some won’t cover damage from installations they haven’t approved. Similarly, check your RV’s warranty—unauthorized modifications could void important coverage.
Remember, cutting corners on safety to save a few dollars isn’t frugal—it’s foolish. Your eco-friendly heating solution should enhance your RV lifestyle, not endanger it.
The Step-by-Step Installation Process
Planning Your Layout and Measuring Twice
Before you pick up a single tool, grab some graph paper and spend quality time planning your wood stove placement. This crucial step prevents costly mistakes and ensures your cozy heating solution works safely within your RV’s compact space.
Start by identifying potential locations that meet manufacturer clearance requirements, typically 12-18 inches from combustible walls and surfaces. Remember, your RV is essentially all combustibles, so you’ll need heat shields or non-combustible backing. Consider weight distribution too—wood stoves aren’t lightweight, and you’ll want yours positioned over structural support beams.
Map out your chimney path from stove to roof exit, avoiding cabinets, water lines, and electrical wiring. Use a tape measure to verify ceiling height clearances, usually requiring at least 18 inches between the stove pipe and any combustible material. Don’t forget about outside clearances—your chimney needs proper height above the roofline for adequate draft and safety.
Measure everything twice, then measure again. Mark your proposed cuts with masking tape before committing. Take photos, create diagrams, and verify that your planned layout allows comfortable movement through your living space. This patient planning phase is your opportunity to catch problems on paper rather than after cutting irreversible holes in your beloved home-on-wheels.
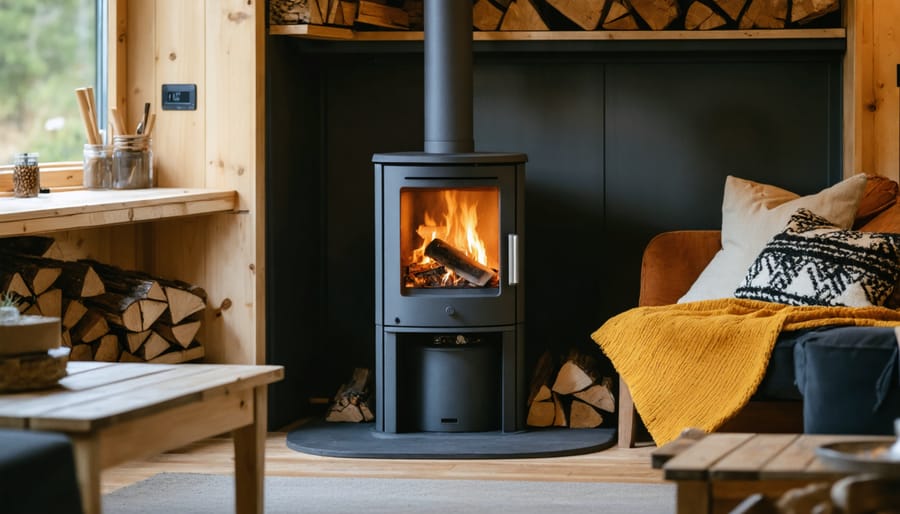
Installing Heat Shields and Floor Protection
Protecting your RV from heat damage is absolutely essential when installing a wood stove. Unlike traditional homes, RVs are built with lightweight materials that can warp, melt, or ignite without proper heat shielding. Think of this step as creating a safety buffer between your cozy heat source and your mobile home.
Start with your floor protection. You’ll need a non-combustible hearth pad that extends at least 18 inches beyond the stove on all sides where loading occurs. Materials like tile, cement board, or metal work beautifully and add a touch of character to your space. Make sure the pad sits on a sturdy subfloor that can handle the stove’s weight.
Wall shields are equally crucial. Install a heat-resistant barrier made from sheet metal or specialized ceramic board at least one inch away from the wall to allow air circulation. This air gap dramatically reduces heat transfer. Many RVers create stylish shields using corrugated metal or decorative tin tiles that complement their interior while keeping things safe.
Don’t forget ceiling protection if your stove is tall or your RV has low clearances. A simple metal shield installed with proper spacing works wonders. These precautions transform your wood stove from a potential hazard into a reliable, eco-friendly heating solution that’ll keep you warm on countless adventures.
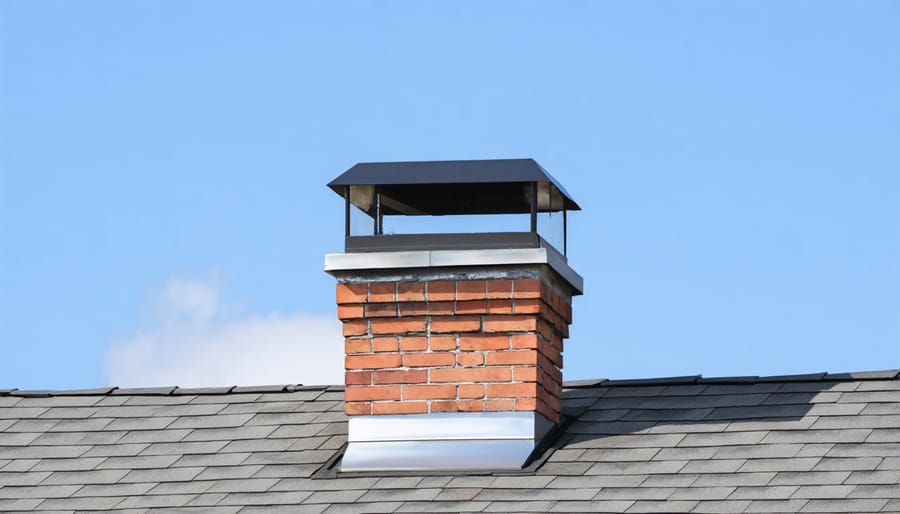
Cutting the Roof Opening (The Scary Part)
Let’s be honest—cutting into your RV roof is the moment that separates daydreamers from doers. It’s completely natural to feel nervous about this step, but with careful planning and the right approach, you’ll create a safe, weatherproof installation that’ll serve you for years.
Before making any cuts, triple-check your measurements from inside the RV. Mark your cutting area on the roof exterior, allowing enough clearance for your stovepipe diameter plus the required air gap specified by your stove manufacturer. Most installations need a circular opening, typically 6-8 inches in diameter depending on your pipe size.
Use a jigsaw with a metal-cutting blade designed for the specific roof material on your RV. Whether you have aluminum, fiberglass, or rubber roofing, the right blade makes all the difference. Cut slowly and deliberately—rushing leads to jagged edges that are harder to seal properly. Keep a vacuum nearby to collect debris as you work, preventing metal shavings from scratching your roof or clogging drainage areas.
The biggest mistake DIYers make is inadequate waterproofing. Apply a generous bead of high-quality, RV-rated sealant around the opening before installing your roof flashing. The flashing itself should extend at least 4 inches beyond the pipe opening in all directions. Consider using Dicor lap sealant, which remains flexible through temperature changes and prevents cracking.
Finally, remember this eco-friendly heating solution requires proper ventilation clearances to prevent heat damage to surrounding roof materials. Check everything twice before sealing permanently—patience here prevents expensive repairs later.
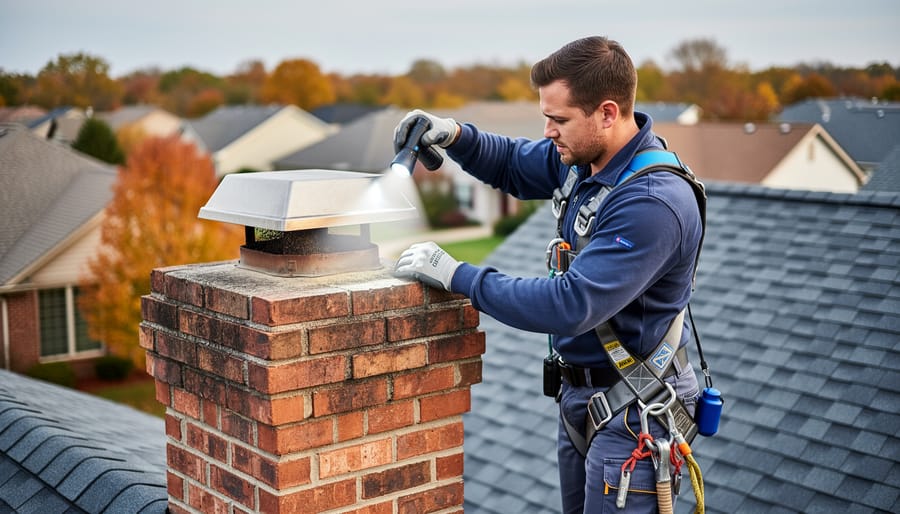
Chimney Installation and Securing
Getting your chimney properly installed is absolutely crucial for both safety and performance—this is where your stove system literally vents all that smoke and combustion byproduct safely away from your living space. Start by determining your chimney route, ideally straight up through the roof with minimal bends, as each elbow reduces draft efficiency and can create creosote buildup.
You’ll need Class A double-wall or triple-wall insulated chimney pipe rated for high temperatures. The general rule is your chimney should extend at least three feet above the roof penetration and two feet higher than anything within ten feet horizontally. This ensures proper draft and prevents downdrafts that could fill your RV with smoke.
When cutting through your roof, measure twice and cut once—this isn’t reversible. Install a roof support box if your chimney run is tall, as RV roofs need reinforcement to handle the weight and movement during travel. The flashing kit creates your first line of defense against weather, sealing around the chimney pipe where it exits the roof. Layer your storm collar above the flashing, with the seam facing away from prevailing winds, and seal everything with high-temperature silicone designed for chimney applications.
Inside, secure your chimney pipe sections with screws at each joint—RV vibration during travel will loosen friction-fit connections. Support brackets every few feet prevent swaying and potential separation. Test your draft before finishing by lighting a small fire and ensuring smoke draws upward consistently. A properly installed chimney transforms your wood stove from a potential hazard into a cozy, eco-friendly heating solution for your mobile lifestyle.
Making It Weatherproof and Road-Ready
Installing a wood stove in your RV brings all the cozy warmth of traditional home heating, but here’s the reality check: your installation needs to handle something most home fireplaces never face—constant motion at highway speeds. Think of it as creating a fireplace that can endure an endless earthquake.
Start with vibration management, which is absolutely essential for safety. Your stove needs to be bolted down using lag screws or through-bolts that go completely through the floor into a structural member below. Don’t just trust the weight of the stove to keep it in place. Add lock washers and thread-locking compound to every bolt connection. These small details prevent loosening over thousands of miles of road vibration.
The chimney pipe requires special attention since it extends through your roof and experiences the most movement. Install guy wires or support cables at the top section to prevent swaying. These tension cables, typically three positioned around the pipe, stabilize everything during travel and high winds. Make sure they’re adjustable so you can fine-tune the tension.
For sealants, choose products rated for both high heat and flexibility. Standard RV sealants won’t survive the temperature swings near your stove pipe. Use high-temperature silicone rated to at least 500 degrees Fahrenheit for all penetrations and joints. Apply a generous bead where the chimney exits the roof, and inspect this seal every few months.
Create a pre-trip inspection routine that includes checking all mounting bolts, examining the chimney for any looseness, and looking for new gaps in sealants. Before hitting the road, always remove ashes and ensure the stove door latches securely. This eco-friendly heating solution rewards diligent maintenance with years of reliable warmth.
Living with Your RV Wood Stove
Living with a wood stove in your RV transforms your mobile lifestyle into something special—creating warmth and ambiance wherever you roam. However, the compact nature of RV living requires some adjustments to traditional wood stove practices.
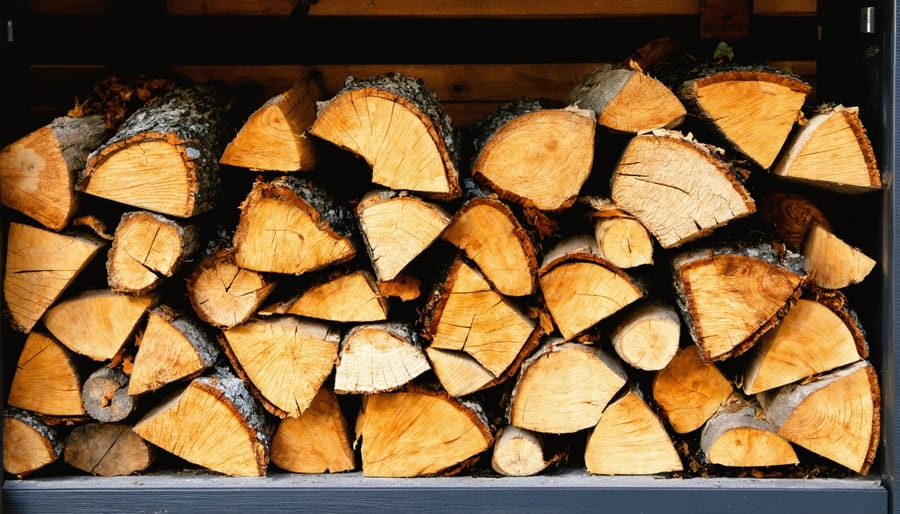
Start with fuel selection. Choose seasoned hardwoods like oak, maple, or ash that burn cleanly and produce minimal creosote. Store wood in weatherproof containers outside your RV to avoid moisture and insects inside. Keep a small indoor supply basket near the stove—enough for one evening but not so much that it clutters your limited space.
Mastering the art of fire-starting in a small space is essential. Begin with small, hot fires rather than attempting large blazes. Your RV’s limited volume heats quickly, so less is truly more. Use kindling and fire starters to establish your fire, then add fuel gradually. Managing stove vents becomes crucial in tight quarters—keep them properly adjusted to control temperature and prevent overheating your space.
Temperature management requires vigilance in an RV. Unlike a house, your small space can go from comfortable to sweltering within minutes. Install a stove thermometer and maintain moderate temperatures. Open a window slightly for fresh air circulation, which also prevents condensation buildup.
Develop a consistent cleaning routine. Cleaning your wood stove regularly prevents dangerous creosote accumulation and maintains efficiency. Empty ashes into a metal container after each use, and inspect your chimney monthly during active use.
Before lighting up, always check campground regulations. Many parks restrict wood-burning stoves due to fire danger, particularly during dry seasons. National forests typically allow them, but private campgrounds may prohibit open flames entirely. Call ahead to avoid disappointment and always follow local fire bans.
This eco-friendly heating solution offers independence from hookups and propane costs, but requires commitment to safe practices and regular maintenance.
Common Mistakes and How to Avoid Them
Even experienced RVers can stumble when installing wood stoves, but knowing the common pitfalls helps you avoid costly and dangerous mistakes. Let’s walk through the issues that trip up most DIY installers.
The most critical error is skimping on clearances. Those manufacturer specifications aren’t suggestions—they’re safety requirements. Many enthusiastic installers think placing their stove just a few inches closer to the wall won’t matter, but inadequate clearance is a leading cause of RV fires. Always measure twice and install once, using proper heat shields when space is tight.
Poor chimney draft creates smoky, inefficient fires that’ll have you second-guessing your entire project. This happens when your chimney pipe is too short, has too many bends, or lacks proper insulation. Your chimney should extend at least two feet above your RV’s roofline and any nearby obstacles. Think of draft as your stove’s breathing system—it needs clear airways to function properly.
Another overlooked mistake is forgetting moisture barriers around roof penetrations. That tiny gap where your chimney exits might seem insignificant, but it’s an invitation for leaks that can damage your RV’s structure. Use high-quality flashing and sealant rated for high temperatures.
Finally, many RVers neglect regular inspections once their stove is running beautifully. Creosote buildup happens faster than you’d expect, especially when burning softwoods or running cooler fires. Schedule monthly chimney checks during heating season and annual professional inspections. This small investment in maintenance prevents dangerous chimney fires and keeps your mobile heating system operating safely for years of cozy adventures.
Installing a wood stove in your RV is genuinely one of the most rewarding projects you can undertake for your mobile lifestyle. There’s something special about combining the cozy warmth of a real fire with the freedom of the open road, creating a traveling sanctuary that’s truly your own. When done correctly, this installation provides reliable, eco-friendly heating that reduces your dependence on electrical hookups and propane, giving you authentic independence wherever you roam.
Throughout this process, remember that successful installation is all about balance. Many RV enthusiasts with moderate DIY skills can handle much of the work themselves, but knowing when to call in professionals for specific tasks like heat shield fabrication or final inspections isn’t admitting defeat. It’s smart planning that ensures your safety and peace of mind.
Safety must always be your top priority. From proper clearances to quality materials and regular maintenance, every decision should pass the safety test first. But once your installation is complete and approved, you’ll discover that few things match the satisfaction of keeping warm by your own wood stove while watching snow fall outside your RV window. The independence, comfort, and connection to traditional heating methods make every careful step worthwhile.


")